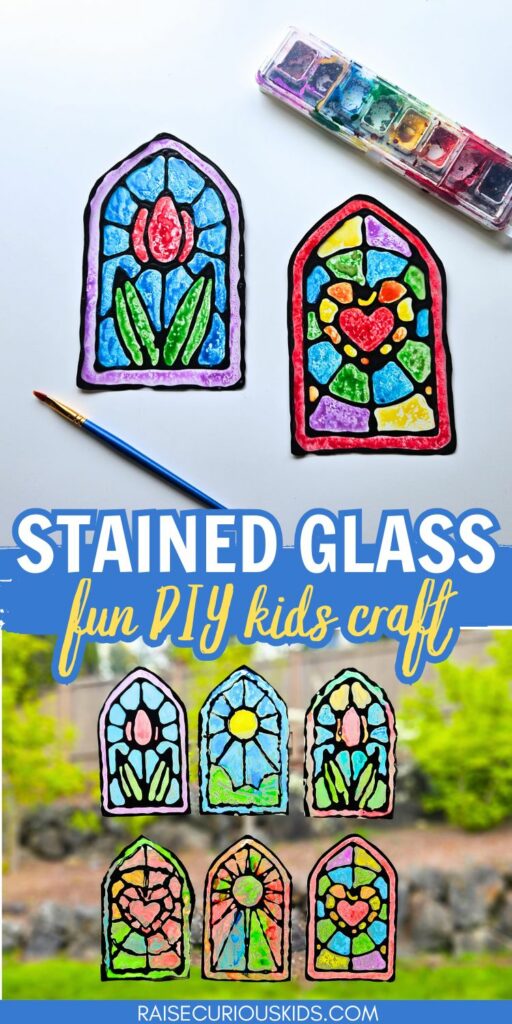
Learn how to make your own stained glass window with this beautiful watercolor craft for kids!
This is a super fun craft for kids to make with an absolutely gorgeous end result that you can proudly display in your home or classroom.
And the best part is that this activity is fantastic for a broad ages of children, from toddlers to older children (and adults love it too!).
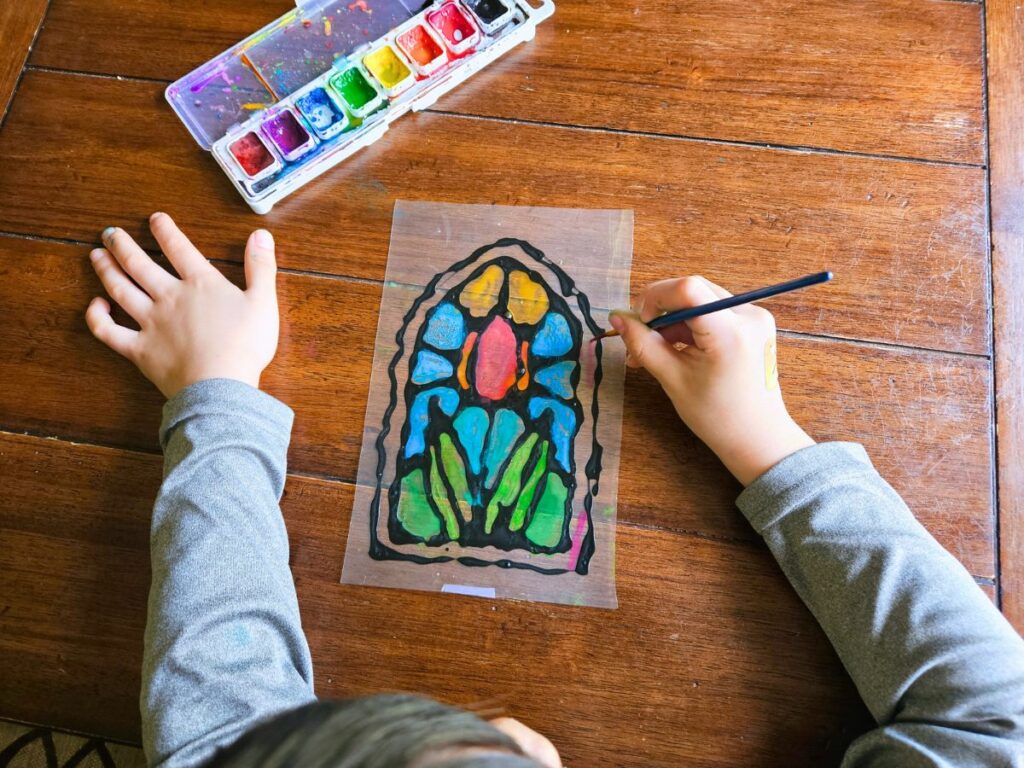
For toddlers and preschoolers, you will need to draw the outline with the black paint in advance and then set them loose to paint the picture once the outline is dry. My preschooler had so much fun painting his stained glass window after I had outlined it for him!
Both my kindergartener and first grader were able to do the whole project by themselves, from outlining the design to painting it.
We used this stained glass window craft as part of our France crafts and activities for kids to learn more about the famous stained glass windows of Notre Dame.
Stained Glass Window Craft for Kids
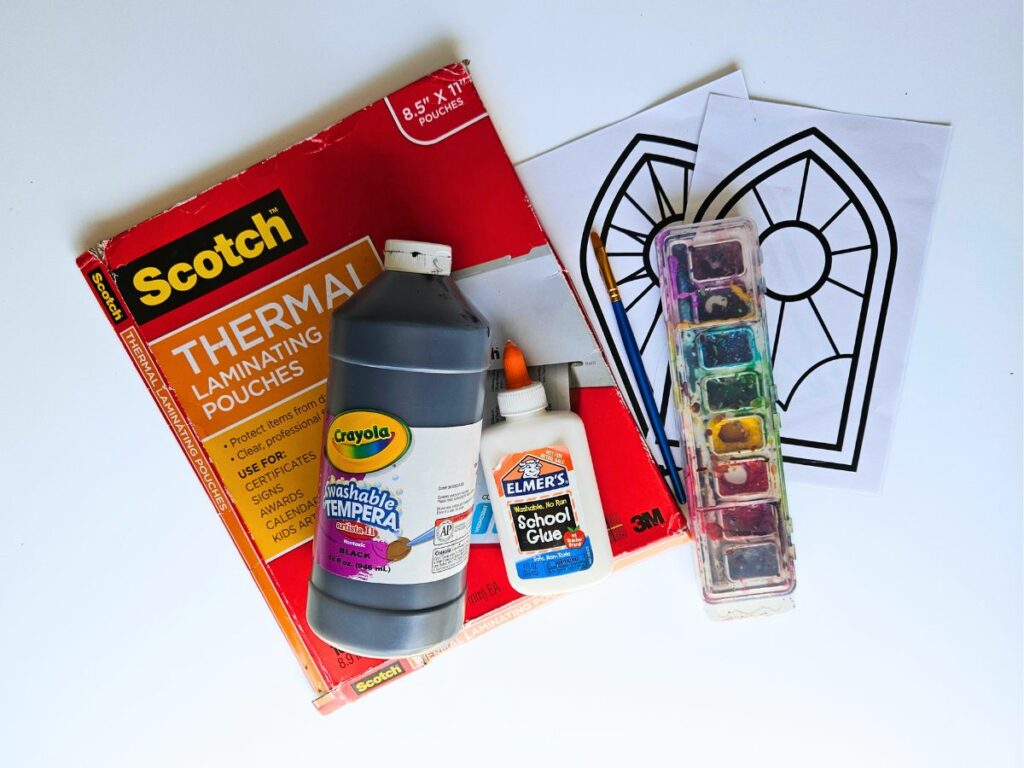
Materials
- Stained glass widow templates (available for download below)
- Watercolor paint
- Paintbrush
- Thermal laminator pouches
- School glue
- Black paint
Instructions
First, download the free stained glass window templates at the bottom of this page. Print out the templates you want on regular printer paper. There are two options for template sizes: a whole page and a half page.

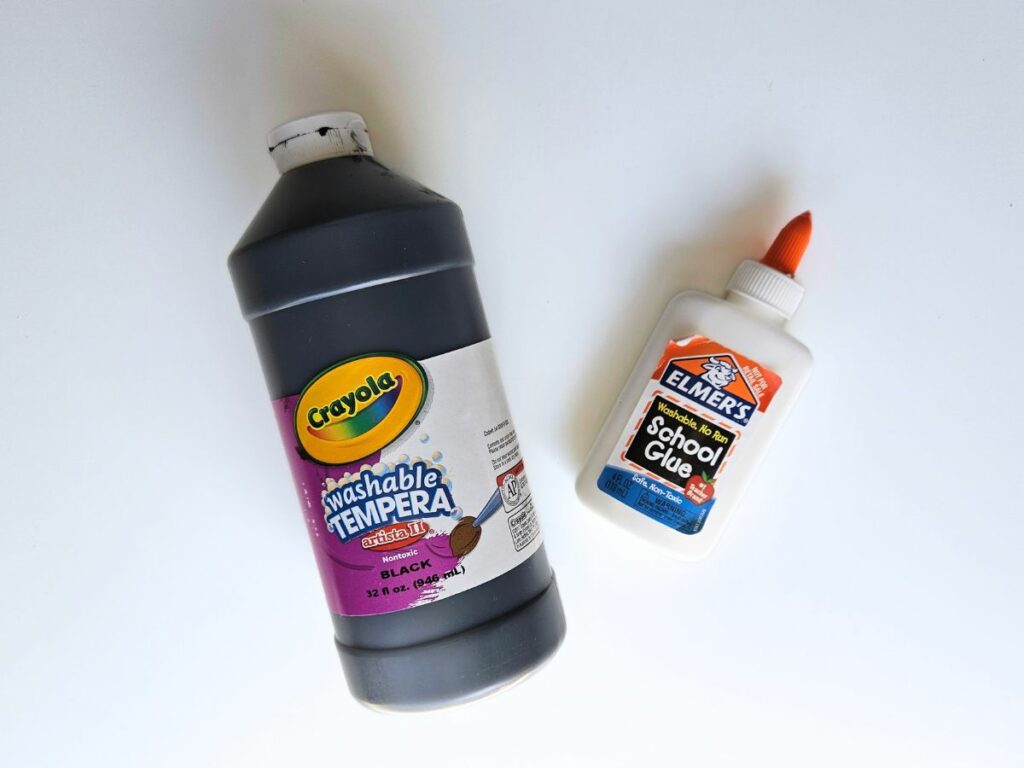
Next, make your black glue by adding 1-2 tablespoons of black paint to a container of white school glue. This works best if the glue is partially used so that you have room to stir the paint. Combine the paint and glue by stirring with the end of a paintbrush until no streaks of white are left. Add more black paint as needed.
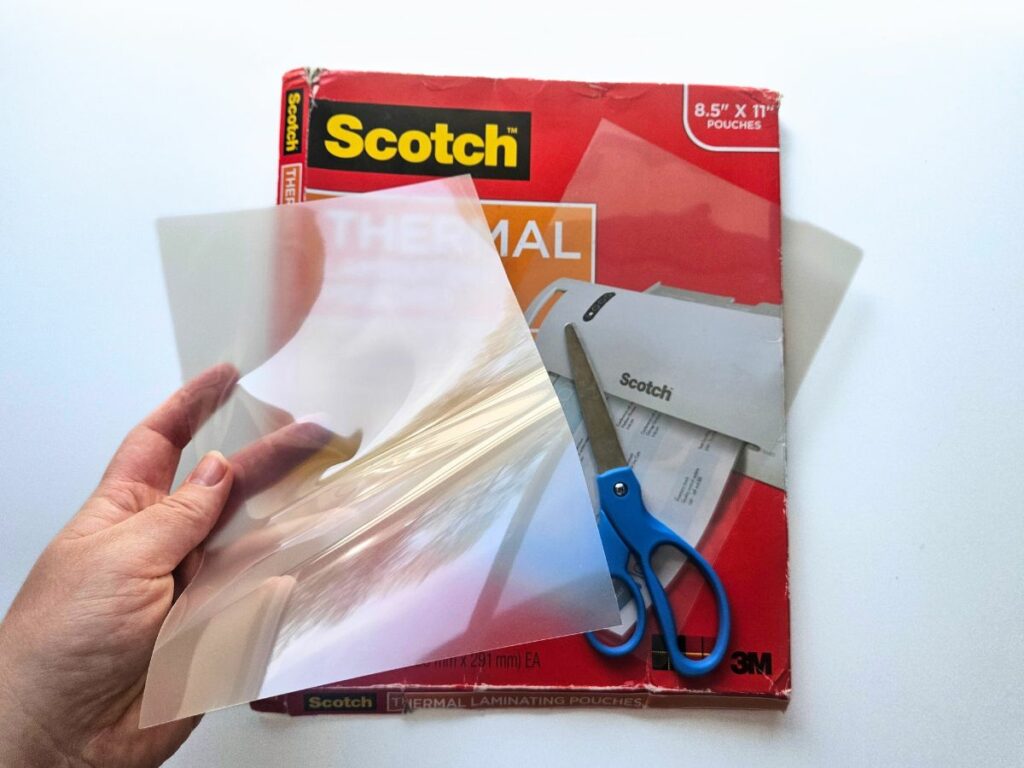
Next, prepare you plastic sheet for painting. I tried a few different kinds of plastic sheeting for this and the best option I found was thermal laminating pouches. These pouches are see-through and the glue and paint adhere well to the surface (unlike sheet protectors, where the glue and paint had a tendency to peel off). That being said, you can experiment with different kinds of plastic (or glass) backings to see if there’s another option you like better.
Cut off the edge(s) that seal the laminator pouch so that you have two separate pages. If you’re using a half-page template, cut one of these sheets in half crosswise to make two smaller pieces.
Tape your template to the back of your plastic sheet.

*Note that the two sides of the laminate sheets are slightly different, one side is smoother and one side is slightly tacky. We found it easier to paint on the smoother side, as the tacky side tends to repel the paint a bit more. That being said, we did have successful art projects using both sides.
Take your black glue and begin carefully tracing over the black lines of the template. Squeeze gently so that only a thin line of paint comes out so that you don’t lose the definition in your image. You might want to do a few practice tries on a scratch paper before starting in on your actual craft.
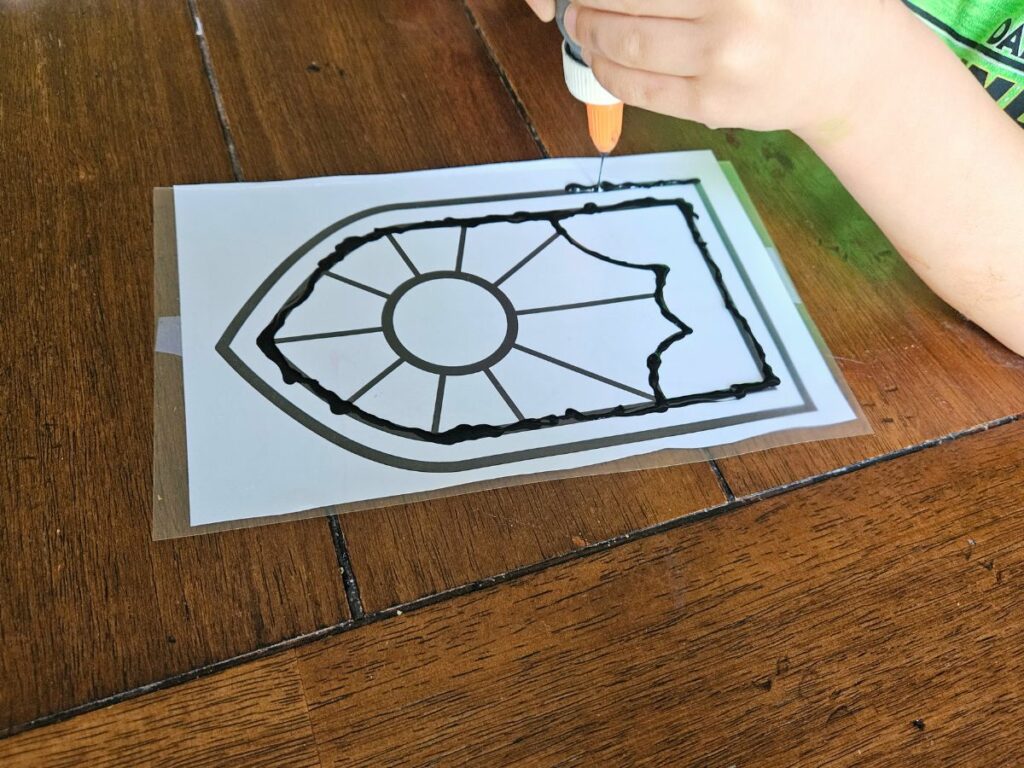
Once you’re done tracing the template, leave your project to dry for 2 to 6 hours, depending on how thick your glue is.
Remove the template from the back of the plastic sheet.
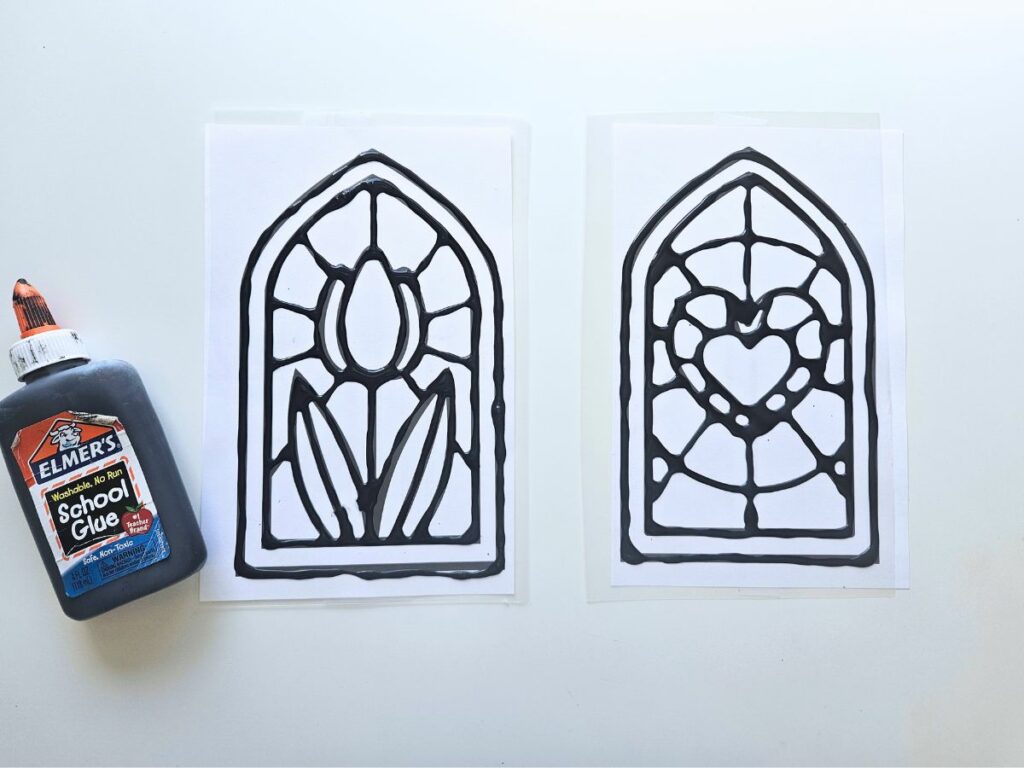
When the outline is dry, you can begin with your painting!
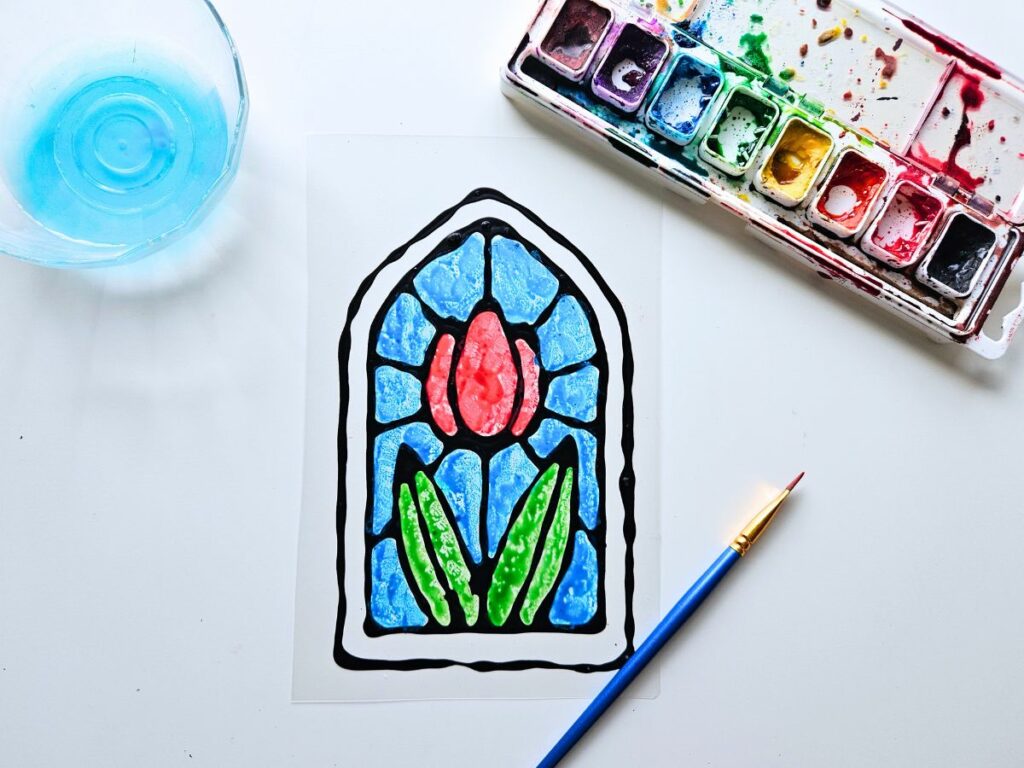
Use watercolor paint to fill in each section of the design with colors of your choice.
Leave your craft to dry for 1 to 2 hours.
At this point you can leave your project as is or cut off the excess around the outside of the “window”
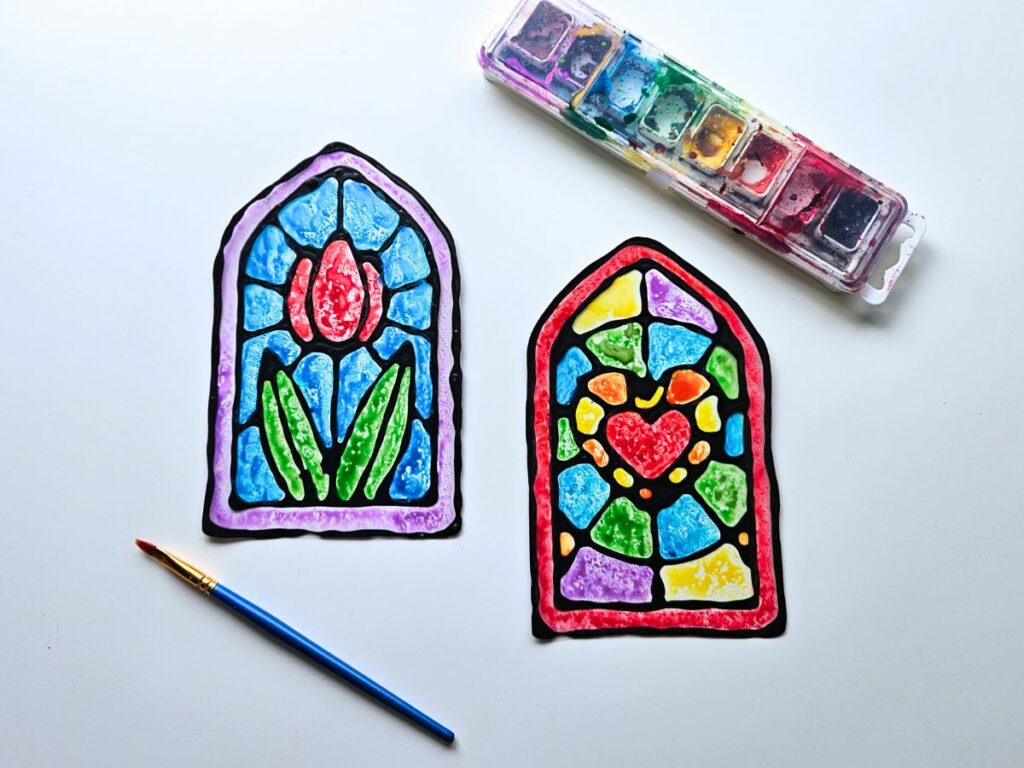
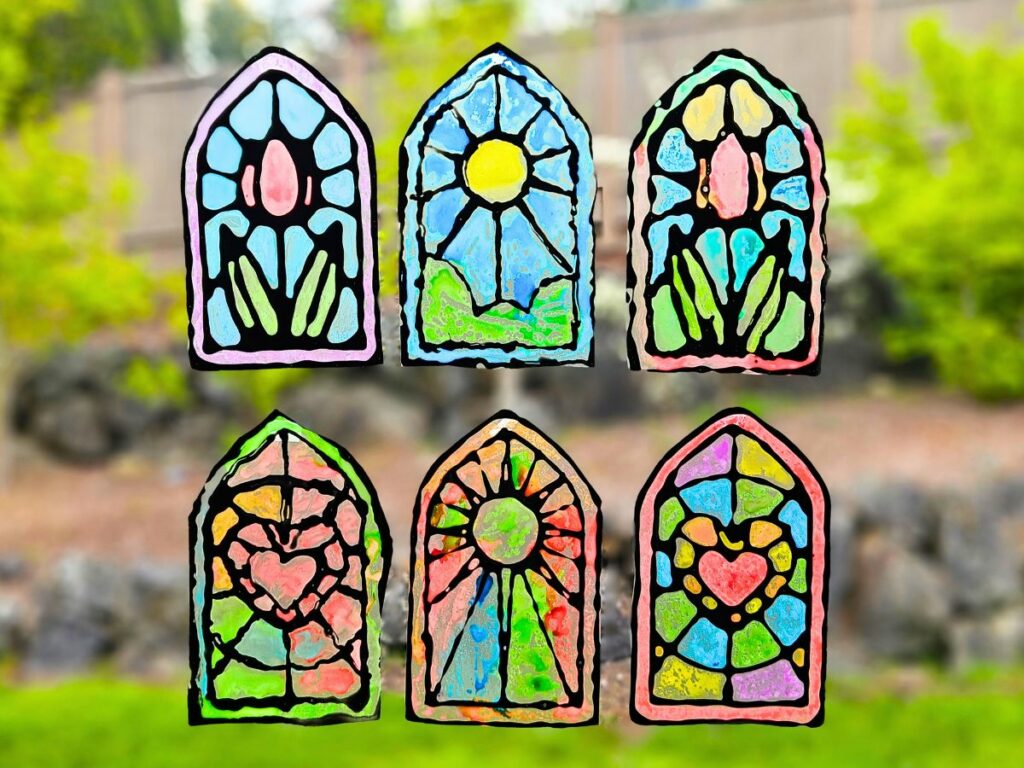
Now your stained glass window craft for kids is ready to enjoy. Hang it up on a window and let the light shine through!
One of the fun things about this stained glass window craft is that it is beloved by kids of all ages. This was an activity that all three of my boys (ages 3, 5, and 7) absolutely loved and wanted to do over and over again!

Stained Glass Window Craft
Make your own stained glass window with this bright and colorful craft for kids!
Materials
- Stained glass widow templates
- Watercolor paint
- Paintbrush
- Thermal laminating pouches
- School glue
- Black paint
Instructions
- First, download the free stained glass window templates and print on regular paper.
- Next, make your black glue by adding 1-2 tablespoons of black paint to a container of white school glue. Combine the paint and glue by stirring with the end of a paintbrush until no streaks of white are left. Add more black paint as needed.
- Cut off the edge(s) that seals the two sides of laminator pouch or sheet protector together so that you have two separate pages. If you're using a half-page template, cut one of these sheets in half crosswise to make two smaller pieces.
- Tape your template underneath the plastic sheet so that the design is visible beneath the sheet of plastic.
- Take your black glue and begin carefully tracing over the black lines. Squeeze gently so that only a thin line of paint comes out so that you don't lose the definition in your image.
- Once you're done tracing the template, leave your project to dry for 2 to 6 hours, depending on how thick your glue is. Remove the template from the back of the plastic.
- Use watercolor paint to fill in each section of the design with colors of your choice.
- Leave your craft to dry for 1 to 2 hours.
- Once dry, cut around the outside edge of your design.
- Hang up your stained glass craft in a window and enjoy!
Other posts you might be interested in:
City Skyline Watercolor Painting for Preschoolers