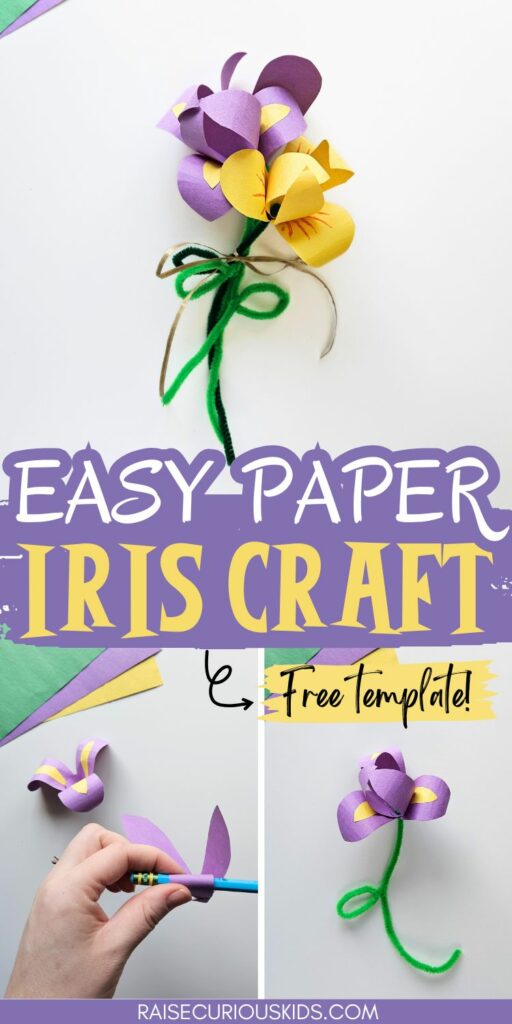
If you’re looking for a lovely flower craft, you’ll be delighted with this easy iris paper craft for kids!
This craft is simple to make using our free template, but really captures the essence of this beautiful flower.
Characterized by three large outer petals, called falls, and three inner upright petals, known as standards, the iris presents a distinctive and often striking appearance.
Its blooms come in a wide array of colors, ranging from vibrant shades of purple, blue, and white to softer hues of yellow, pink, and orange.
These paper irises are perfect as a gift for Mother’s day or a birthday or as a way to celebrate spring. We used this iris craft as part of our France crafts and activities, given that the iris is the national flower of France.
This is a perfect craft for preschool, kindergarten, or elementary aged children who will love making their own beautiful flowers!
Iris Craft for Kids
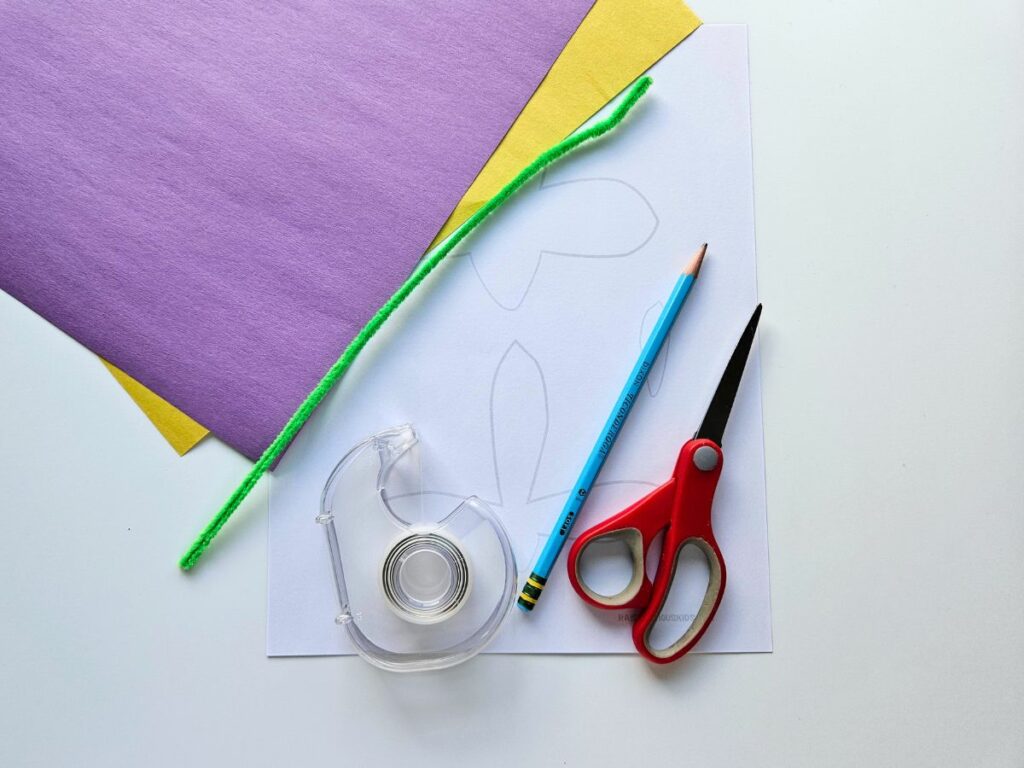
Materials
- Iris printable template (available for download below)
- Colored paper (purple and yellow are good options)
- Green pipe cleaner
- Scissors
- Tape or glue
- Pencil
Instructions
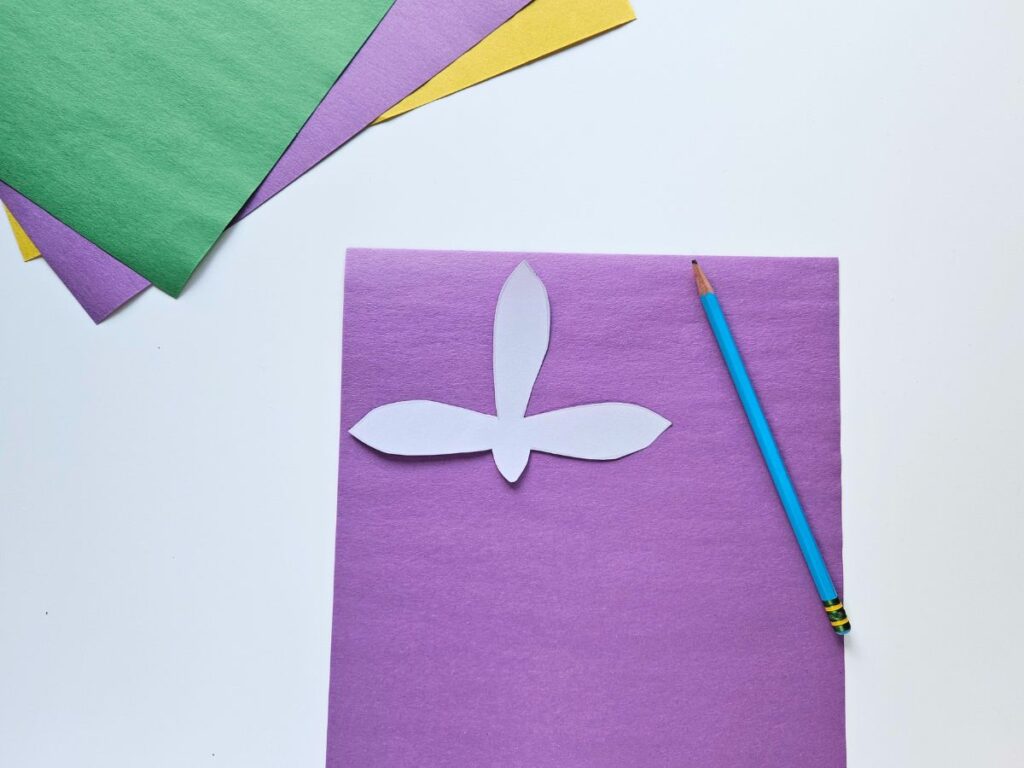
First, download and print out the iris template (you can get the free template at the bottom of this post).
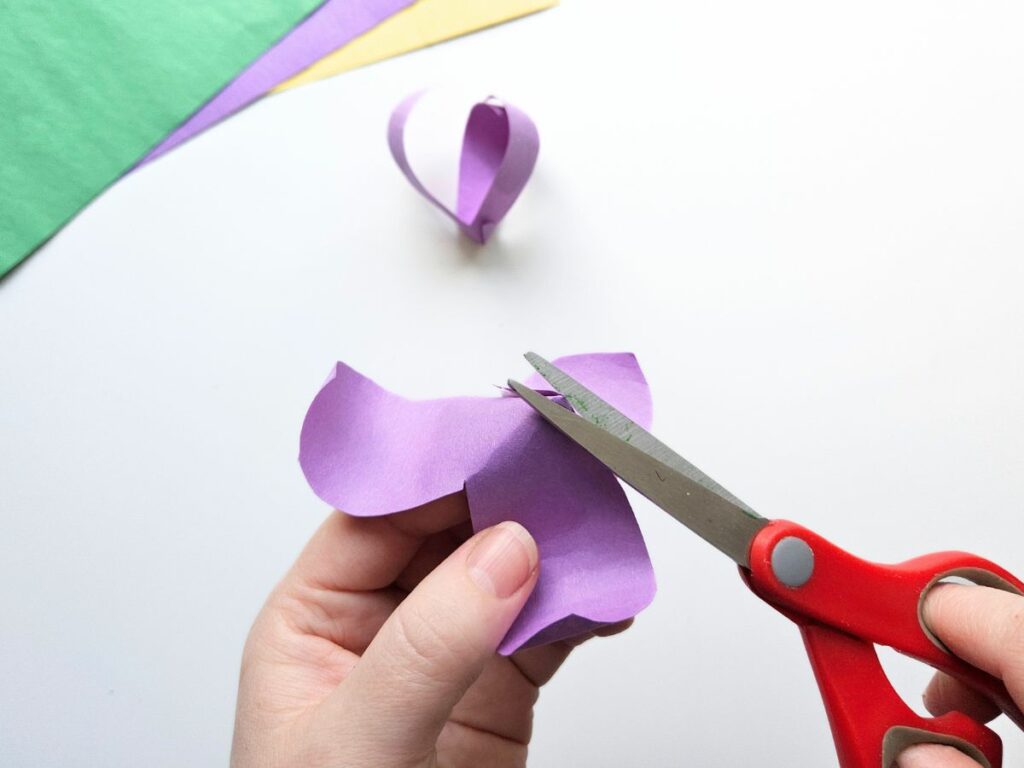
Cut out all of the pieces on the template.
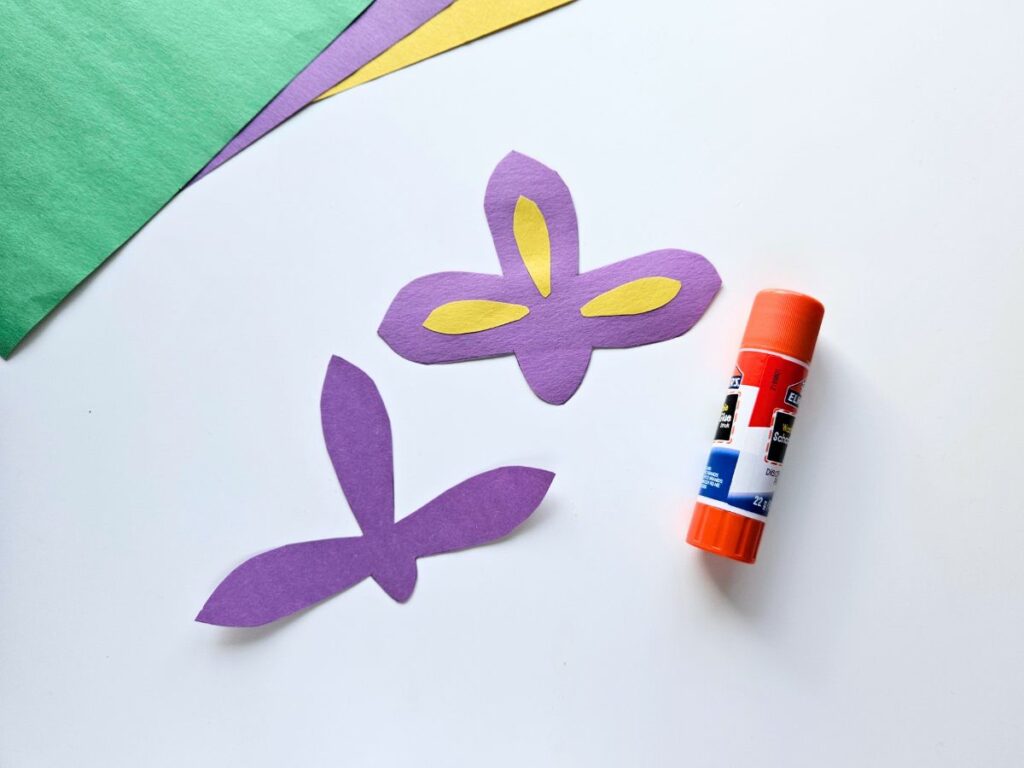
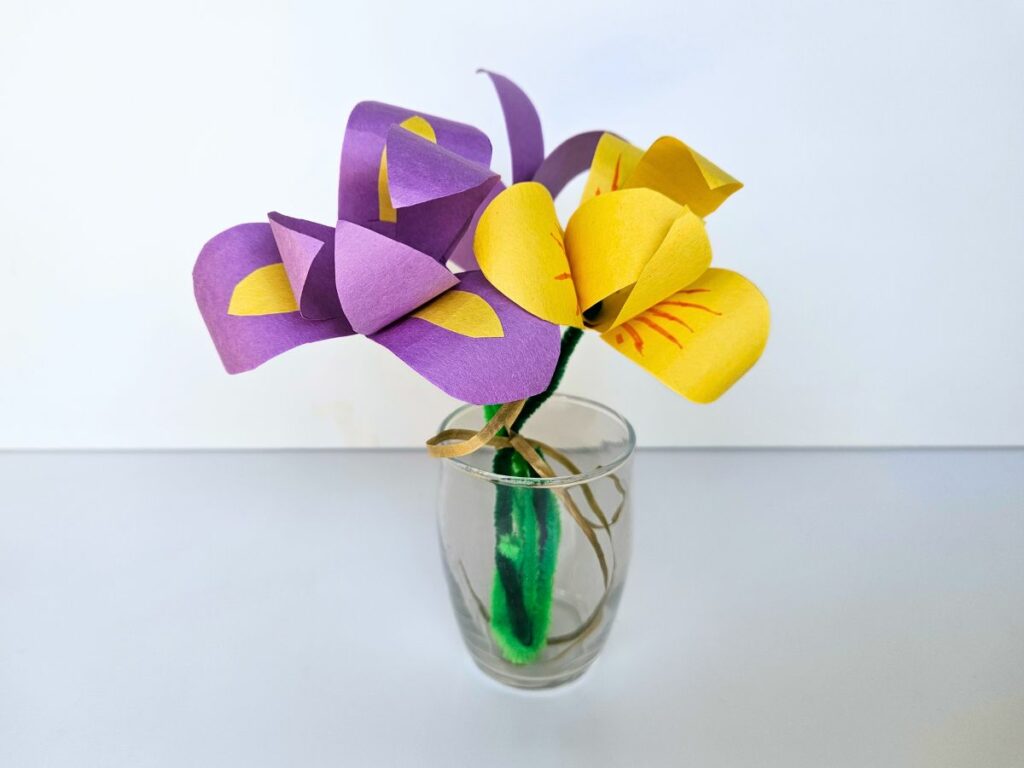
Trace each section on a piece of colored paper. We chose to make purple and yellow irises, but there are lots of options!
If you want to do a different inner petal color, trace that part on a colored piece of paper and cut out. Then glue it to the inner part of each of the larger petals.
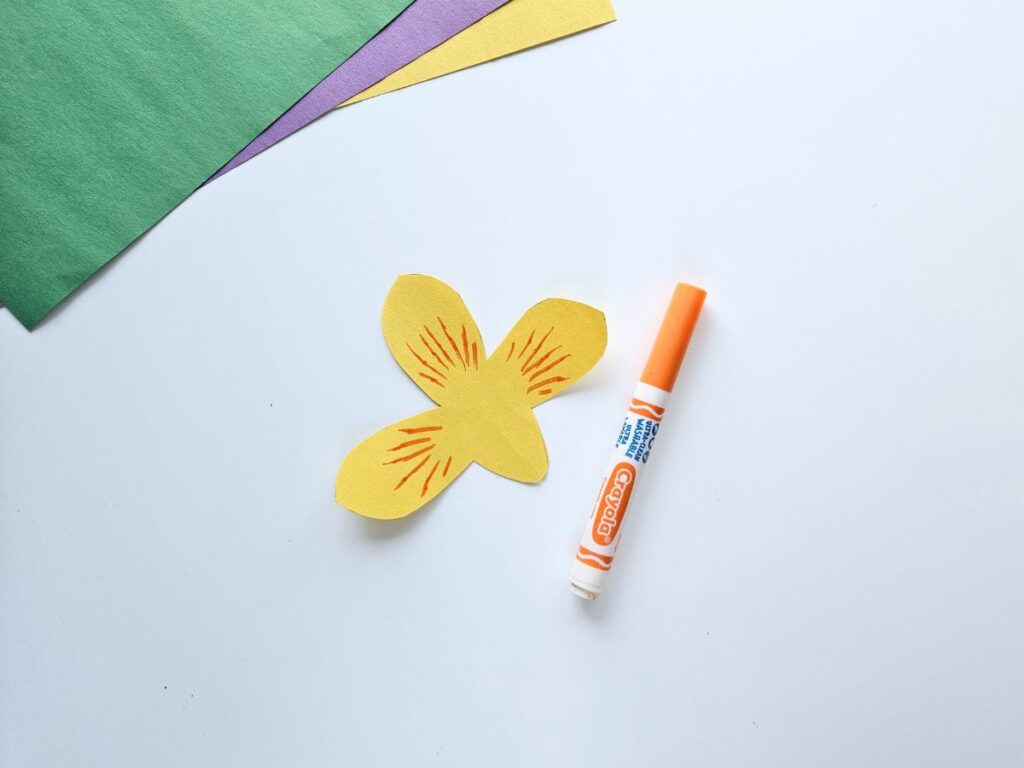
For lighter colors, you can also use marker to make the contrasting inner color. In the example below I used orange maker to make lines of color on the yellow petals.
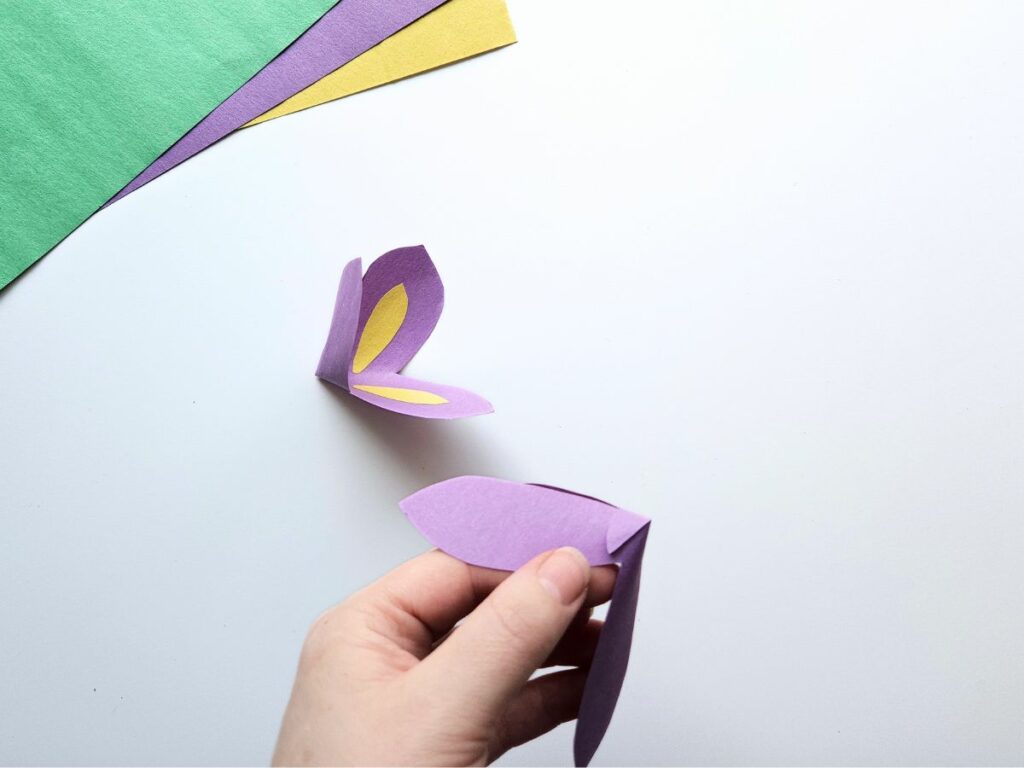
Cut the bottom of each set of petals where the dotted line is in the template.

Curve the large petal set into a circle, bringing one side of the cut section into the center of the petal circle and attaching the other piece to the outside using tape or glue.
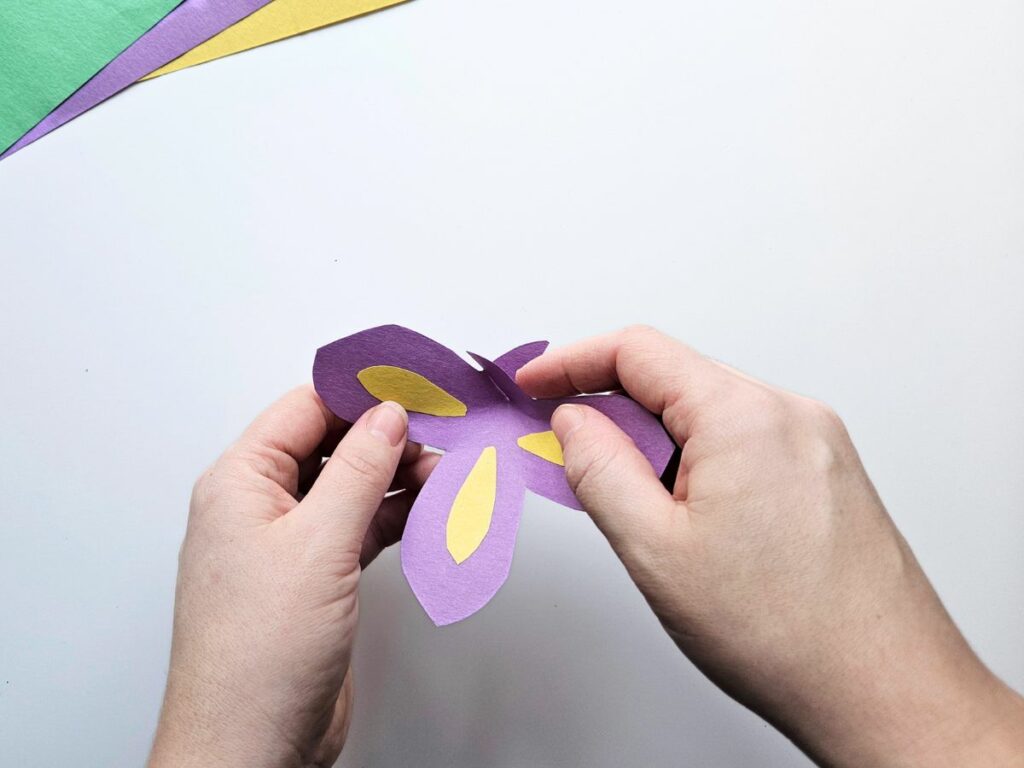
Do the same thing with the other set of petals.
Using a pencil, gently curl each of the outer petals outward.
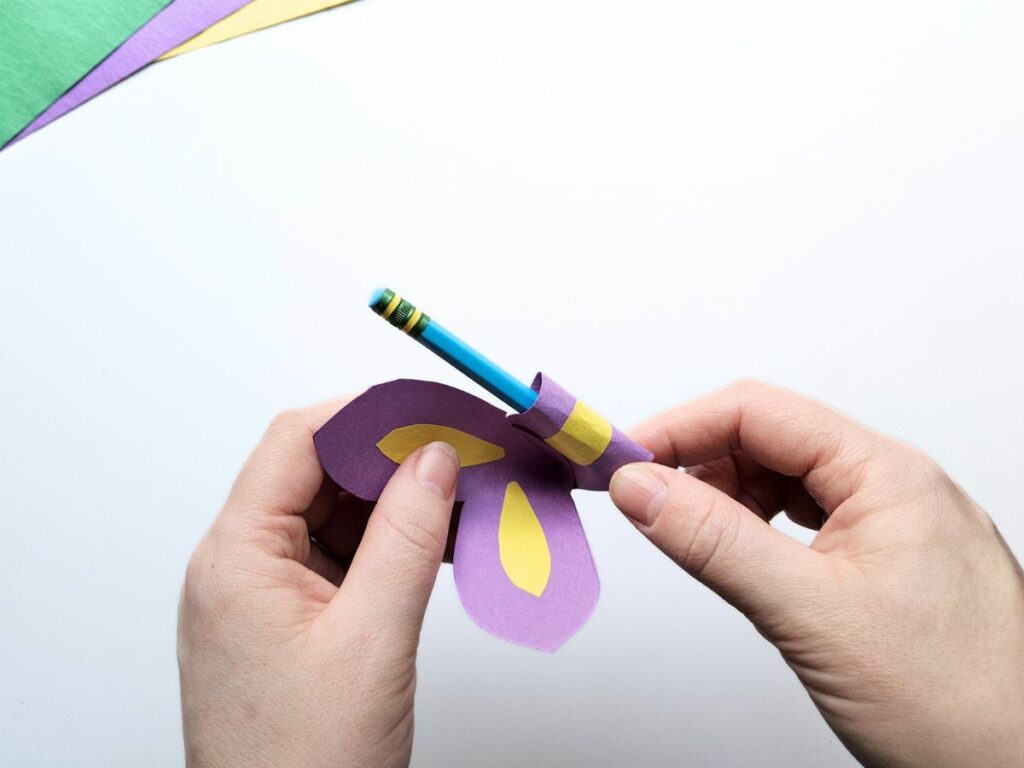
Next, curl the inner petals inward around the pencil.
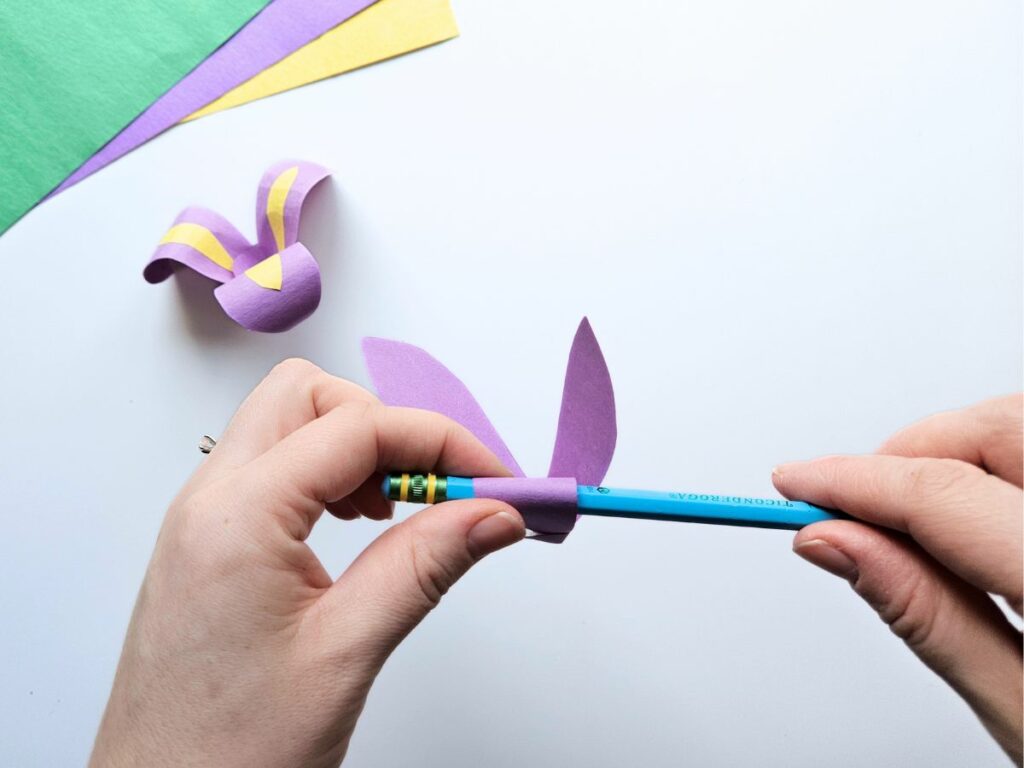
Cut a small hole in the bottom of each set of petals for the pipe cleaner stem.
Now take a green pipe cleaner and bend the tip over. This is just to make a thicker section so it won’t slide all the way through the flower.

Take the unbent side and slide it through the hole in the inner set of petals, entering the hole from the top side of the petals.

Take the outer set of petals and insert the pipe cleaner through the hole in that set as well, once again coming from the top.
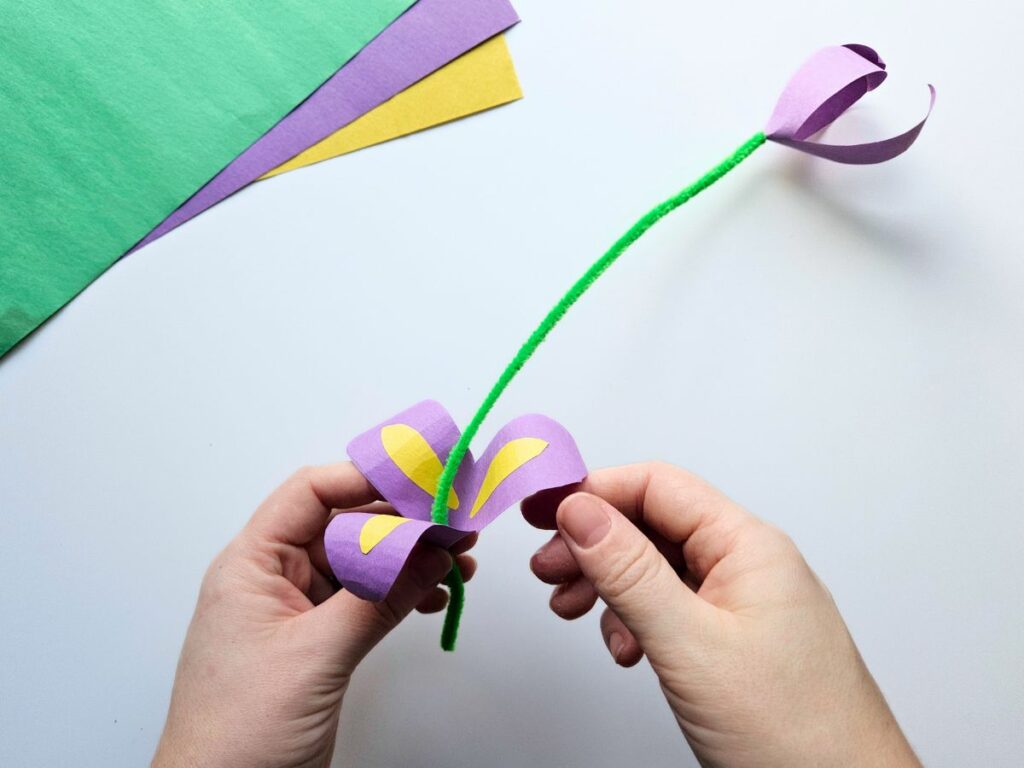
Keep pulling the pipe cleaner through until the inner petals are nested within the outer petals and the pipe cleaner has reached the bent over part at the top.
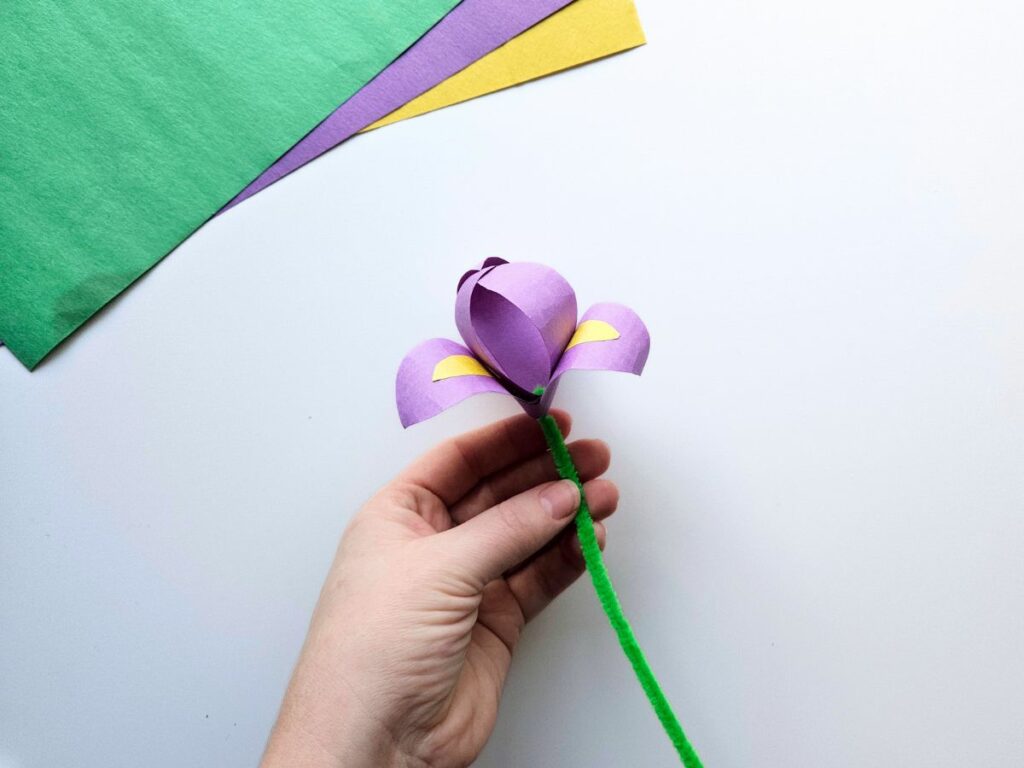
If you so desire, twist a loop into the center of the pipe cleaner to make a leaf for the flower.
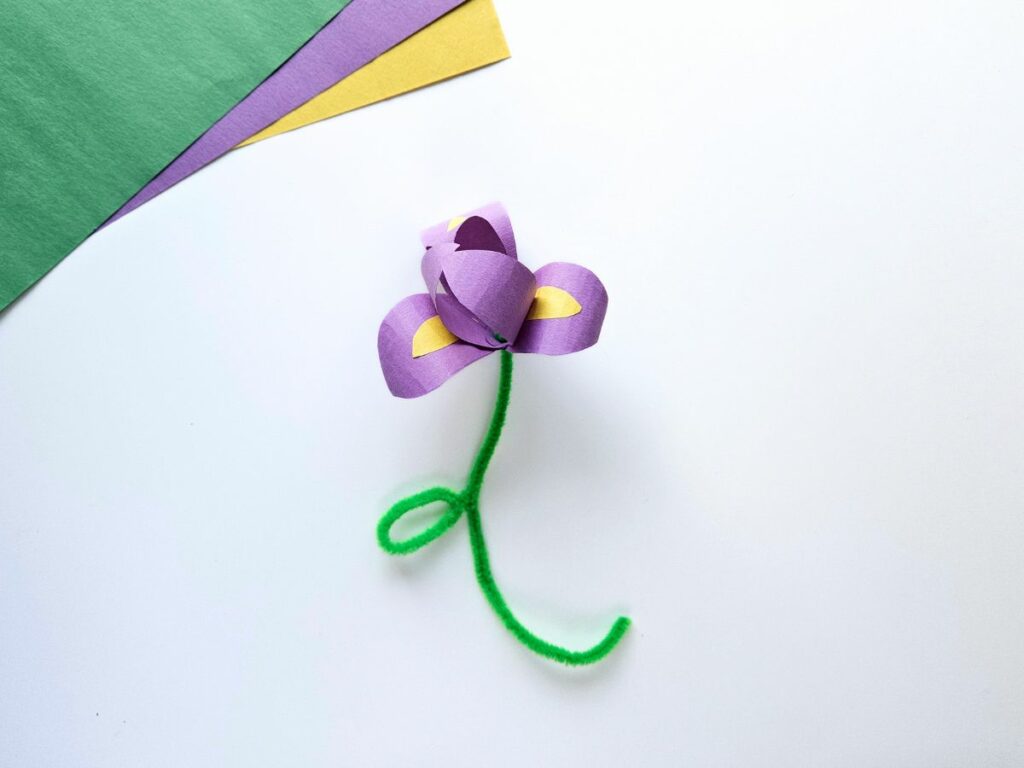
Now your beautiful iris craft is complete!
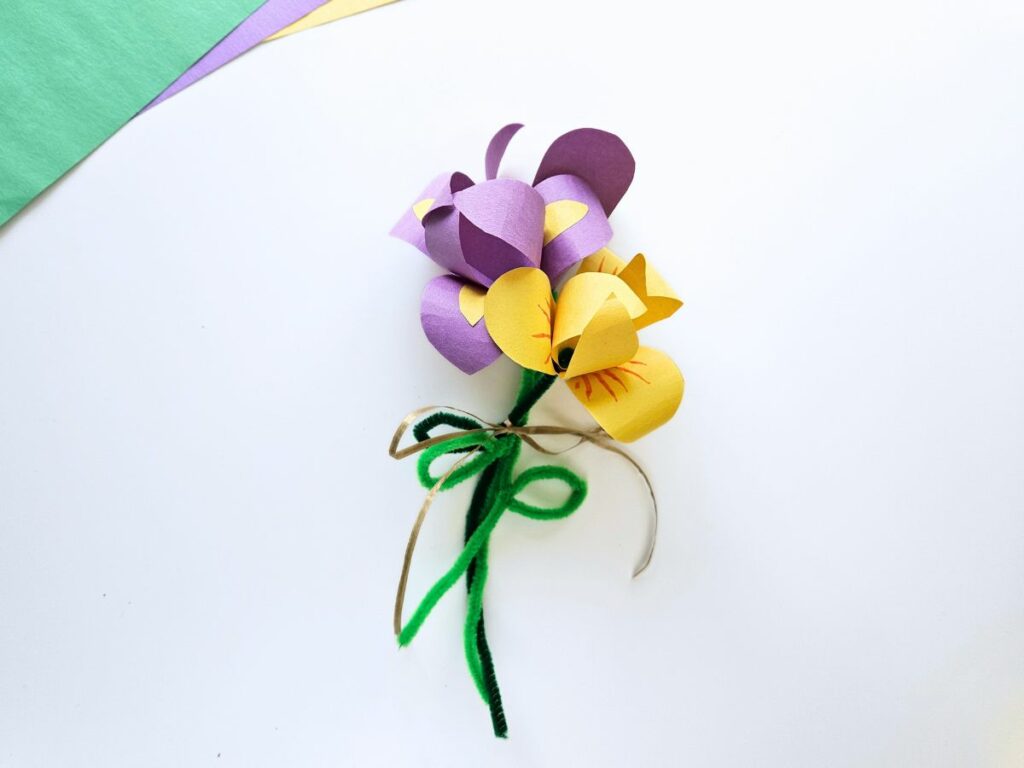
This iris flower craft is so adorable and makes a perfect gift for a birthday or Mother’s Day or just to make as a fun craft to celebrate spring.

Iris Paper Craft
Make your own flower bouquet with this adorable paper iris craft!
Materials
- Iris printable template
- Colored paper
- Green pipe cleaner
- Scissors
- Tape or glue
- Pencil
Instructions
- First, download and print out the iris template.
- Cut out all of the pieces on the template.
- Trace the two petal sections from the template on a piece of colored paper (purple or yellow make good choices).
- If you want to do a different inner petal color, trace that part from the template on a piece of paper of contrasting color and cut out. Then glue it to the inner part of each of the larger petals.
- Cut the bottom of each set of petals where the dotted line is in the template.
- Curve the large petal set into a circle, bringing one side of the cut section into the center of the petal circle and attaching the other piece to the outside using tape or glue. Do the same thing with the other set of petals.
- Using a pencil, gently curl each of the outer petals outward. Then curl the inner petals inward around the pencil.
- Cut a small hole in the bottom of each set of petals for the pipe cleaner stem.
- Now take a green pipe cleaner and bend the tip over to prevent it from slipping all the way through the flowers.
- Take the unbent side and slide it through the hole in the inner set of petals, entering the hole from the top side of the petals.
- Take the outer set of petals and insert the pipe cleaner through the hole in that set as well, once again coming from the top.
- Keep pulling the pipe cleaner through until the inner petals are nested within the outer petals and the pipe cleaner has reached the bent over part at the top.
- If you so desire, twist a loop into the center of the pipe cleaner to make a leaf for the flower.
Other crafts to try: