Make your own Uncle Sam hat with this fun and easy craft for kids!
The free template has two options for making the hat, a coloring option and an option using colored paper. Either way you’re left with an adorable had that kids can actually wear!
This is a great craft for a Fourth of July celebration or as part of a USA unit of study.
Keep reading to learn how to make this craft and get your free template!

Uncle Sam Hat Craft
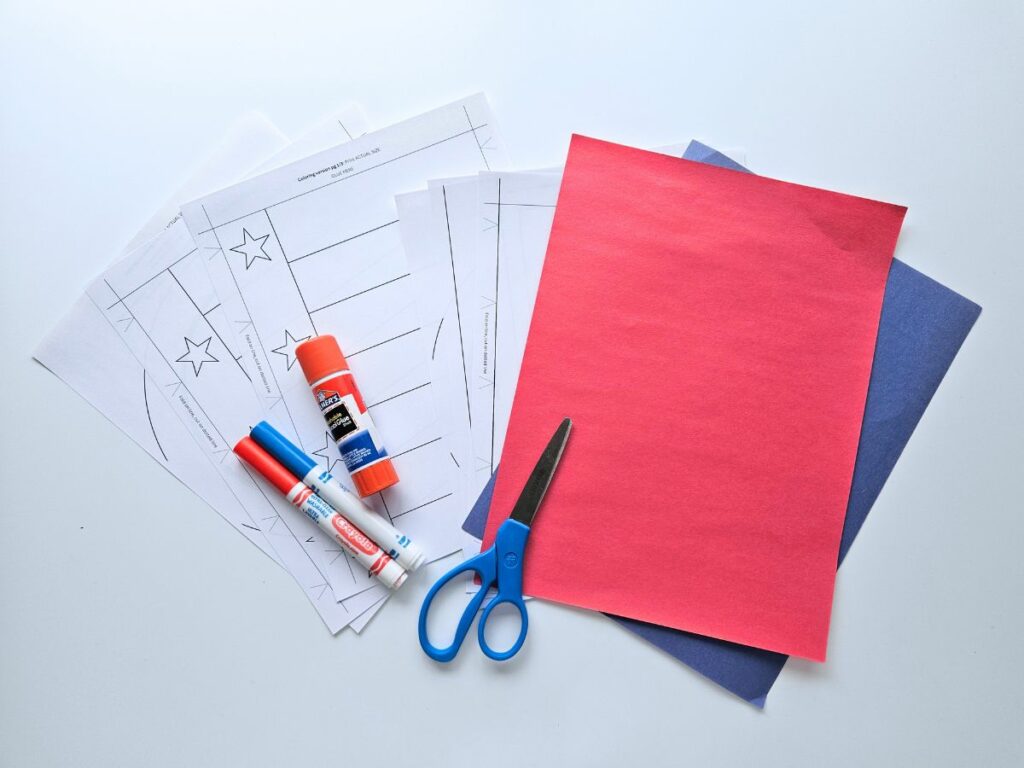
Materials
- Uncle Sam hat printable
- Red and blue paper OR markers, crayons, or paint
- Scissors
- Glue
Instructions
There are two options for making this craft: either by coloring the templates or by tracing and using colored paper. Either option turns out great!
Coloring Option
First, download and print out the “coloring version” of the Uncle Sam hat craft.
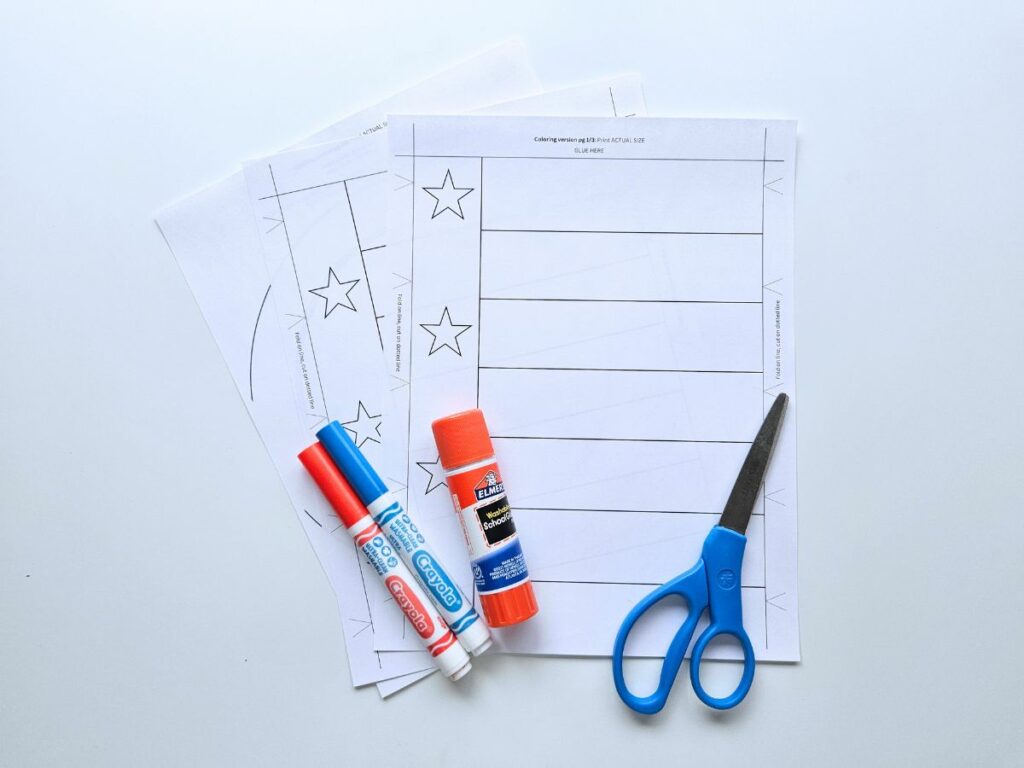
Color the stripes above the stars red, the stripe around the stars blue, and the brim and top circles red (or you can leave them white).

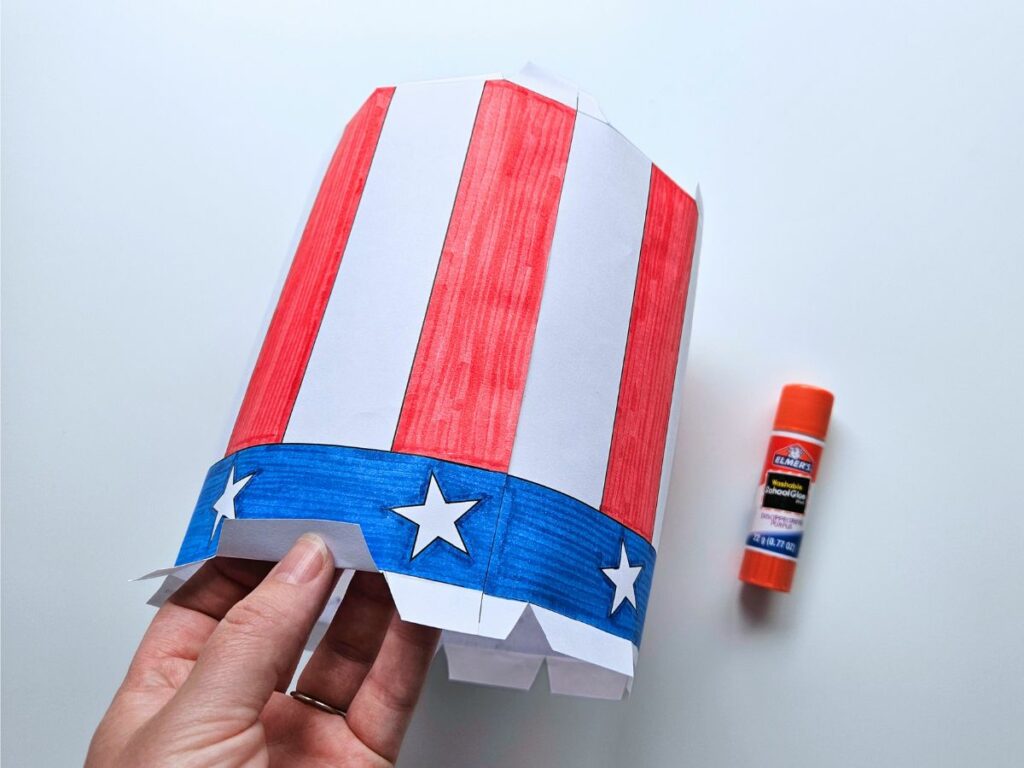
Cut out the dotted triangles located along each side. Fold the top tabs back and the bottom tabs forwards.
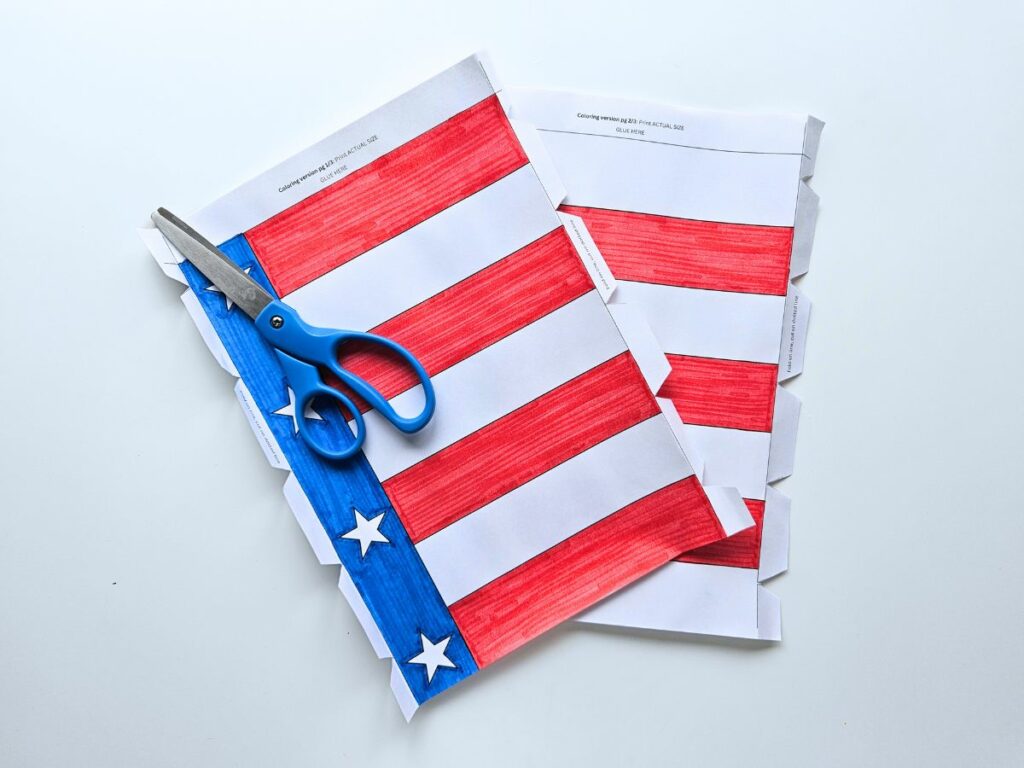
Glue the two pages together.
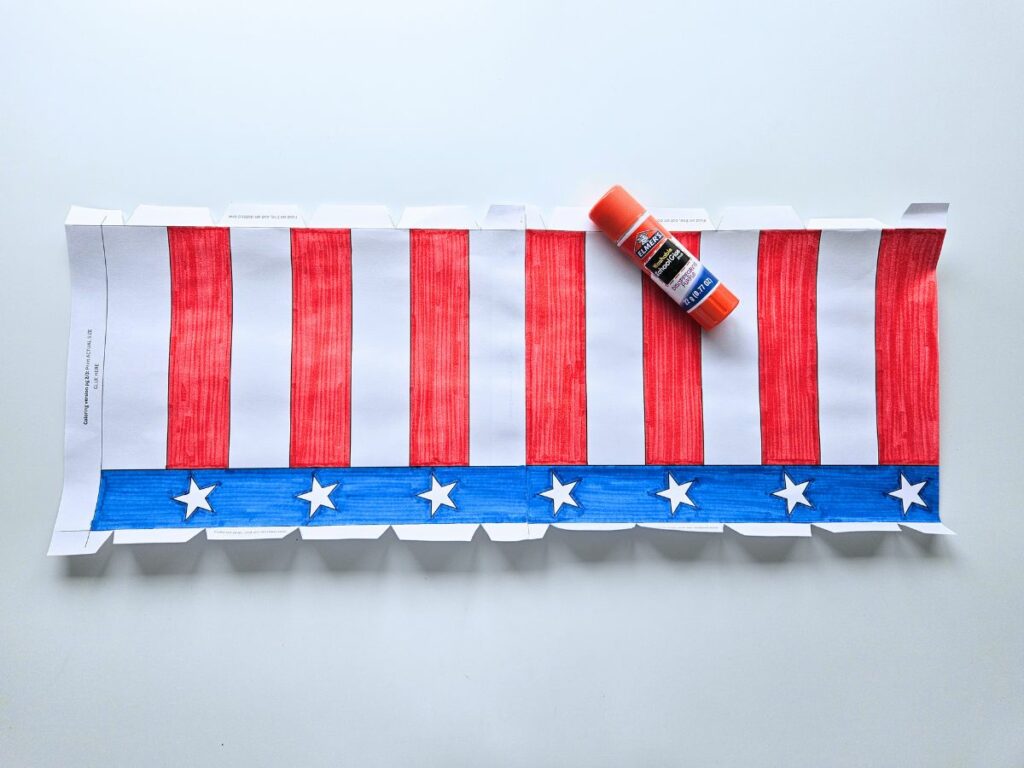
Glue the other side of the pages together to form a tube.
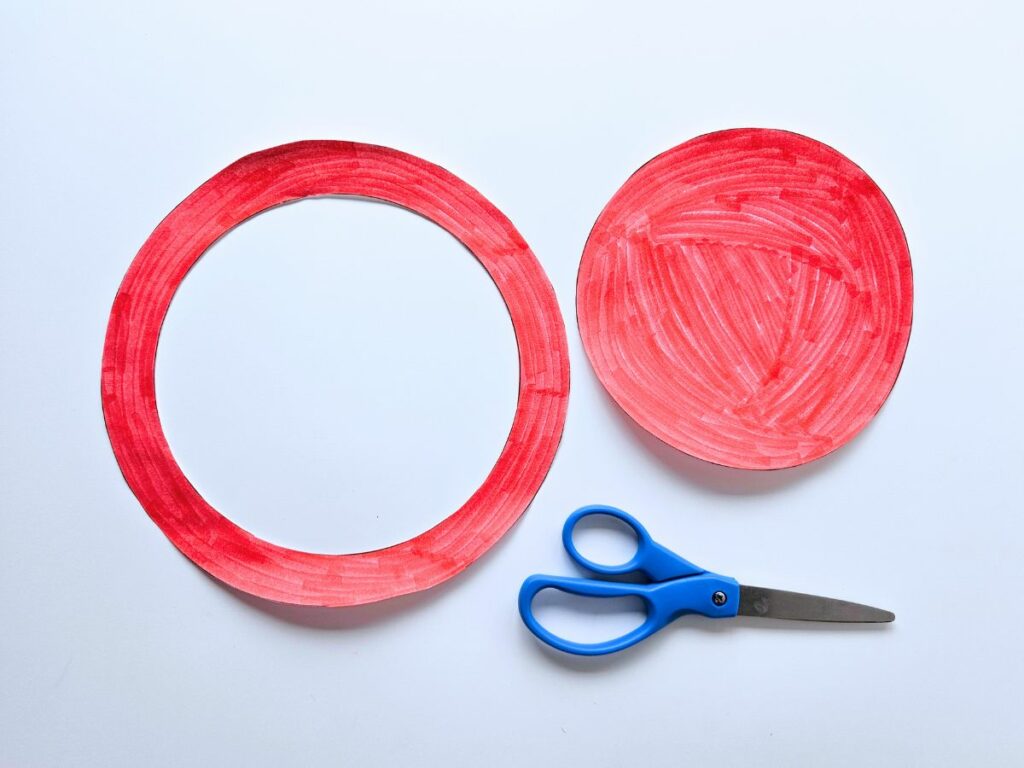
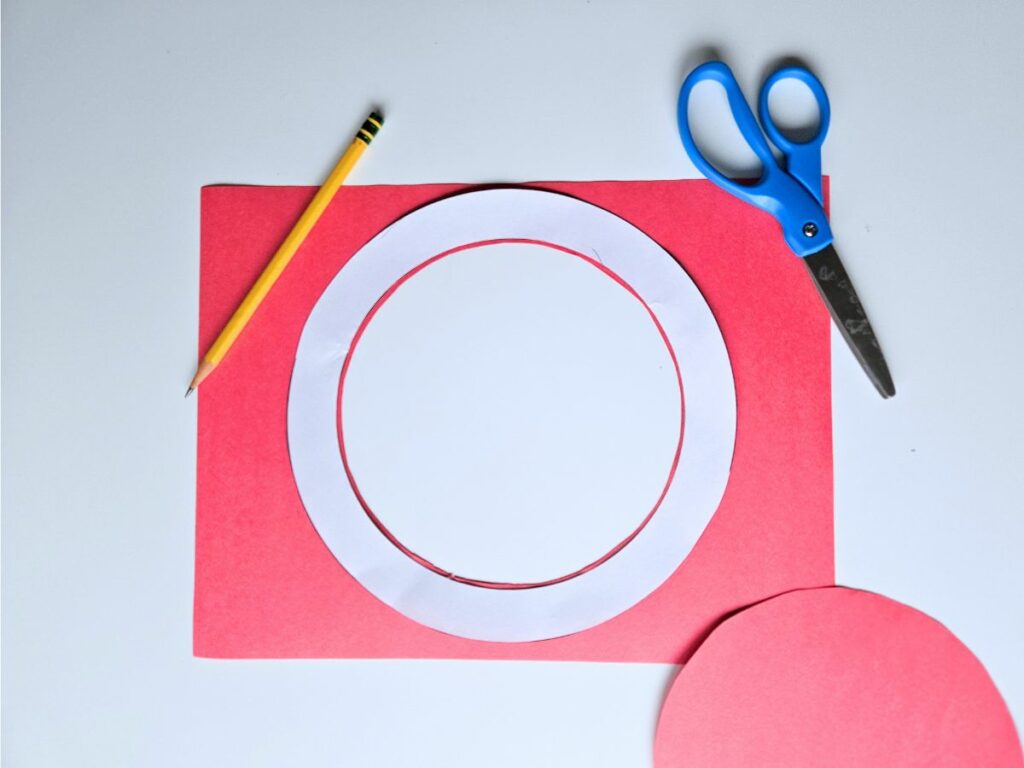
Cut out the two circles along the solid lines (the dotted line is a buffer where you can insert the scissors for cutting).
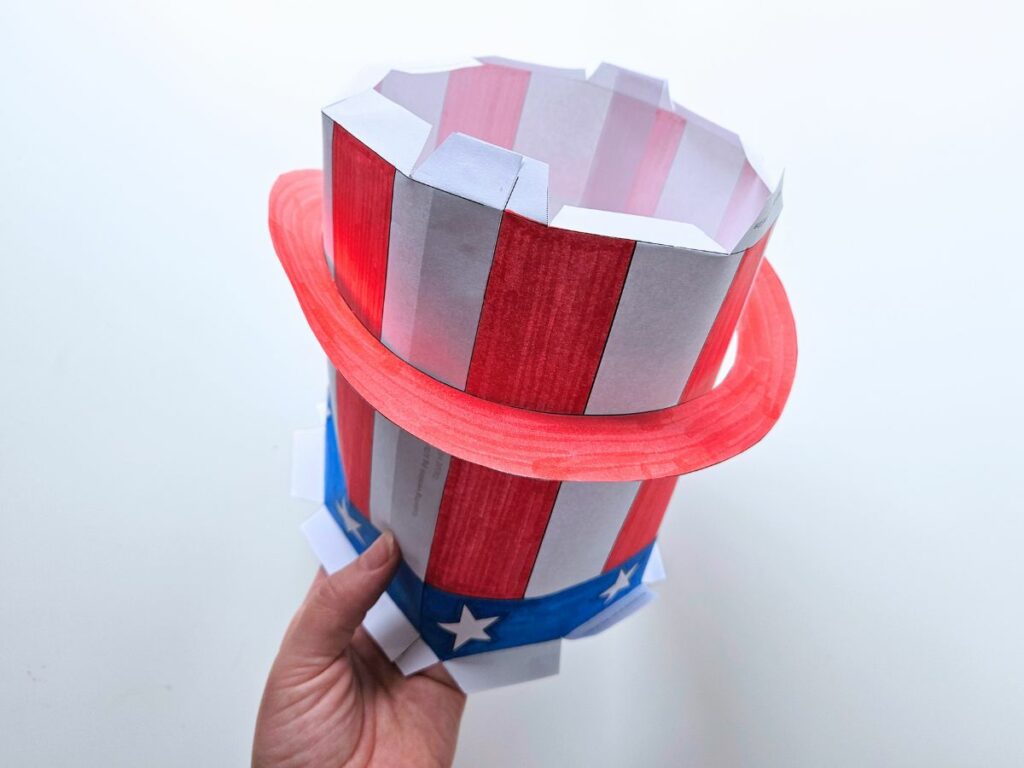
Lower the brim of the hat down over the hat and secure it by gluing the tabs to the brim.
Glue the top circle to the tabs on the top of the hat.
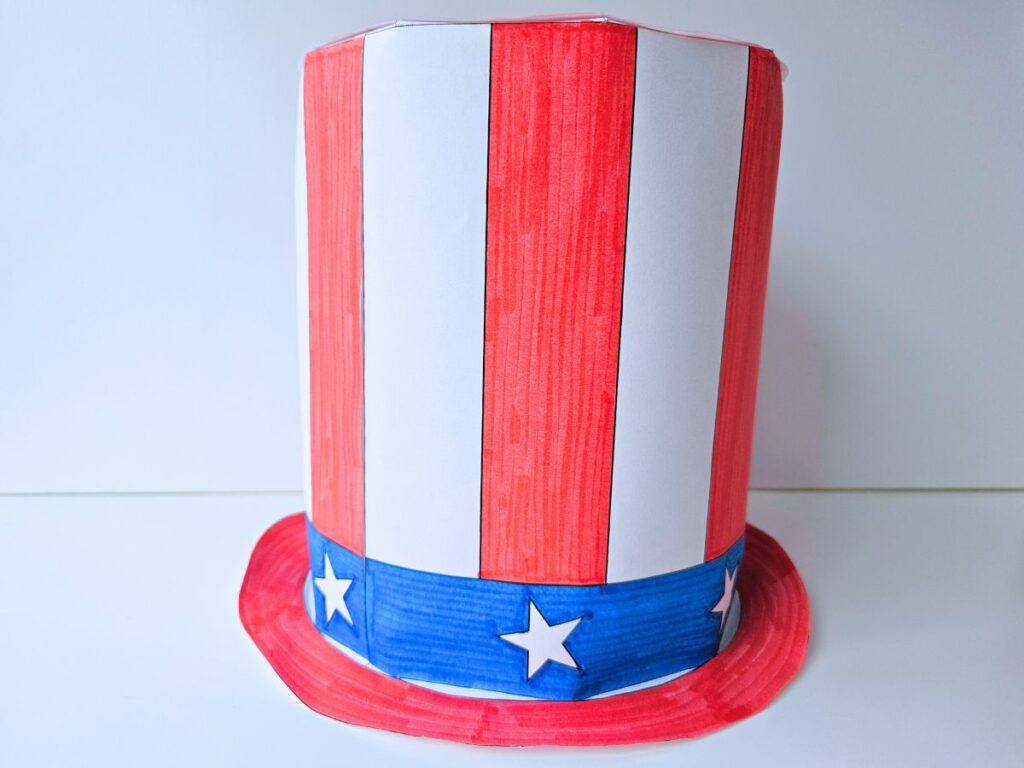
Your hat is complete!
Colored Paper Version
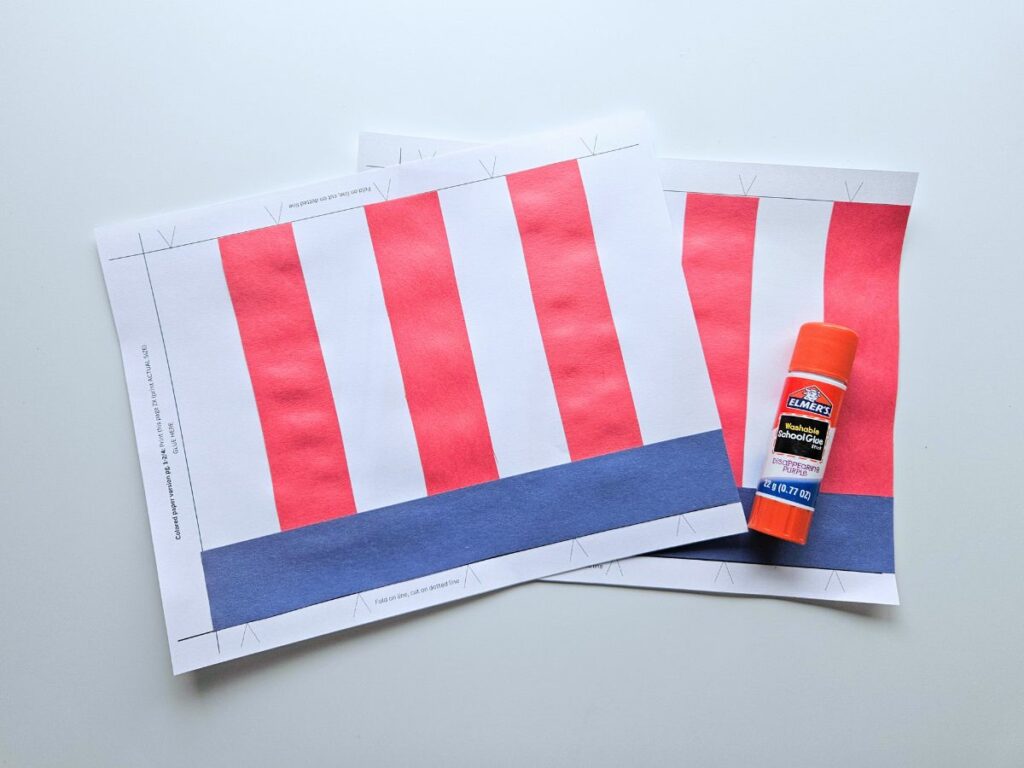
To make the colored paper version of the hat, download and print out the “colored paper” portion of the template. You’ll have four pages.

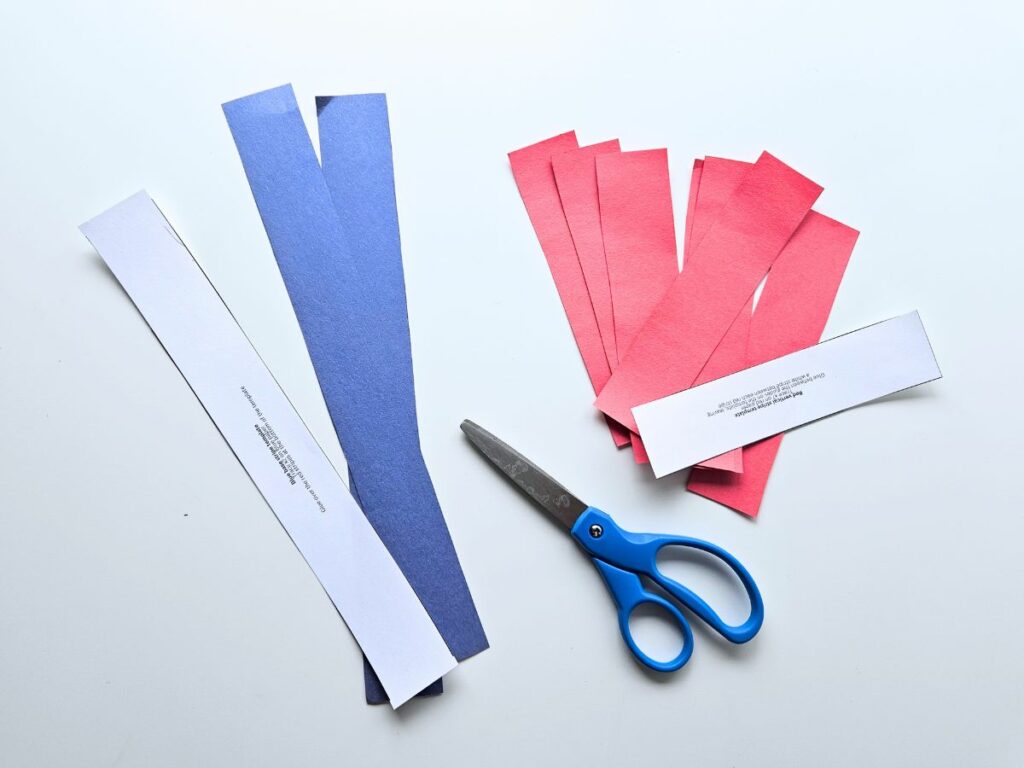
Next, cut out the stars and and templates for the red stripes and blue stripe.

Trace the red template onto red paper seven times and cut out. Trace the blue template two times onto blue paper and cut out.
Glue the red stipes onto the template between the guide lines, leaving a white stripe between each red stripe. Be sure that the pattern of stripes continues between the two pages.
Then glue the blue stripes over the bottom of the red stripes between the guide lines.
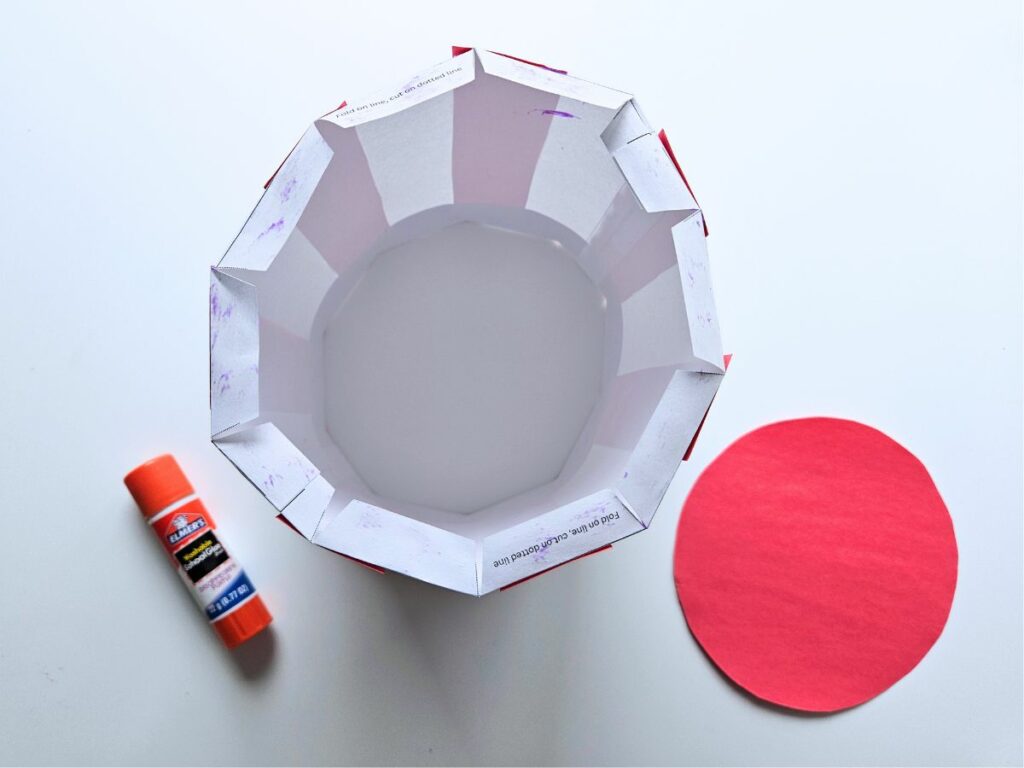
Cut out the dotted triangles along the top and bottom of the page. Glue the two pages together.
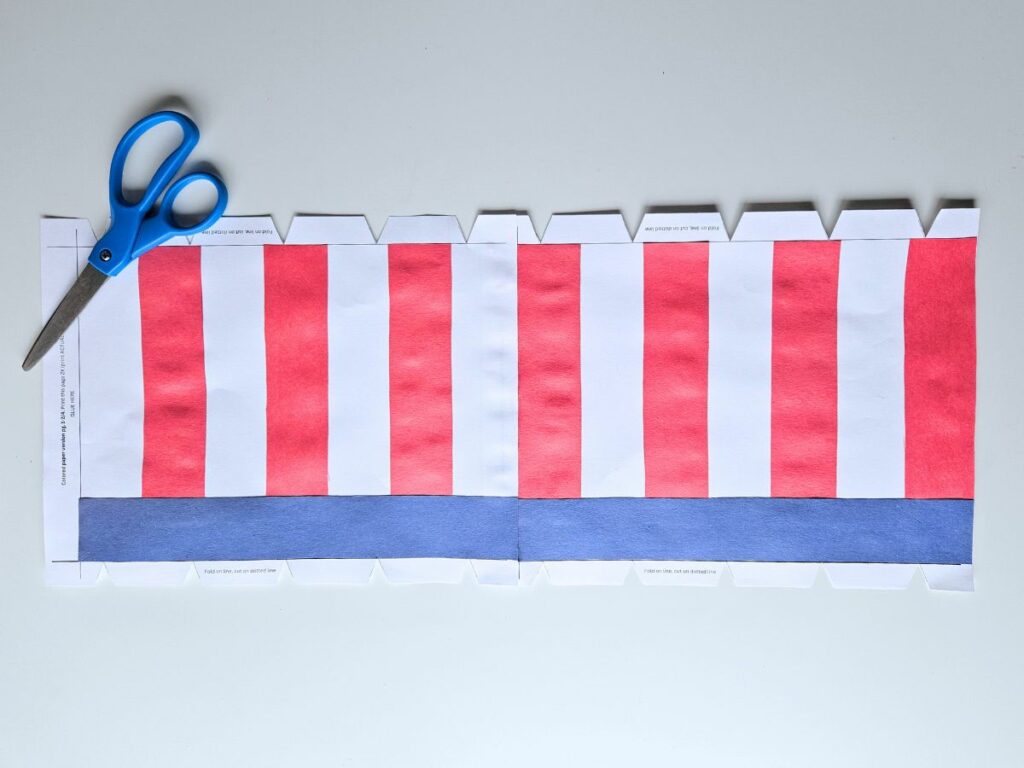
Bend the top tabs backwards and the bottom tabs outwards.
Glue the other side of the pages together to form a tube.
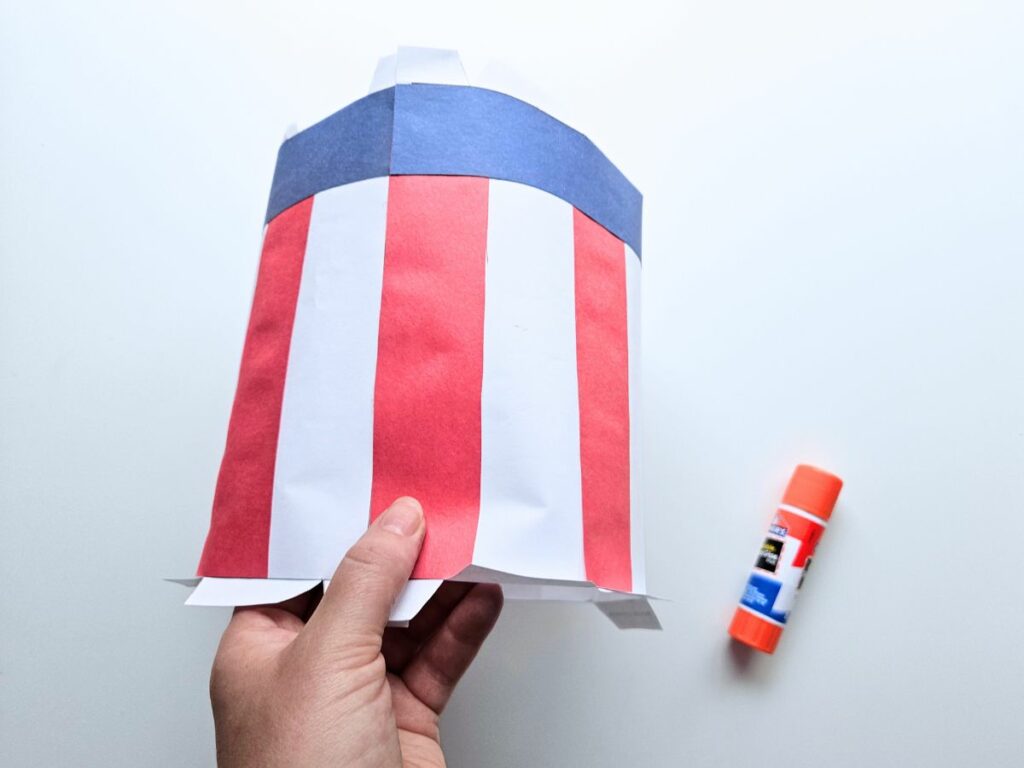
Trace the smaller circle in the middle of a piece of red paper and cut it out. Then trace the larger circle on the red paper and cut out as well.
Lower the brim over the hat and glue it to the tabs on the bottom of the hat.

Glue the small circle to the tabs at the top of the hat.
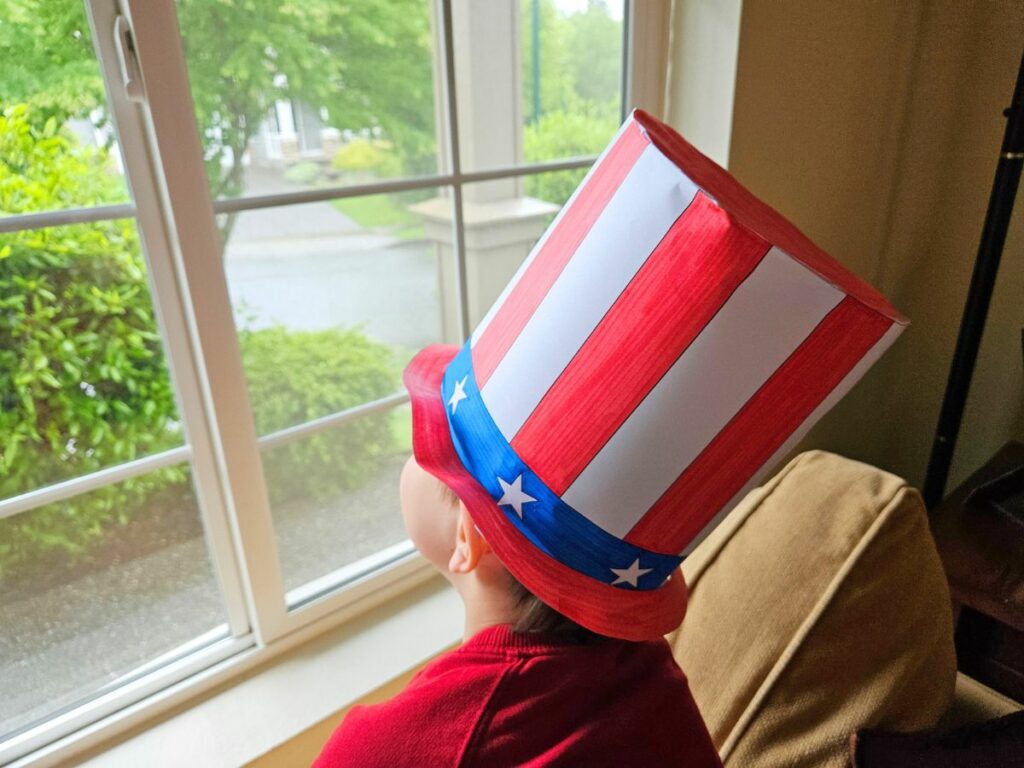
Enjoy your completed hat!

My son had so much fun making this cute hat craft. It was hard to get him to take it off!
Other posts you might enjoy:
Statue of Liberty 3D Craft for Kids
American Bison Tissue Paper Craft for Kids
USA Crafts and Activities for Kids (Perfect for Fourth of July!)