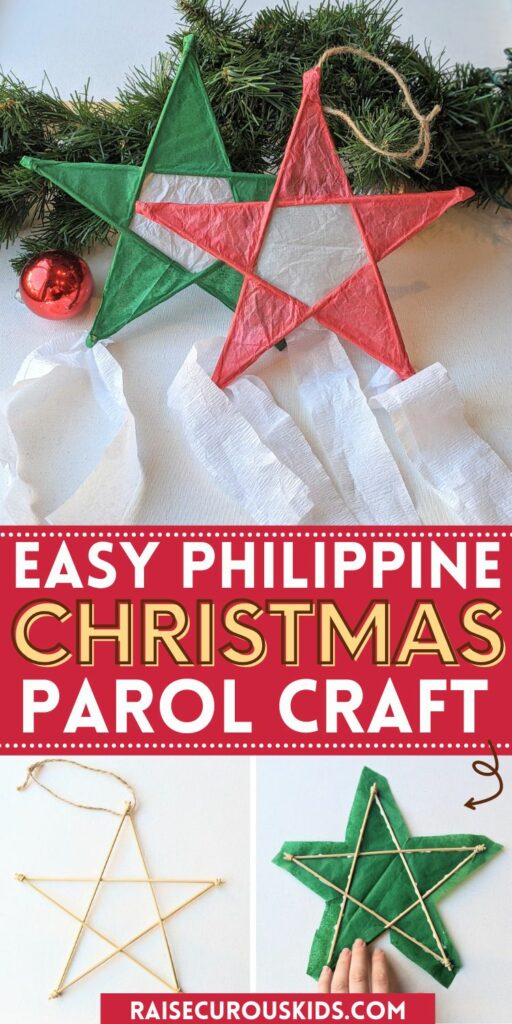
When I started planning for our preschool unit on the Philippines, I couldn’t help but want to include how to make a parol, or Philippine Christmas star.
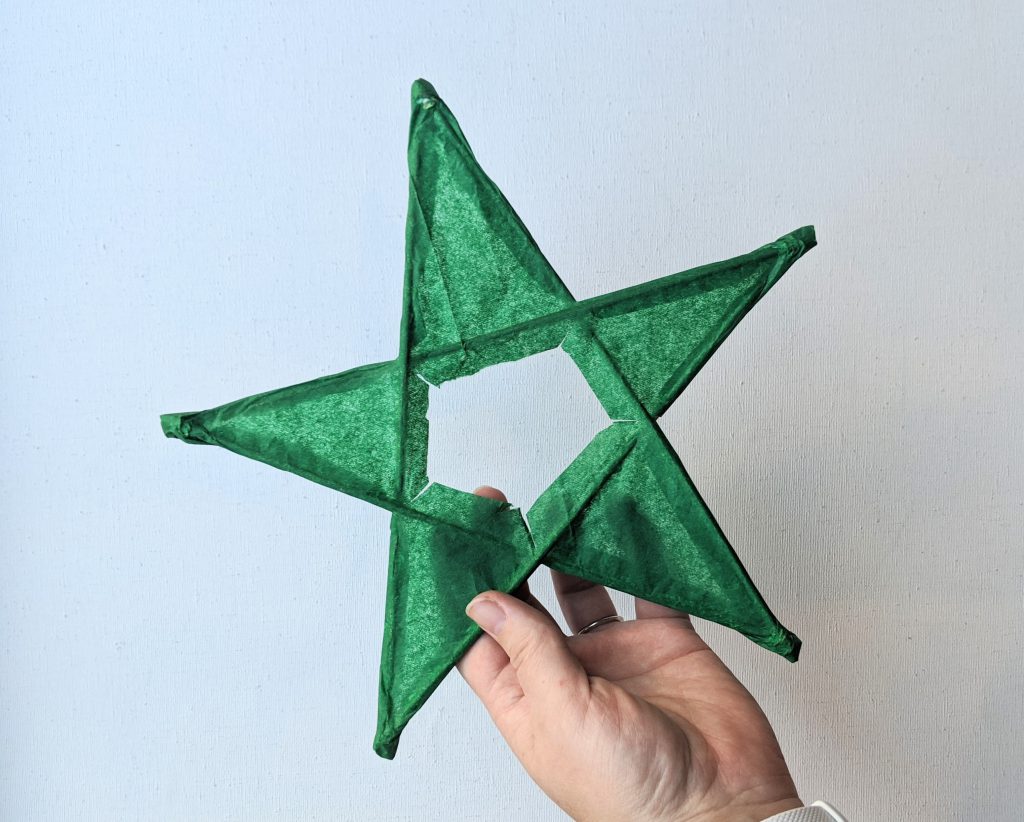
A parol is a decorative, star-shaped lantern. Although traditionally made out of bamboo and paper, you can now find them made out of all sorts of different materials.
These festive stars are lit and hung in the Philippines during the Christmas season.

And the Christmas season in the Philippines is loooong. They refer to it as the “ber” months, meaning September, October, November, and December. As much as I love Christmas, I can totally get on board with four months of holiday celebrations!
My son was so excited with his finished parol craft. He was especially excited to show it off to his Filipino relatives. And of course, he asked if we can leave it up until Christmas. In the Filipino spirit of starting Christmas celebrations early, how can I say no?!
Read on to learn how to make a parol!
How to Make a Parol
Materials:
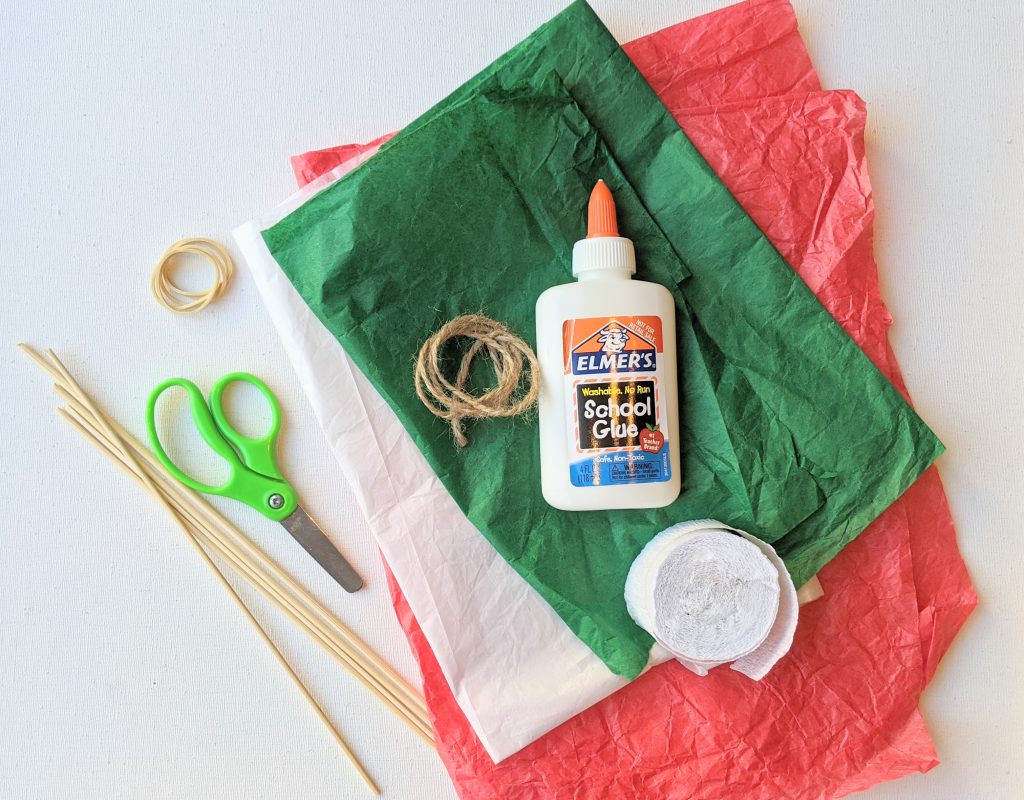
- Bamboo skewers
- Rubber bands
- Tissue paper
- Scissors
- Glue
- String
- Streamers (optional)
Instructions for the parol craft:
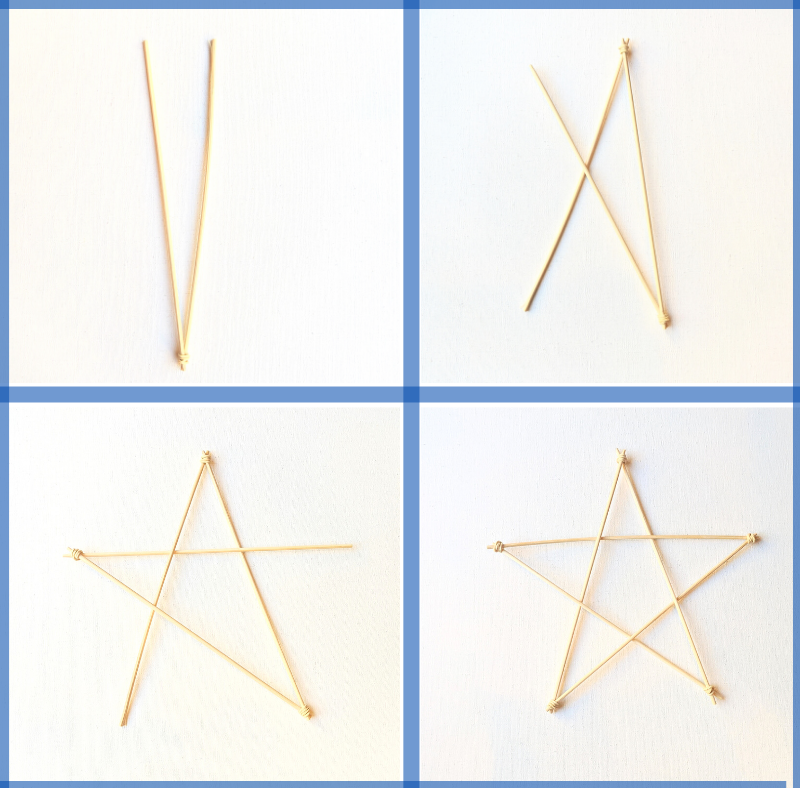
Start off by using scissors to cut the sharp ends off of the bamboo skewers.
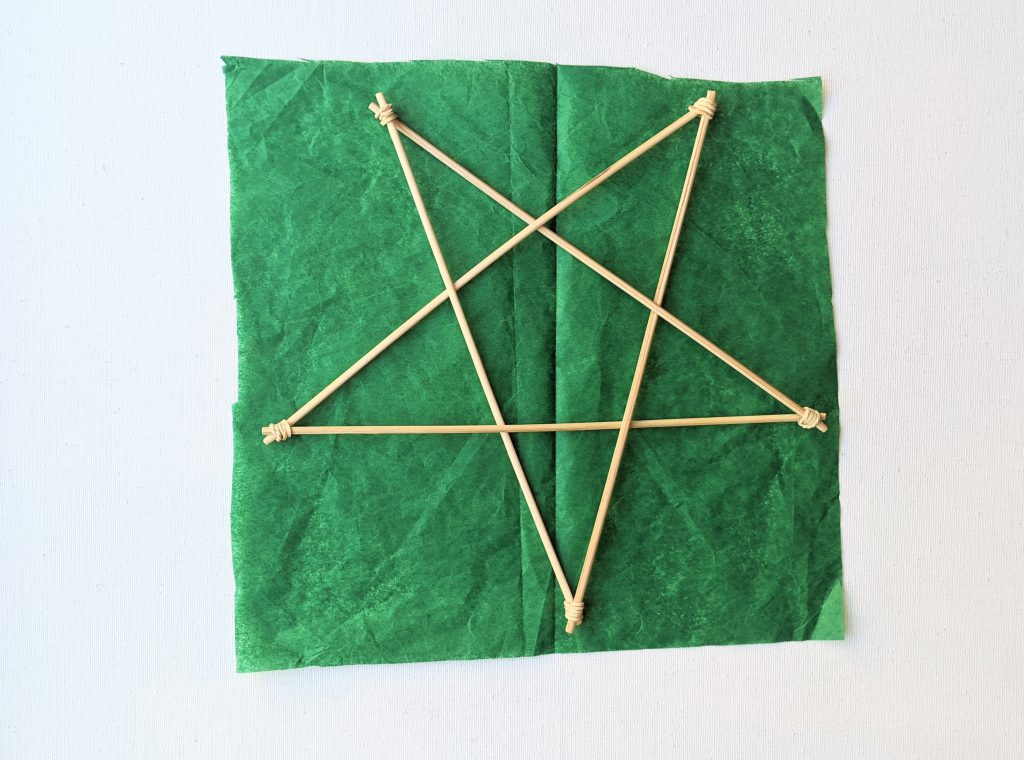
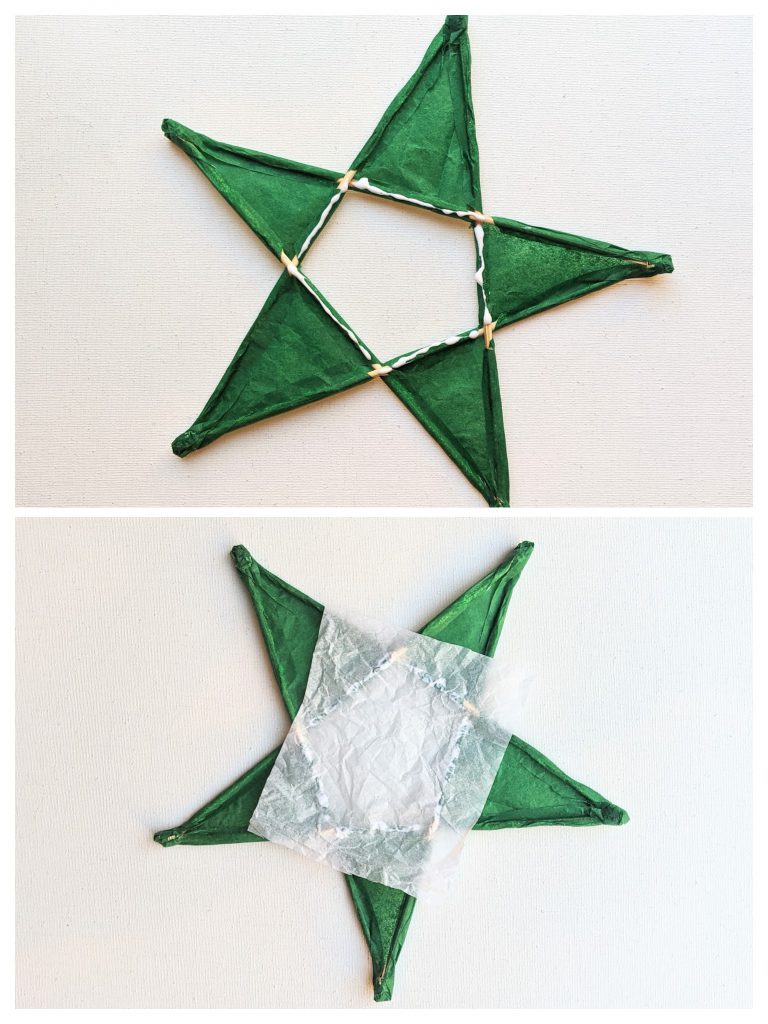
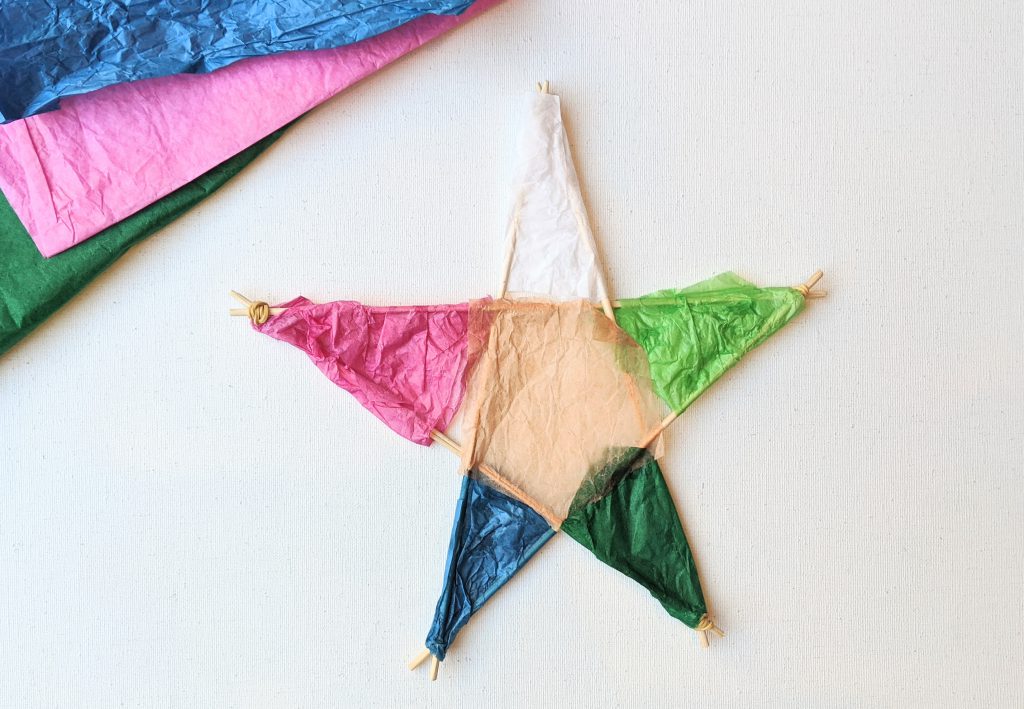
Next, use rubber bands to connect the ends of the bamboo sticks one at a time to form a star.
The trick here is to make sure that the bamboo skewers are intertwined, not just placed on top of each other. When you’re finished, each stick should be over one stick and under another one.
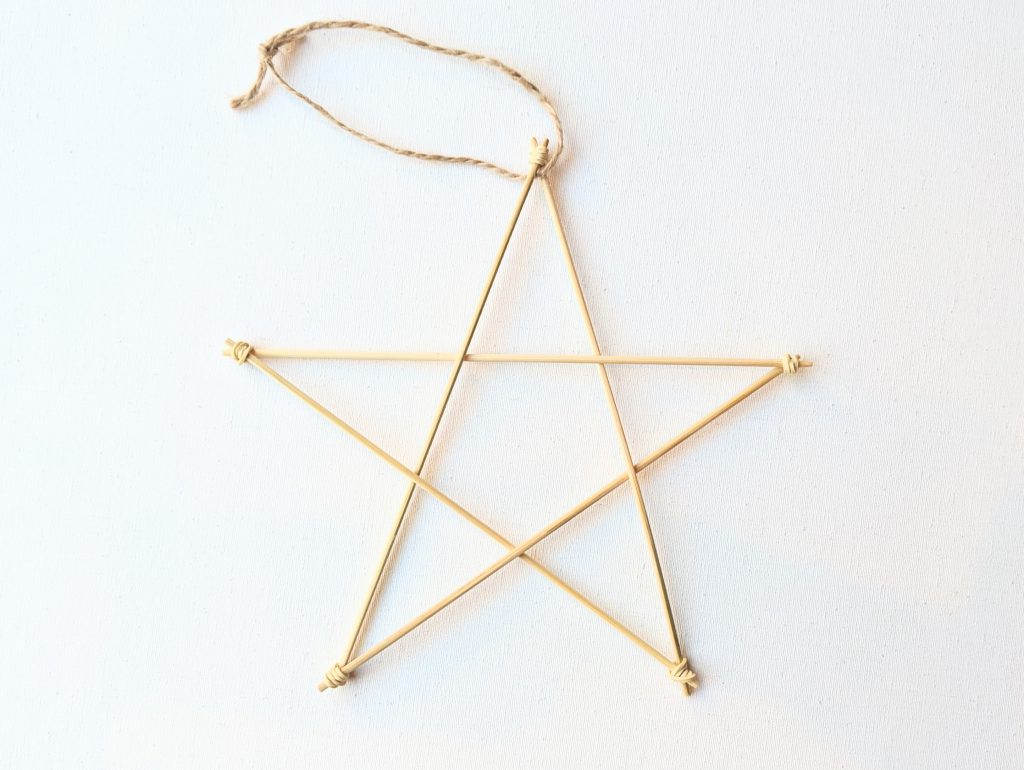
Tie a string at the tip of one of the points to hang the parol once it’s completed.
You can also wait until the end and glue the string to the completed star (like I did for the green star in the tutorial below), but it is more secure if you attach it in the beginning.
4. Cut out a piece of tissue paper slightly larger than your bamboo star.
5. Draw a thin line of glue along all of the skewers. Place the piece of tissue on top and press gently along the sticks to adhere the star to the tissue. Wait for the glue to dry.
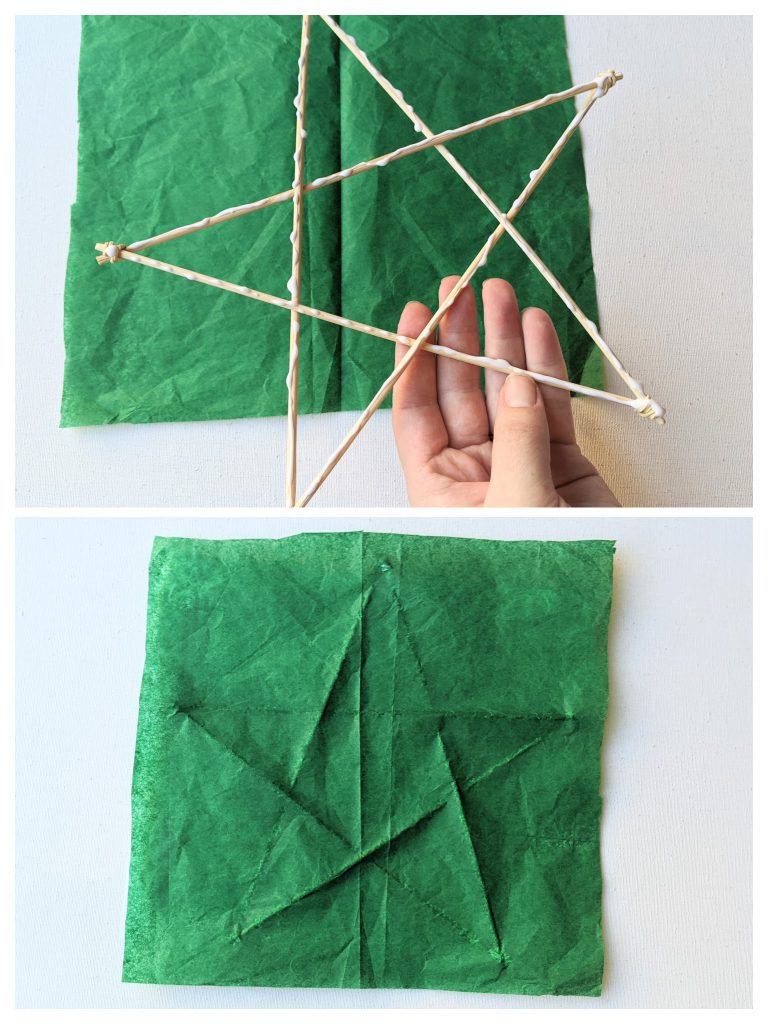
6. Once dry, cut the tissue so that it’s just slightly larger than the star. Also cut a line directly into the tissue at the ‘v’ of each point so that you can easily fold the tissue.
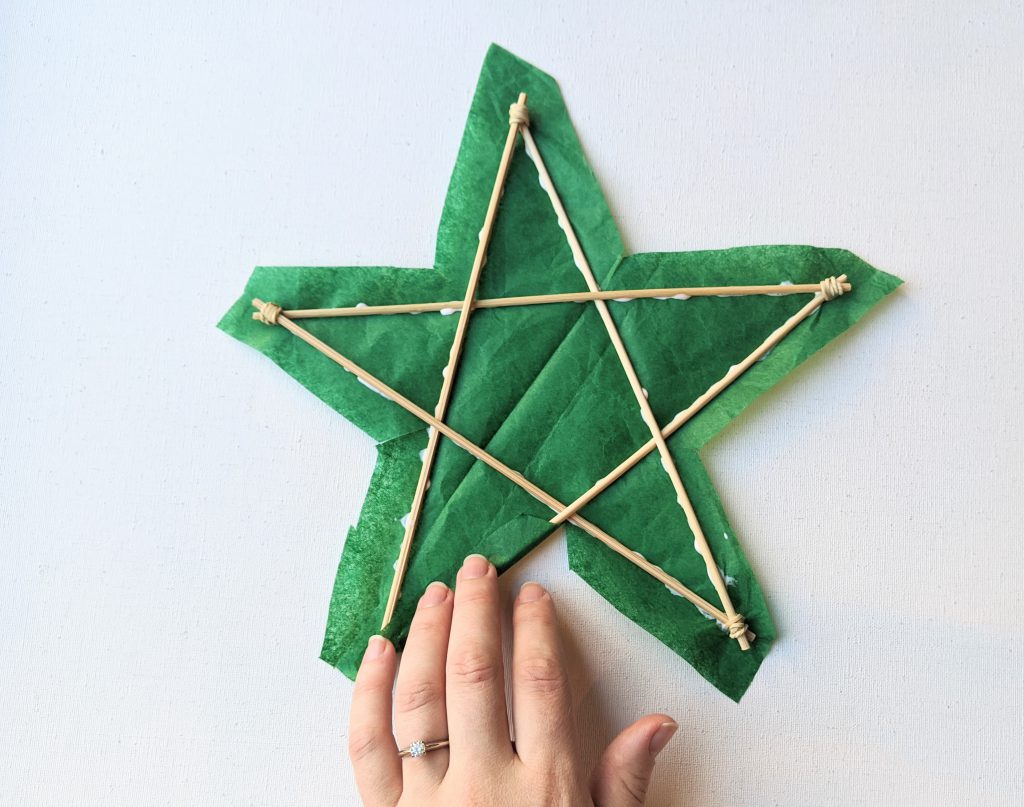
7. Apply a line of glue along the bamboo skewers and fold the tissue paper over so that the bamboo sticks are contained in the tissue paper.
Now you can either leave your parol like this, or if you want to add another color to the middle continue on with the steps below.
Carefully cut a section out of the middle of the star, following the shape of the sticks. Leave a small border. Once again, cut a line into each of the ‘v’s for easy folding.
Place a line of glue along the wooden sticks in the middle and fold the tissue over the sticks, pressing down to secure them.
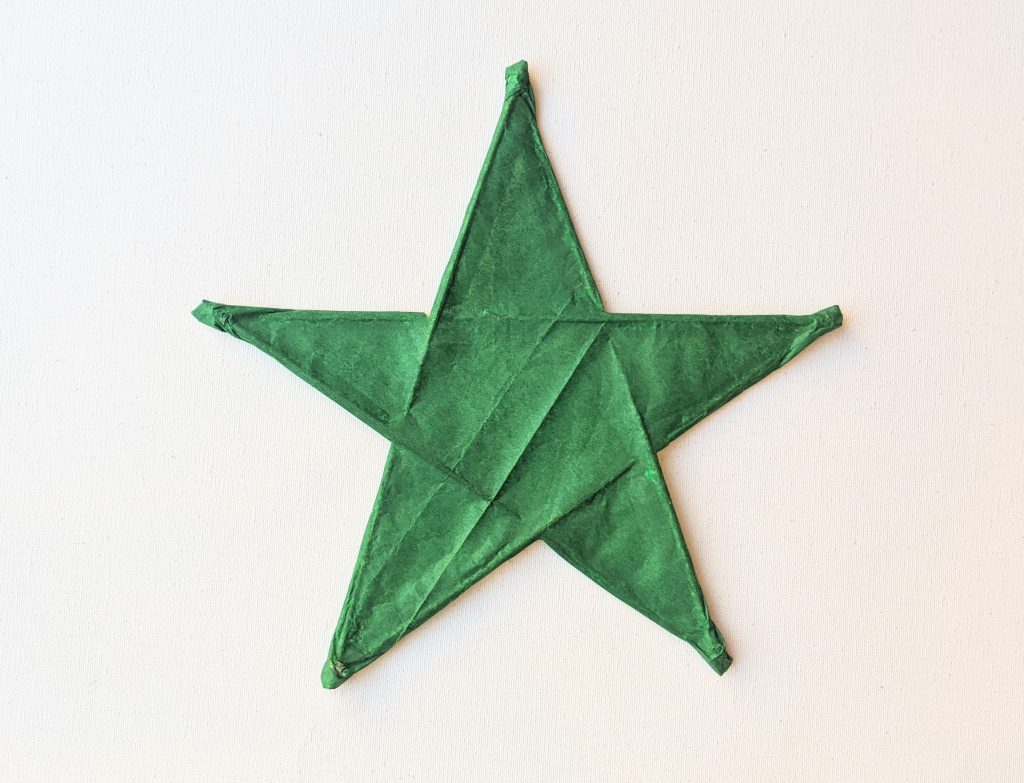
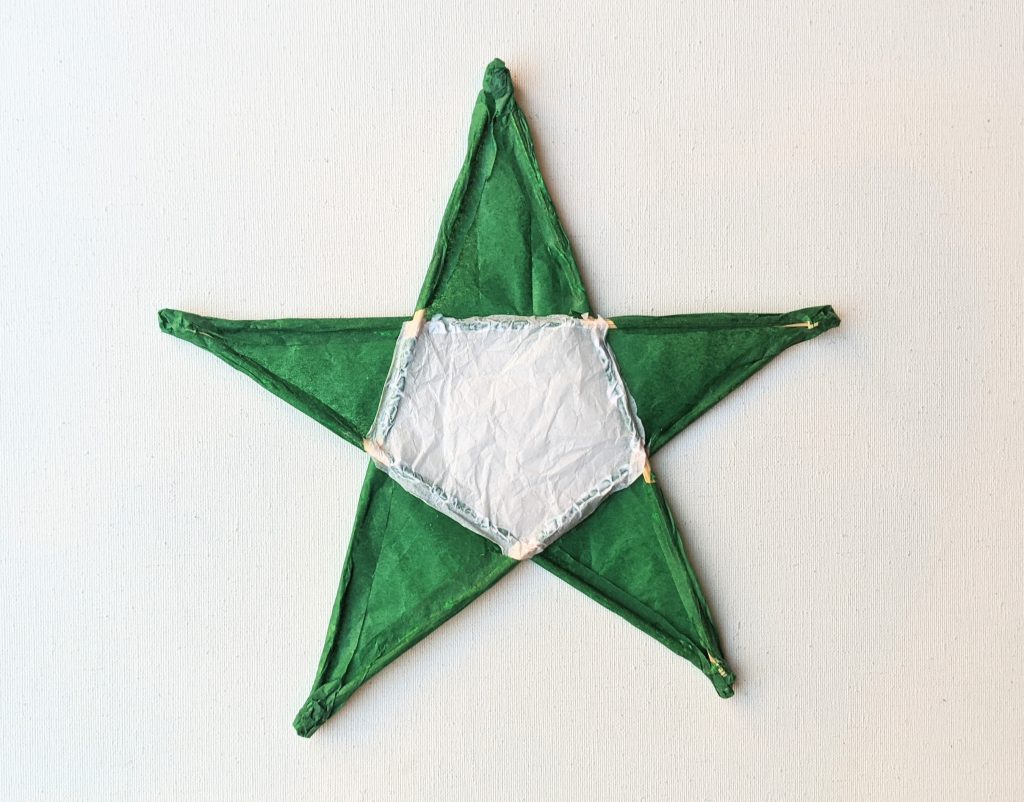
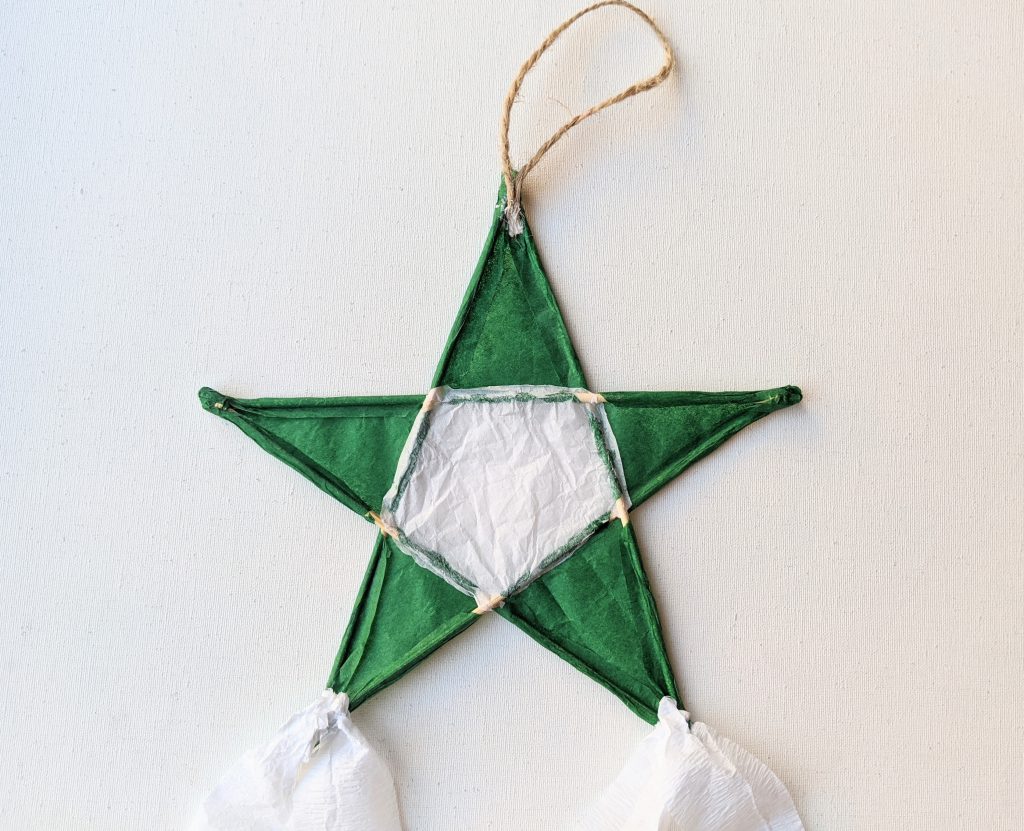
Cut a piece of tissue just larger than the middle section in the color of your choice. Place a line of glue around the middle sticks on the back and press the tissue down.
Let it dry, then trim the edges as close as possible to the sticks. Glue the remaining edges down along the sticks.
If you would like to add streamers, cut four equal-sized strips. Take two, scrunch the tops together, and glue them to a point of the star on the back. Do the same with the other bottom point.
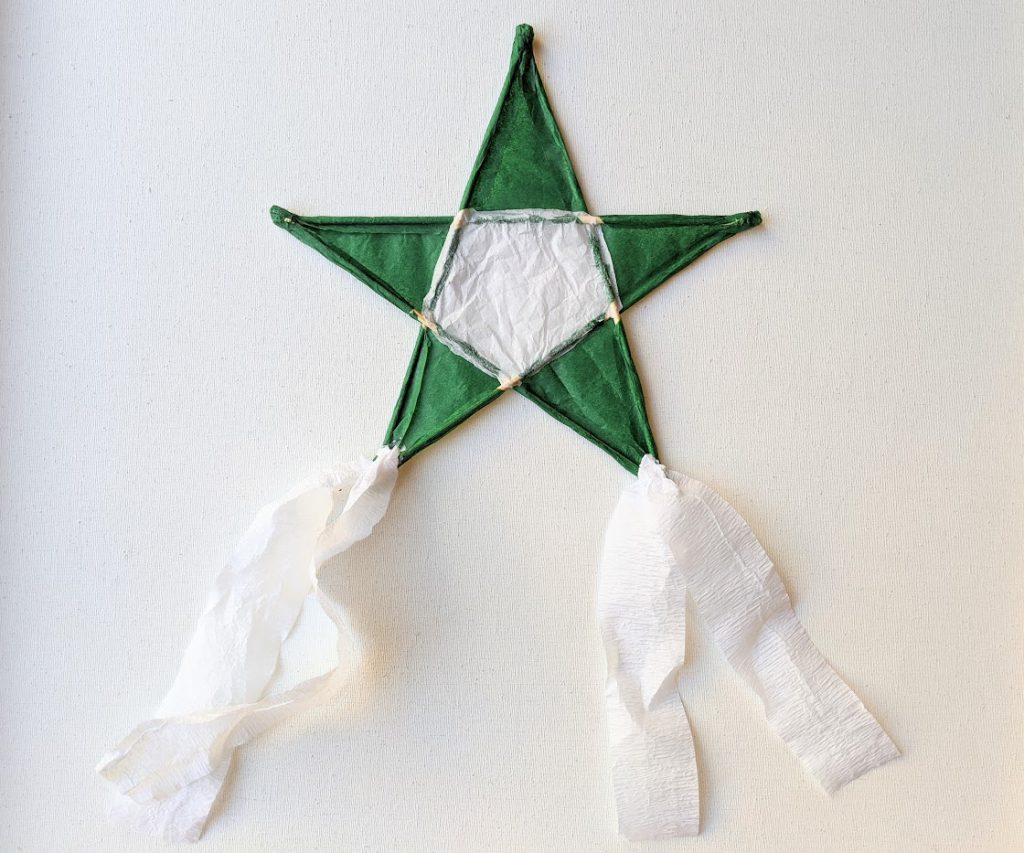
Glue the string on the top point if you didn’t attach it at the beginning. Use glue liberally and wait for it to be completely dry before hanging the parol up.
For younger kids
If you’re making your parol with a young child, you can also do a more informal version of a parol.
Just cut strips of paper roughly the height of each point on the star. Have your child wrap the tissue and glue it to itself on the other side, forming a sheath around each point.
Cut a piece of paper the size of the middle section and glue that on as well.
Now that your parol is completed, it’s time to hang it up!
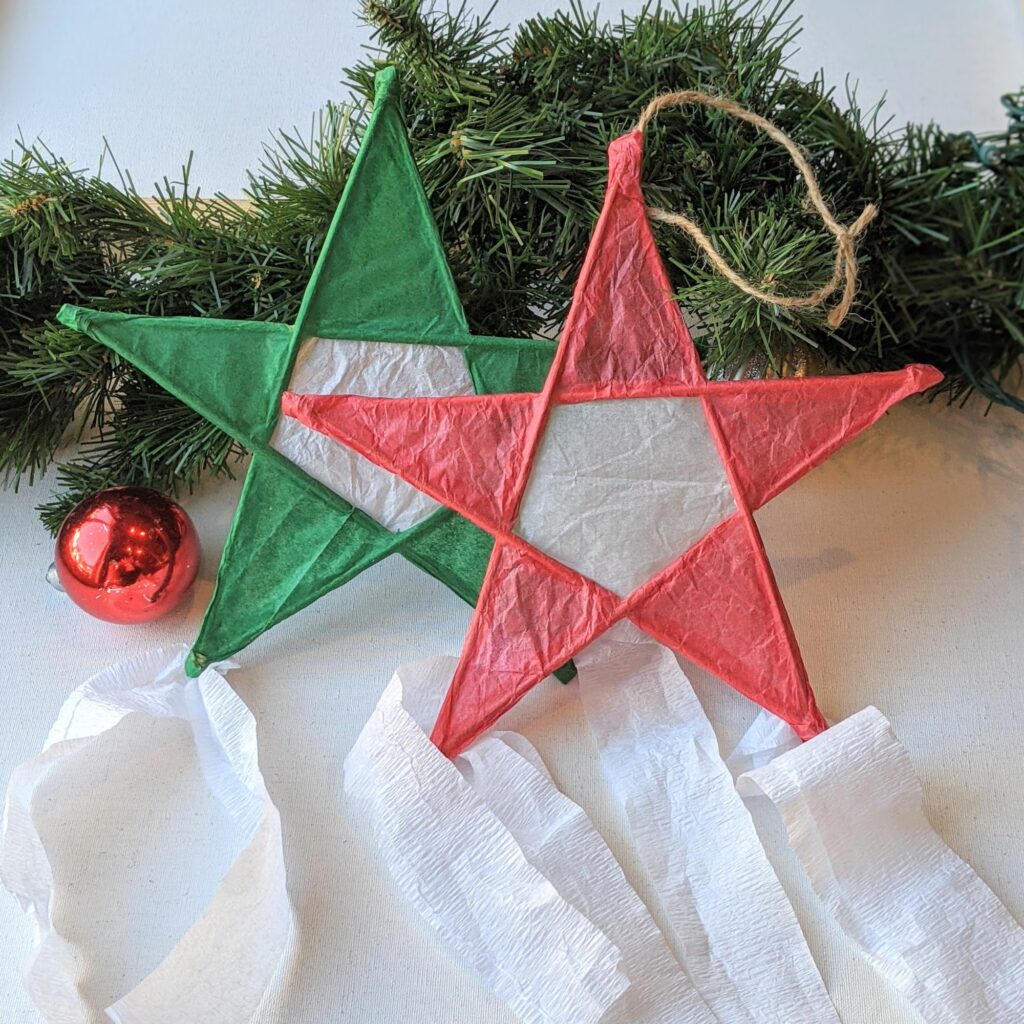
You can place it in a window so the light shines through, hang it on your Christmas tree, or find another festive place to spotlight your craft.

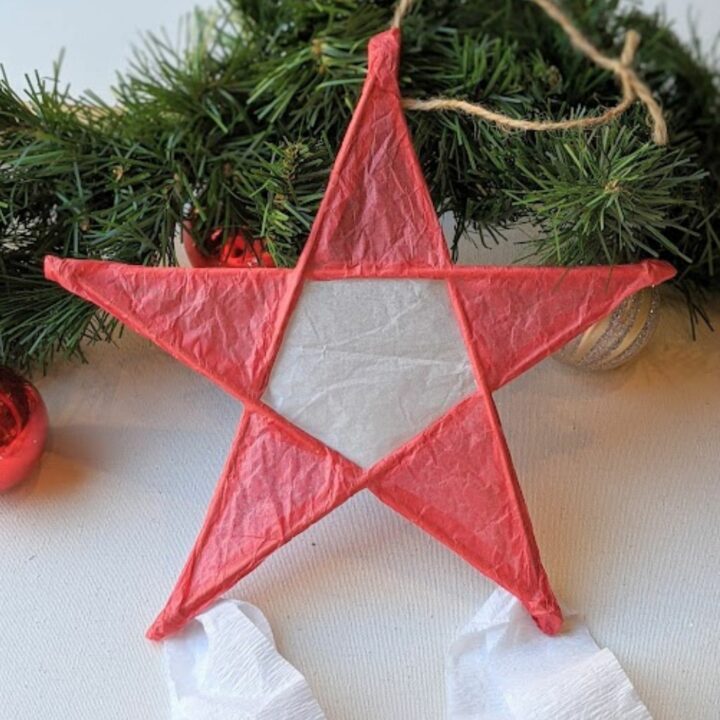
Philippine Christmas Parol Craft
This Philippine parol is a perfect craft to make for Christmas!
Materials
- Bamboo skewers (sharp end cut off)
- Rubber bands
- Tissue paper
- Scissors
- Glue
- String
- Streamers (optional)
Instructions
- Use rubber bands to connect the ends of the bamboo sticks one at a time to form a star, intertwining the sticks
- Tie a string at the tip of one of the points to hang the parol once it's completed.
- Cut out a piece of tissue paper slightly larger than your bamboo star.
- Draw a thin line of glue along all of the skewers. Place the piece of tissue on top and press gently along the sticks to adhere the star to the tissue. Wait for the glue to dry.
- Once dry, cut the tissue so that it's just slightly larger than the star. Also cut a line directly into the tissue at the 'v' of each point so that you can easily fold the tissue.
- Apply a line of glue along the bamboo skewers and fold the tissue paper over so that the bamboo sticks are contained in the tissue paper.
- Carefully cut a section out of the middle of the star, following the shape of the sticks. Leave a small border. Once again, cut a line into each of the 'v's for easy folding.
- Place a line of glue along the wooden sticks in the middle and fold the tissue over the sticks, pressing down to secure them.
- Cut a piece of tissue just larger than the middle section in the color of your choice. Place a line of glue around the middle sticks on the back and press the tissue down.
- Let it dry, then trim the edges as close as possible to the sticks. Glue the remaining edges down along the sticks.
- If you would like to add streamers, cut four equal-sized strips. Take two, scrunch the tops together, and glue them to a point of the star on the back. Do the same with the other bottom point.
Other posts you might be interested in:
Glowing Rudolph Craft for Kids
Christmas Handprint Art for Kids (8 Adorable Templates!)
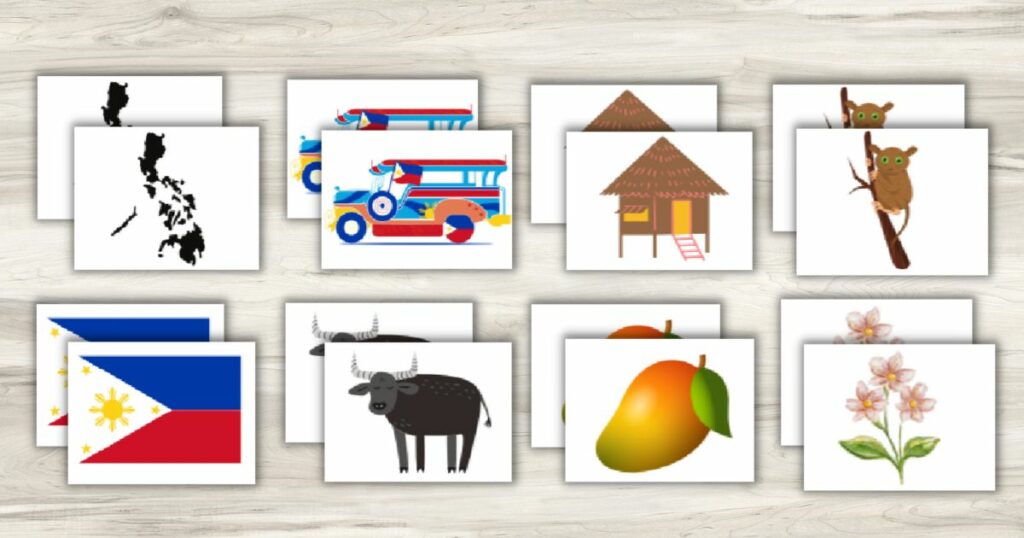
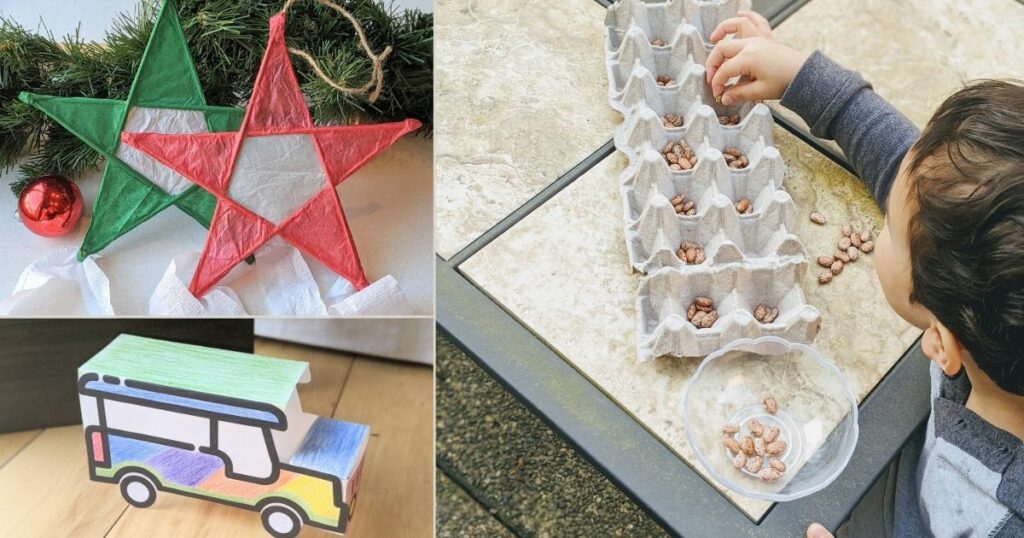
Philippines Preschool Unit- Crafts, Activities, and Free Printables!