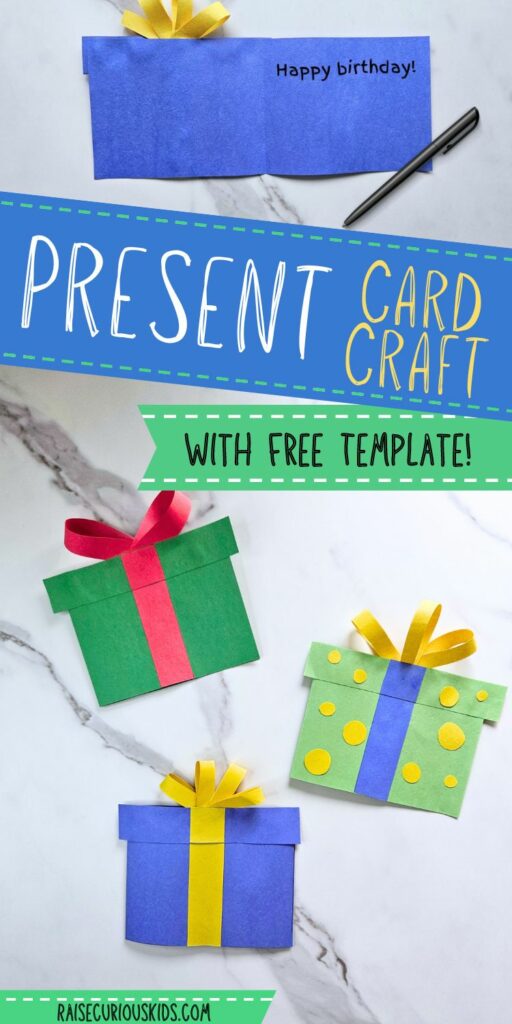
Looking for a fun and creative DIY craft that kids can make to add a personal touch to a special occasion? This homemade present-shaped card is just the thing!
Perfect for birthdays, Christmas, or any time you want to brighten someone’s day, this card is easy to create and can be customized in countless ways.
With a free template to guide you, kids can let their imaginations run wild, decorating their cards with colors, patterns, and special embellishments.
It’s a simple yet thoughtful way to show someone you care, and the best part is, it’s as fun to make as it is to give!
Homemade Present Card Craft
Materials
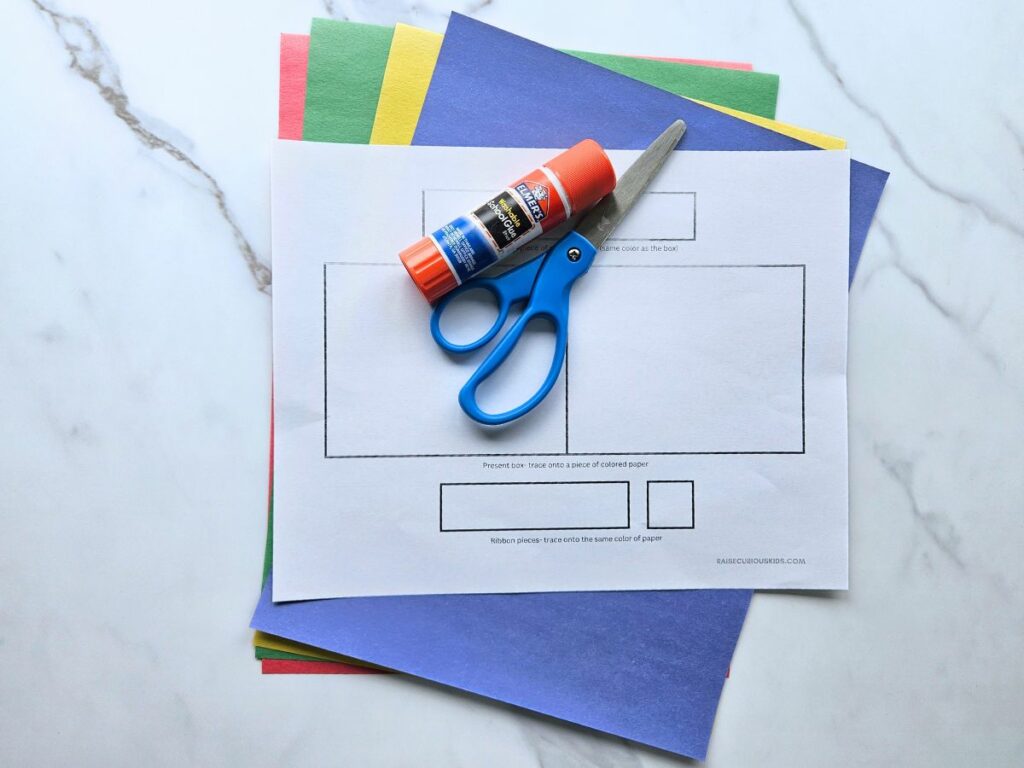
- Present card template (available for download below)
- Colored paper
- Scissors
- Glue
Instructions
First, go ahead and download the present card craft template from the link at the bottom of this page, and print it out.
Next, grab your scissors and cut out all the pieces from the template.
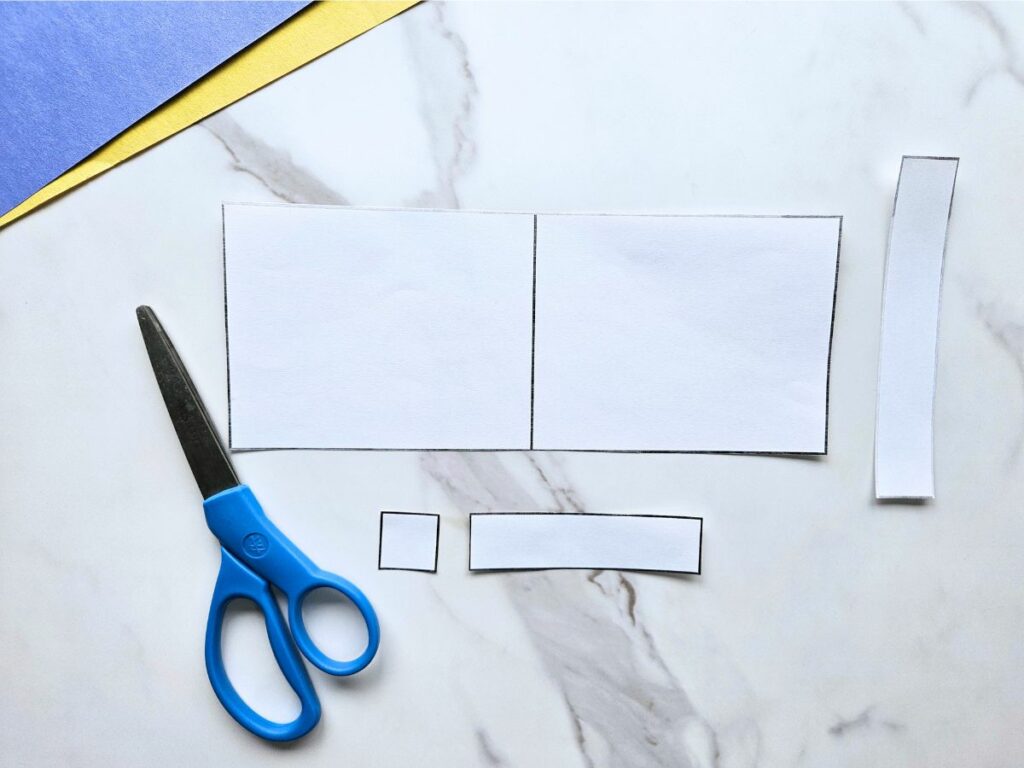
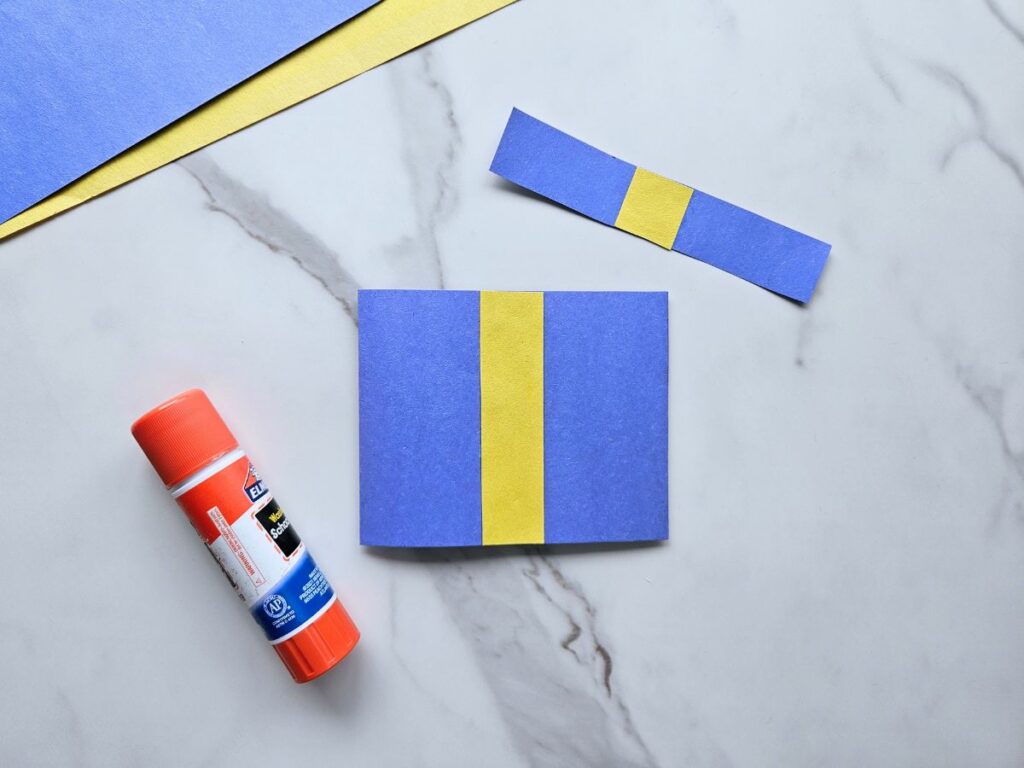
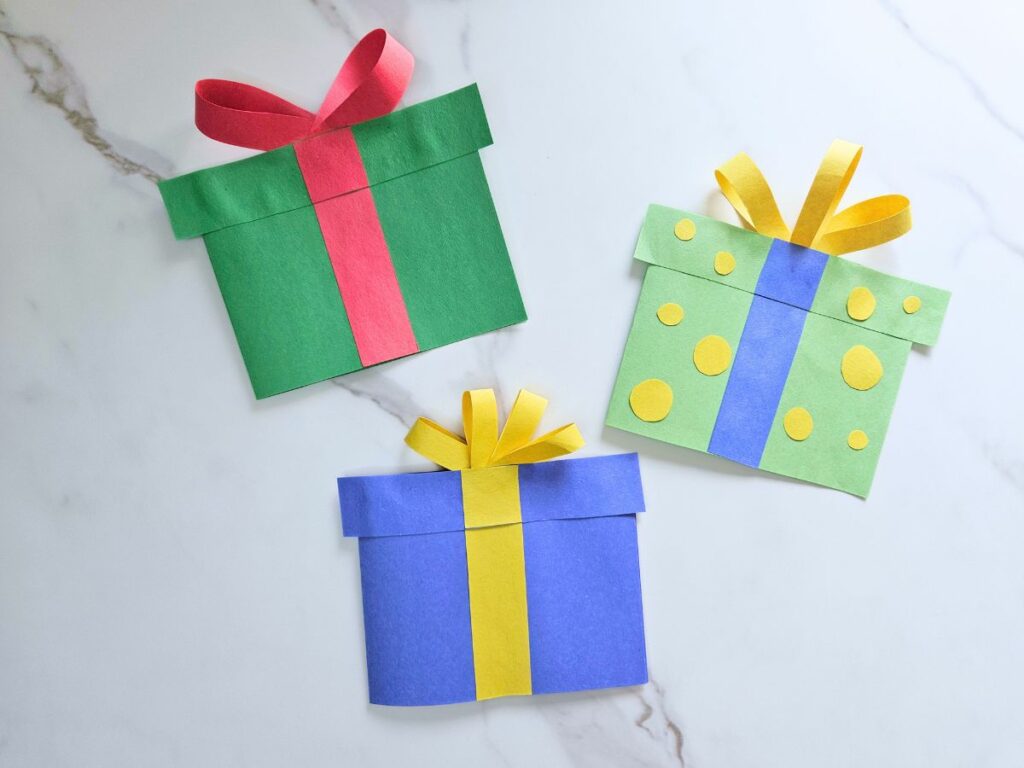
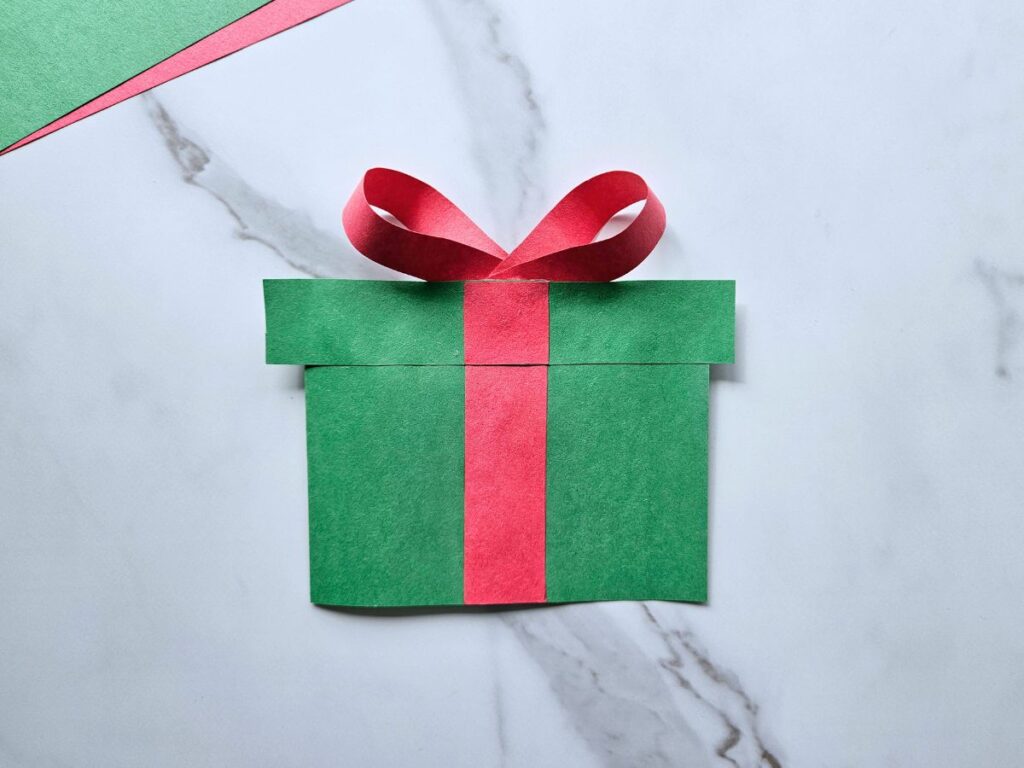
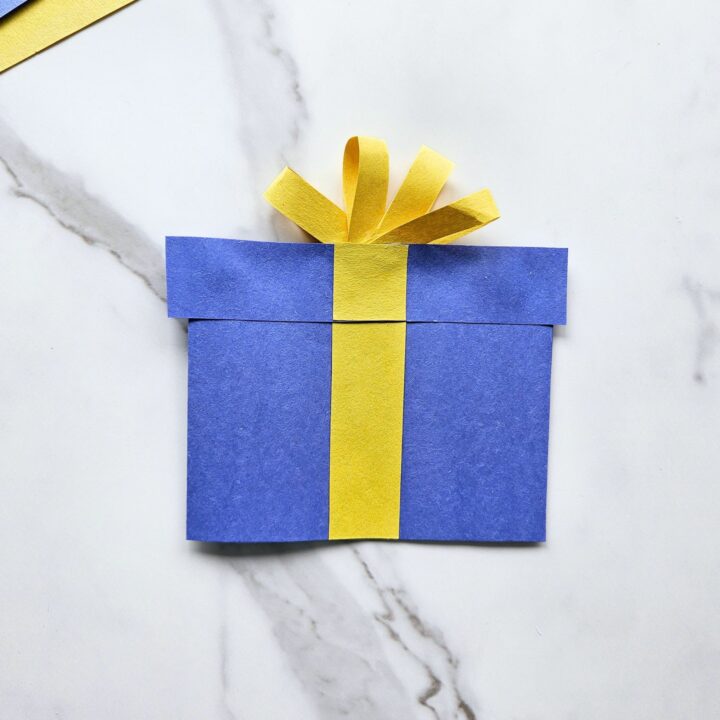
For the box and lid, trace those pieces onto the same color of paper and cut them out. Then, do the same with the ribbon pieces on another color of paper. The fun part is that kids can choose whatever color combinations they like!
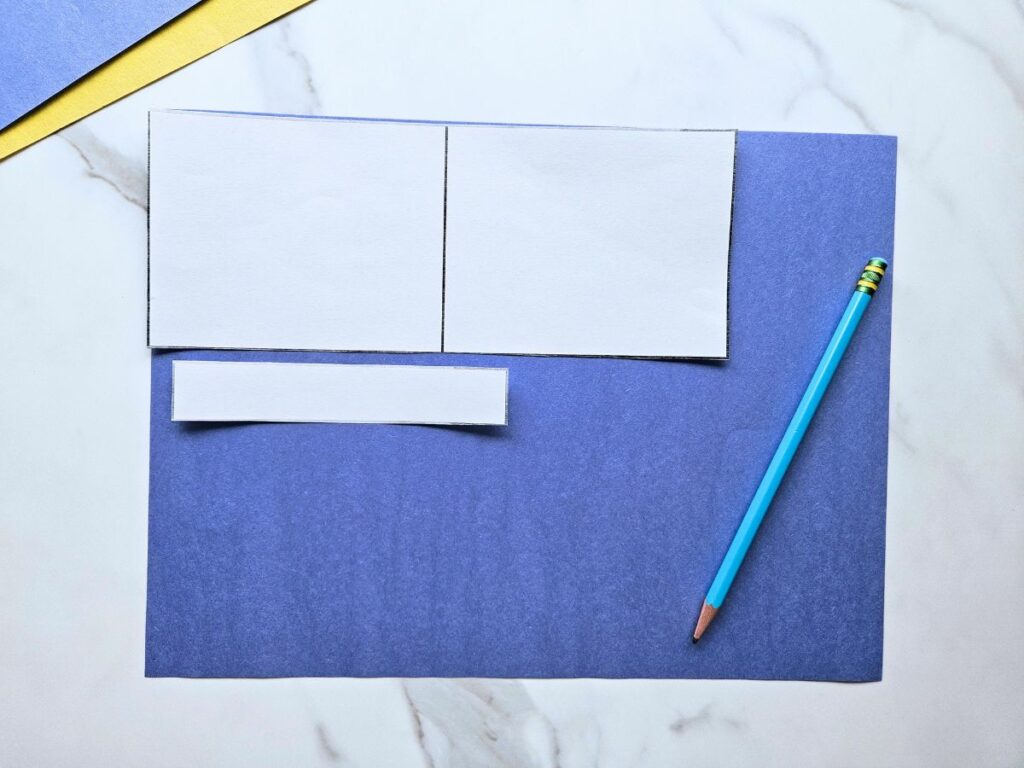
Now, fold the box piece in half.
Take the ribbon piece and glue it vertically onto the box. Then, glue the small ribbon piece right in the center of the lid, making sure it lines up with the ribbon on the box.
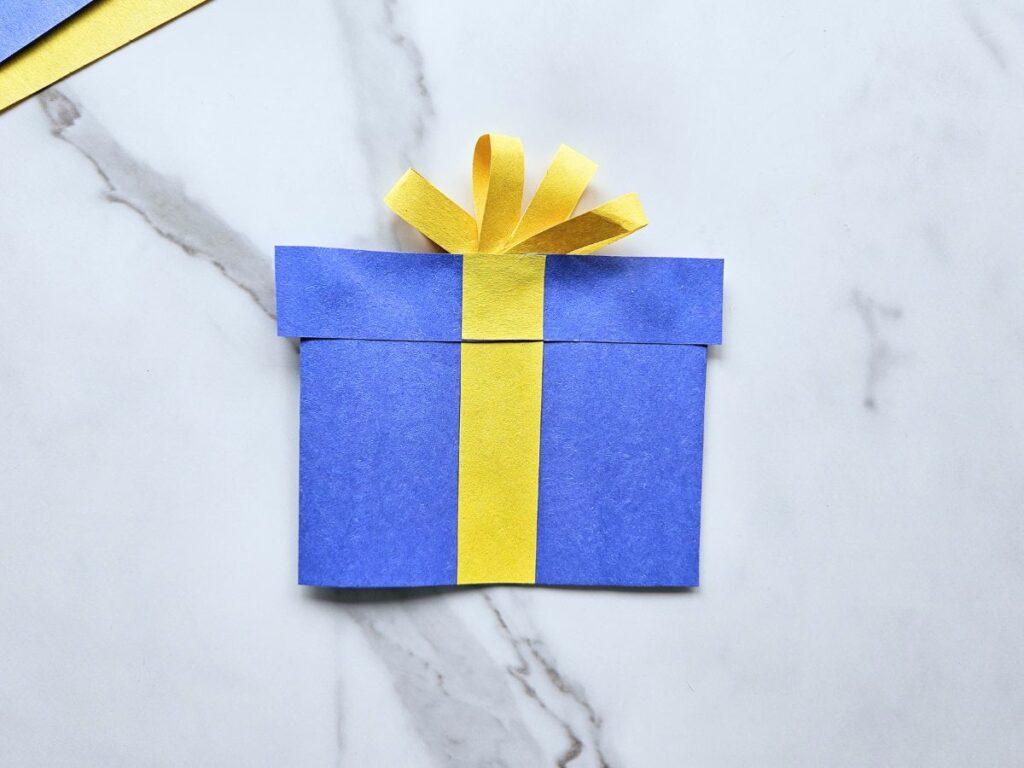
If you want to add a bow to your present, this is the time to do it!
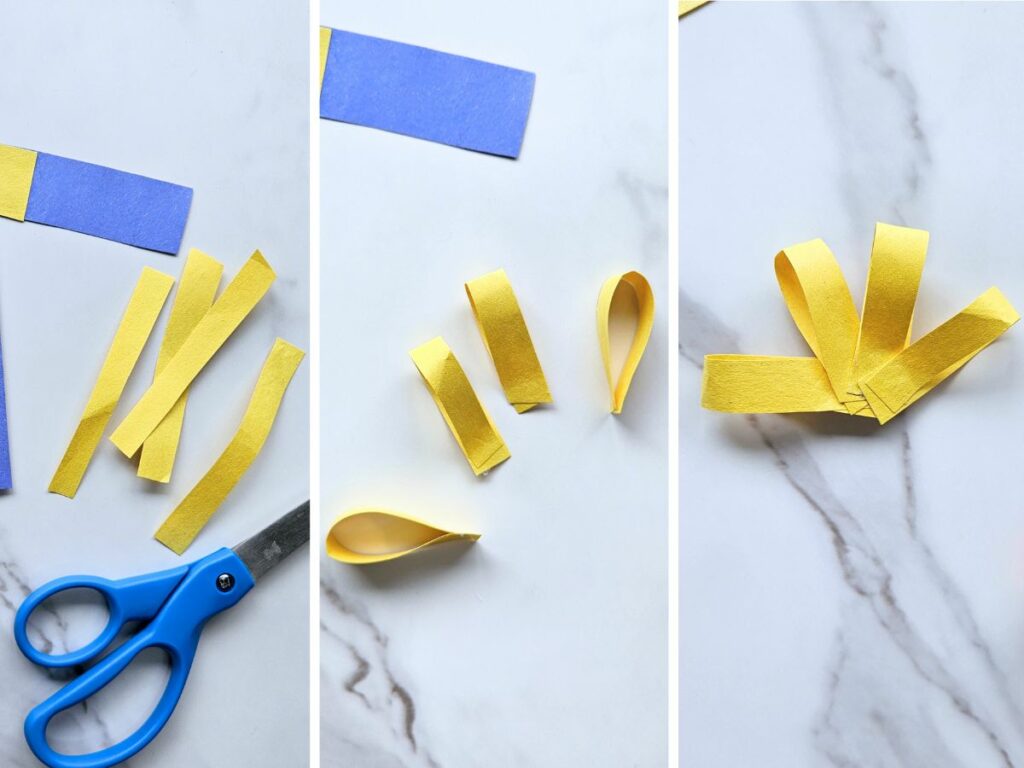
For a puff bow: Cut three or four long, narrow strips of paper in your chosen color. Fold each strip into a loop and glue the ends together. Then, glue all the loops together at the bottom.
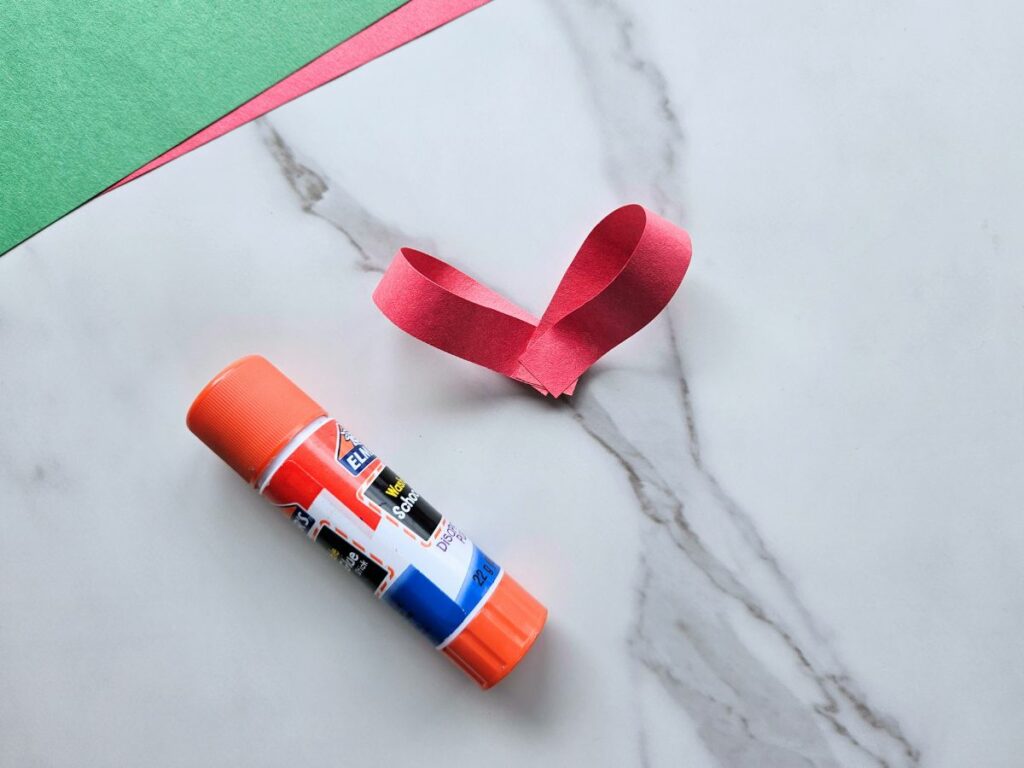
For a traditional bow: Cut out two long, narrow strips of paper. Fold each strip into a loop and glue the ends together, angling them slightly for a better look. Then, glue the loops together at the base.
Once your bow is ready, glue it to the top of your card. Then, take the lid of the box and glue it to the top of the craft, covering the base of the bow. This secures your bow and hides where you glued it.
You can leave your card as it is, or get creative and add some decorations like polka dots, stripes, or anything else you can think of!
Once your card is all decorated, write a note inside, and it’s ready to be gifted to a friend or loved one for a birthday, Christmas, or any special occasion!

Creating a present-shaped card is a wonderful way for kids to get creative while making something truly special for someone they care about.
With endless possibilities for customization, each card becomes a unique and heartfelt gift, perfect for any occasion. Make the craft out of red and green paper and just like that you have a perfect Christmas card!
Plus, the process of making these cards can be just as rewarding as the joy of giving them. Whether it’s a birthday, Christmas, or just a simple “thinking of you,” this card will surely bring a smile to anyone’s face.
Present Card Craft
Make your own personalized card with this cute present card craft!
Materials
- Present card template
- Colored paper
- Scissors
- Glue
Instructions
- First, download and print out the free present card template.
- Cut out all the pieces of the template.
- Trace the box and lid templates onto a piece of colored paper and cut them out. Trace the ribbon templates onto a different color of paper and cut them out. Fold the box piece in half.
- Glue the long ribbon vertically to the box and glue the short ribbon to the center of the lid, checking to make sure they line up.
- To make a puff bow: Cut three or four long, narrow strips of paper in your chosen color. Fold each strip into a loop and glue the ends together. Then, glue all the loops together at the bottom.
- To make a a traditional bow: Cut out two long, narrow strips of paper. Fold each strip into a loop and glue the ends together, angling them slightly for a better look. Then, glue the loops together at the base.
- Glue the base of the bow to the top of your card, then glue the lid to the top of the card covering the bottom of the bow.
- Add decorations like polka dots or stripes as desired.