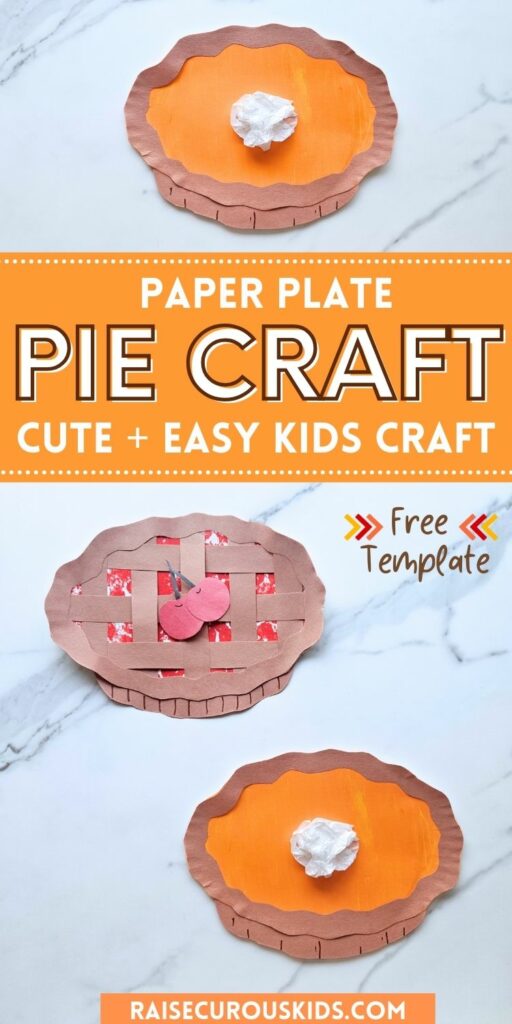
Fall is here, and with it comes the season of delicious pies and cozy crafts! If you’re looking for a fun and easy project to do with your kids, our paper plate pie craft is the perfect choice.
With a free template available, you can choose to make either a cherry or pumpkin pie.
This craft is so simple to create using a paper plate, paper, and paint, making it ideal for kids of all ages. It’s a wonderful way to get into the Thanksgiving spirit.
Read on for instructions to make this easy pie craft!
Paper Plate Pie Craft
Materials
- Pie craft template (available for download below)
- Paper plate
- Paint (red or orange)
- Bubble wrap (for cherry craft)
- Colored paper
- White tissue paper (optional)
- Scissors
- Glue
Instructions
First, download and print out the free pie craft printable template, which you can find by scrolling to the bottom of this page.
Continue with the instructions below depending on if you want to make a pumpkin pie craft or a cherry pie craft.
Pumpkin Pie Craft
To make the pumpkin pie craft, begin by painting your paper plate orange.

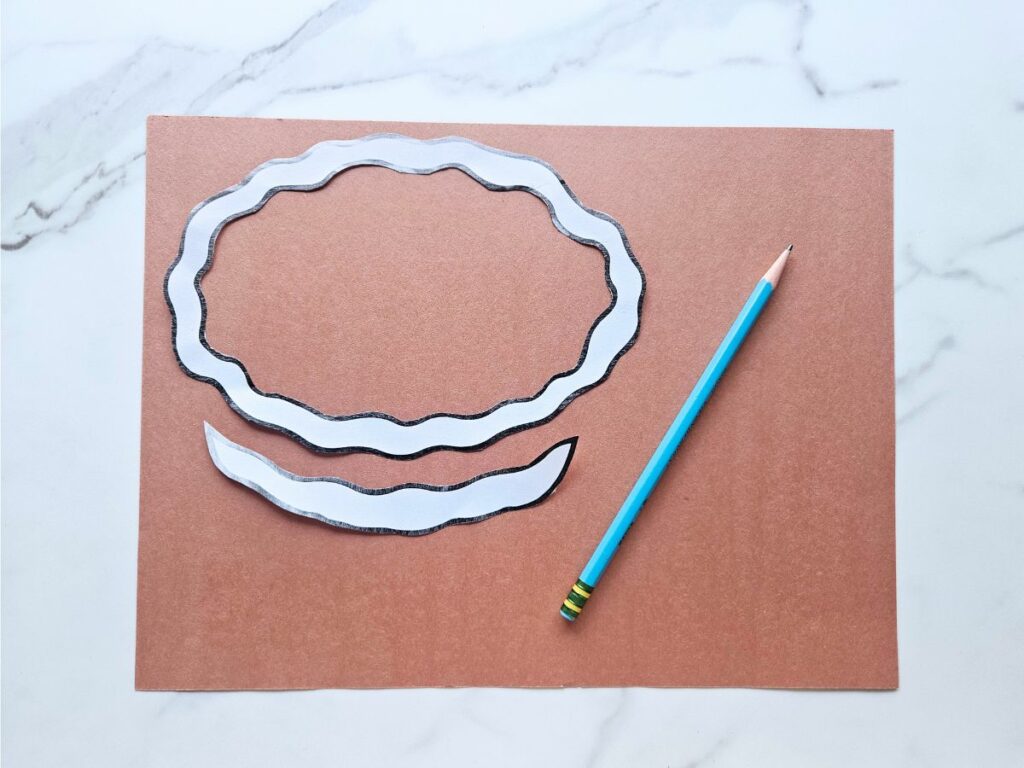
While the paint dries, cut out the pieces of the template.
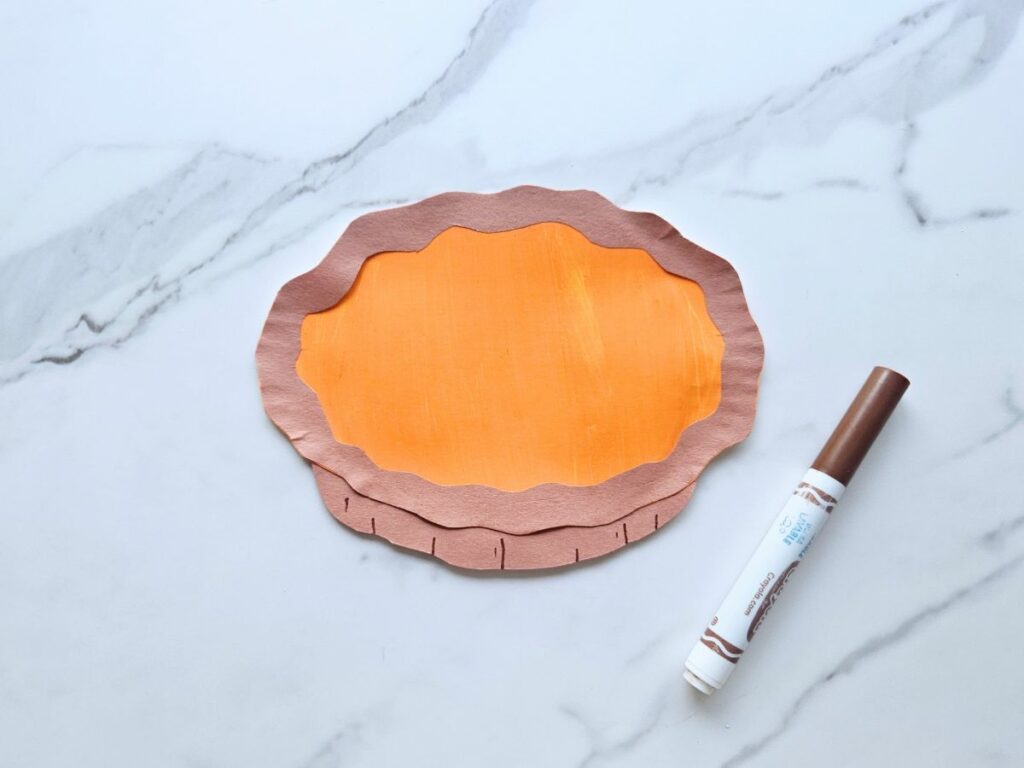
Trace the edge and bottom of the pie on brown or tan paper and cut them out.
Glue the crust of the pie onto the orange paper plate.
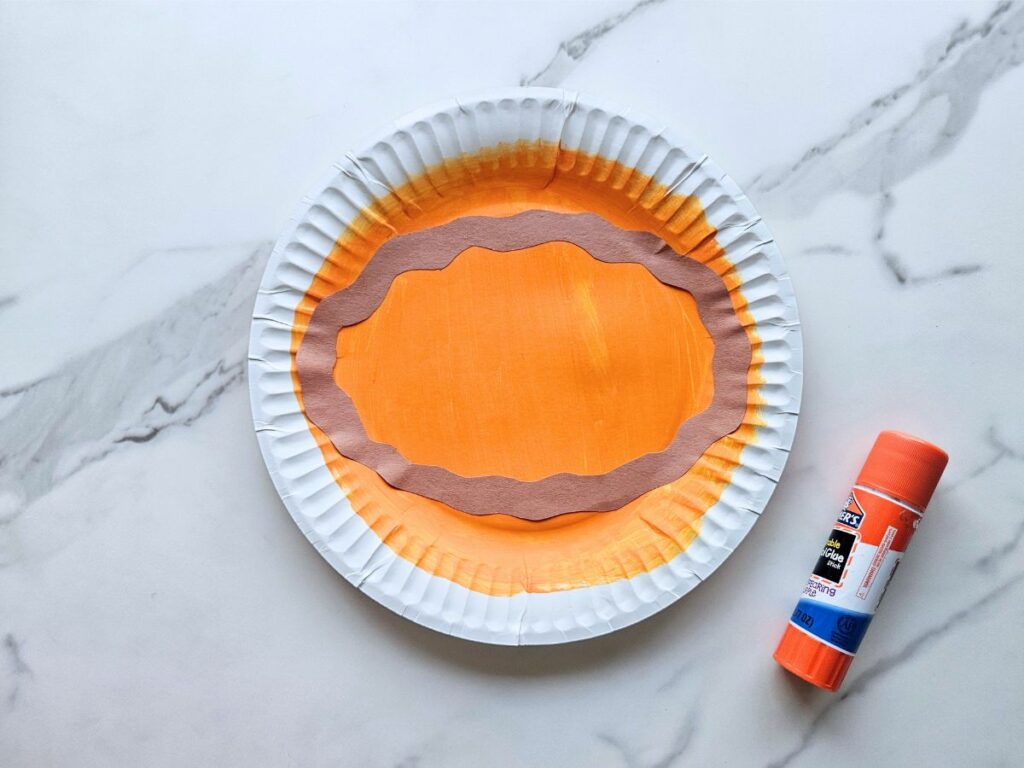
Cut off any parts of the plate that extend beyond the edge of the pie.
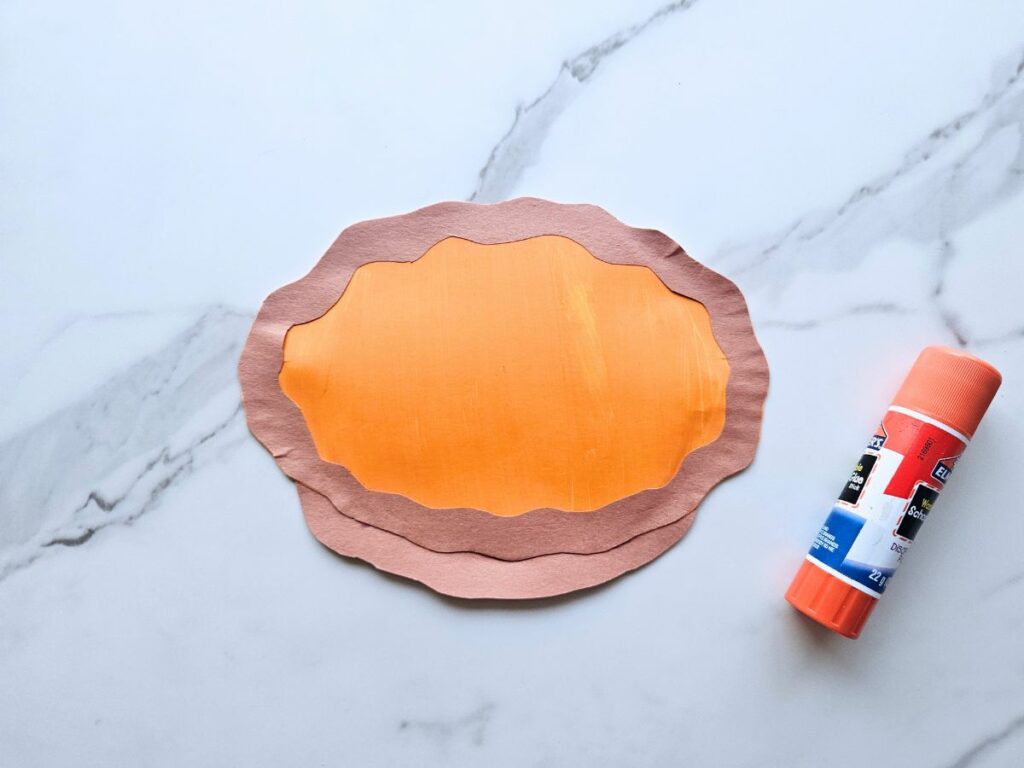
Glue the bottom of the pie to the pie.
Use a marker to mark the pleats on the base of the pie.
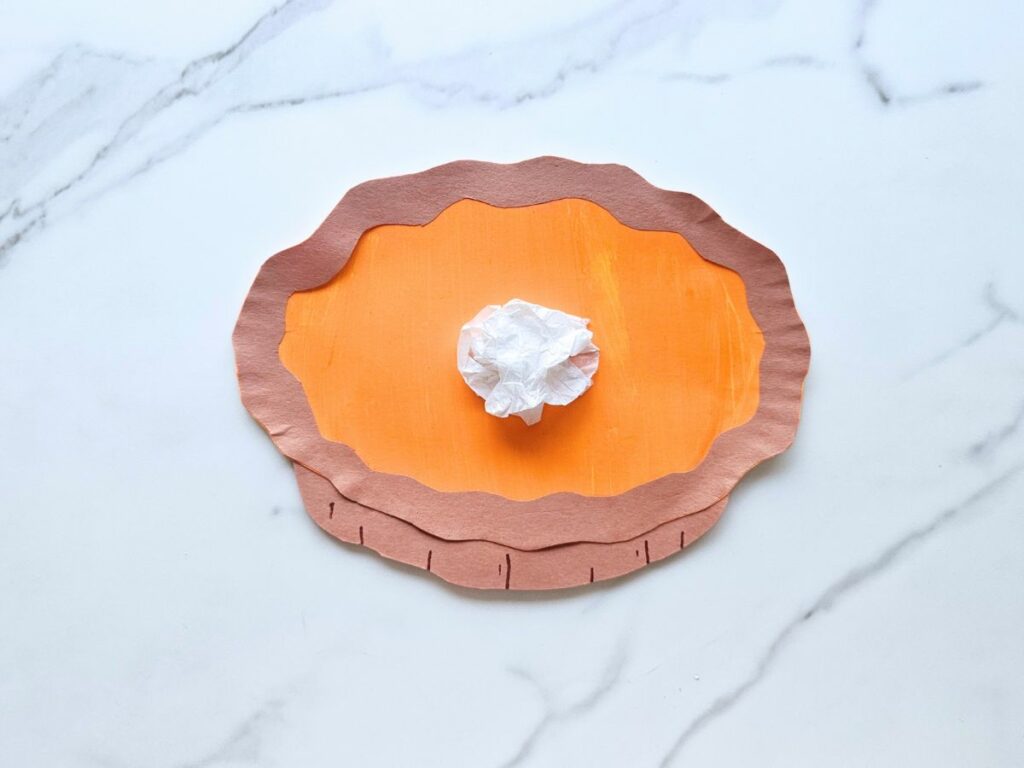
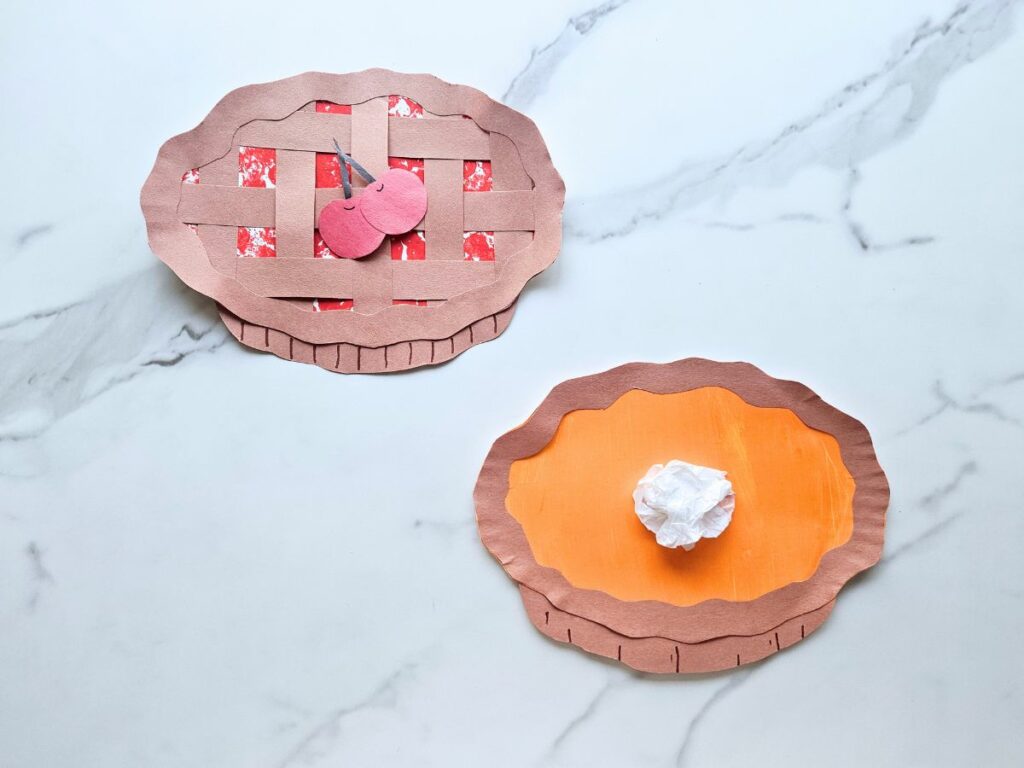
If desired, use a gently crumpled piece of tissue paper for the whipped cream.

And now your pumpkin pie is finished and ready to enjoy.
Cherry Pie
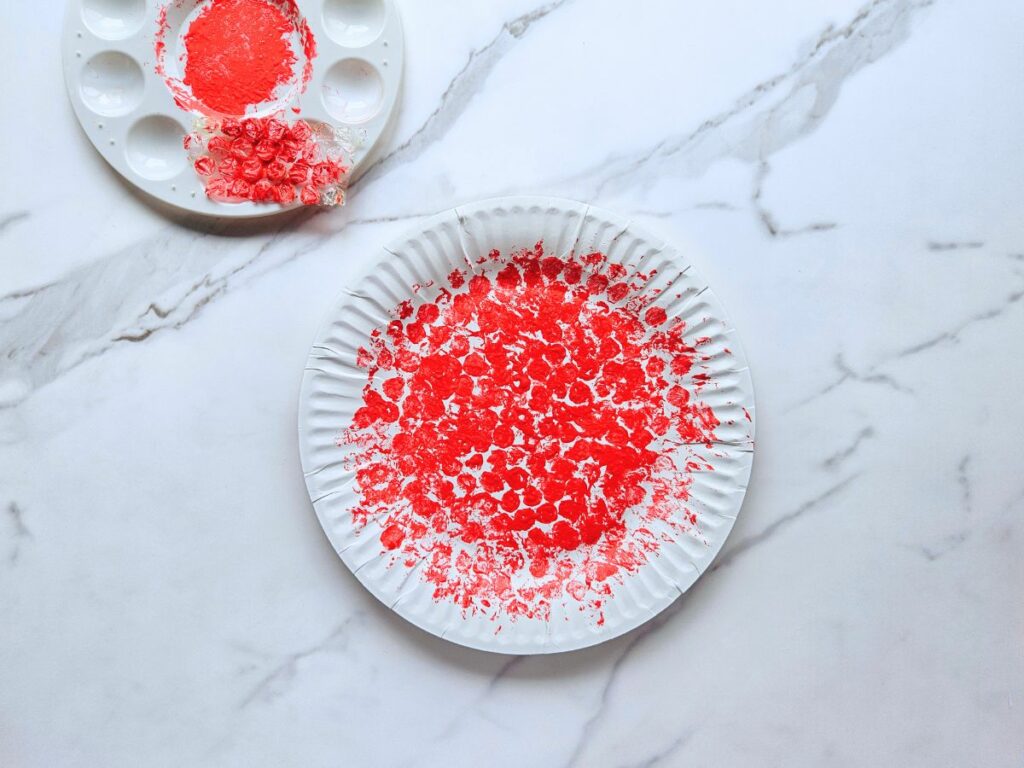
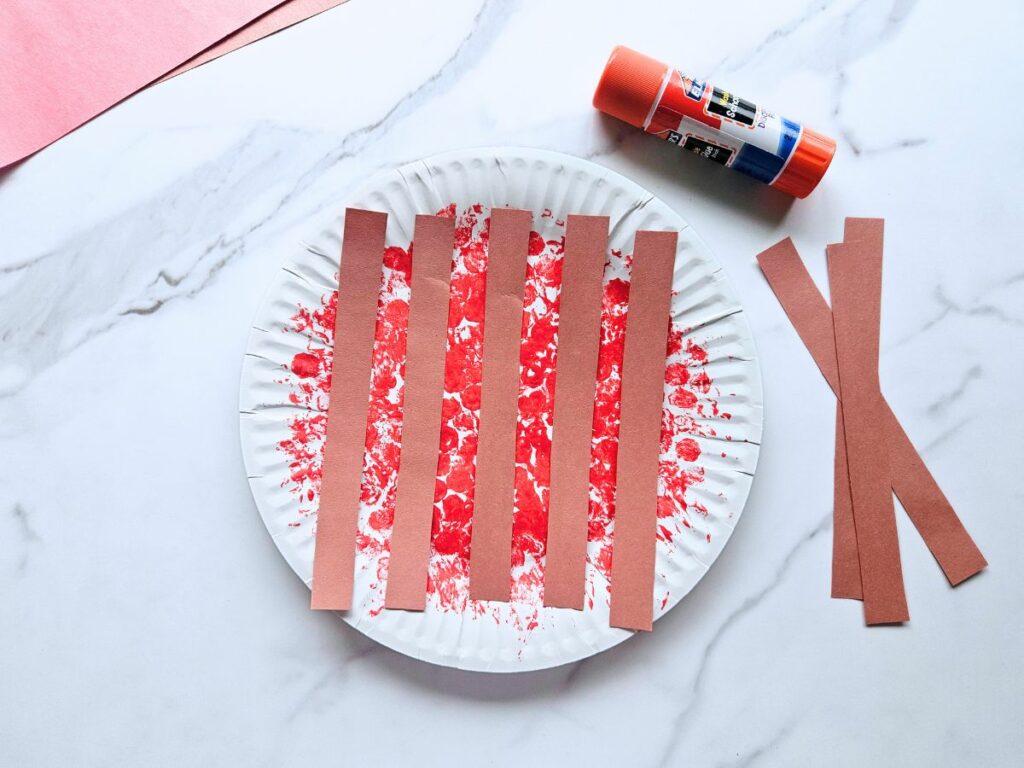
To make the cherry pie, spread some red paint on a paint palette or paper plate.
Dip a piece of bubble wrap into the paint and press it onto the plate to make the cherries in the pie. Continue until the whole plate is covered.
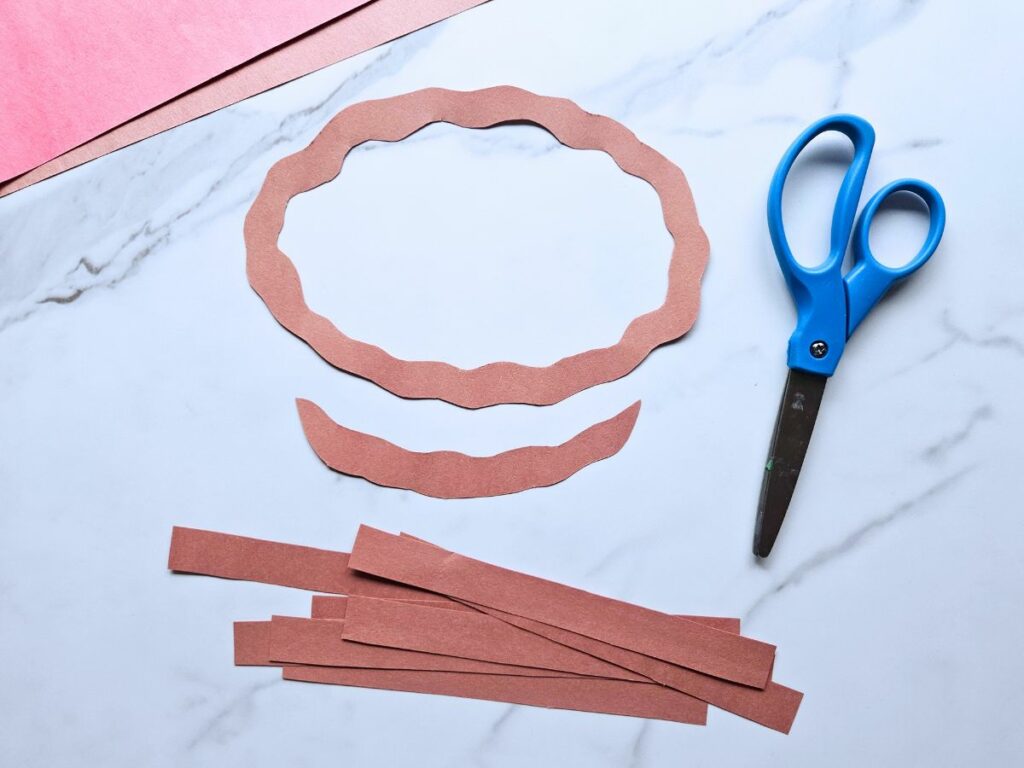
While the plate dries, cut out the pieces of the template.
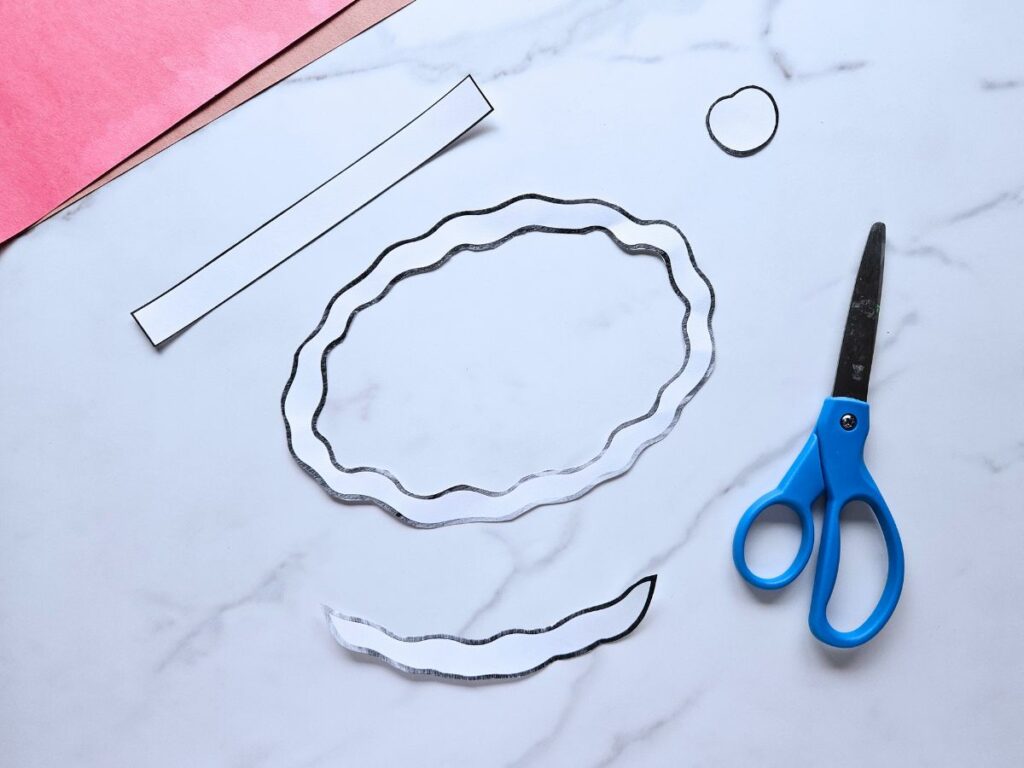
Next, trace the edge and bottom of the pie on brown or tan paper. Also trace the eight lengths of the lattice onto brown or tan paper. Cut the pieces out.
Take five pieces of the lattice and spread them onto the plate parallel to each other and equidistance apart. Glue just the tops of the strips to the paper plate.
Now take the other pieces of the lattice and place them perpendicular to the glued lattice, weaving them over an under each piece of lattice on the plate.
Once all of the pieces of lattice are on the plate, glue the pieces of lattice together on the edges and glue the lattice to the plate.

Now, glue the edge of the pie over the top of the lattice on the plate.
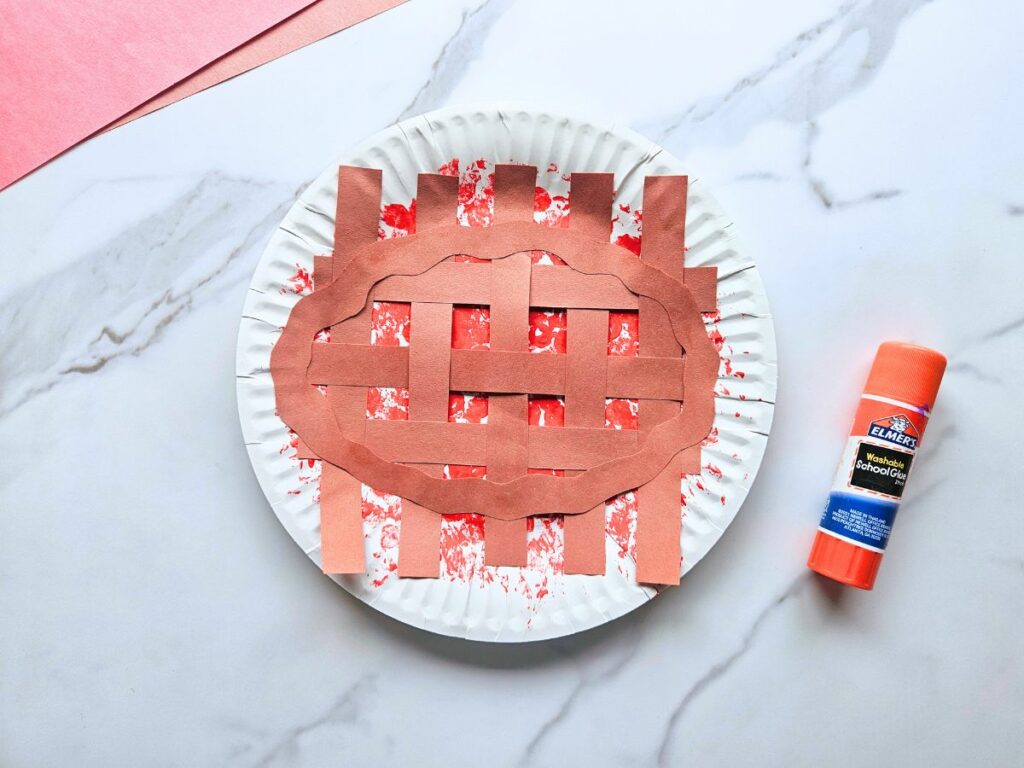
Cut around the out side edge of the pie.

Glue the bottom onto the pie and use a marker to make the pleats on the bottom of the pie.
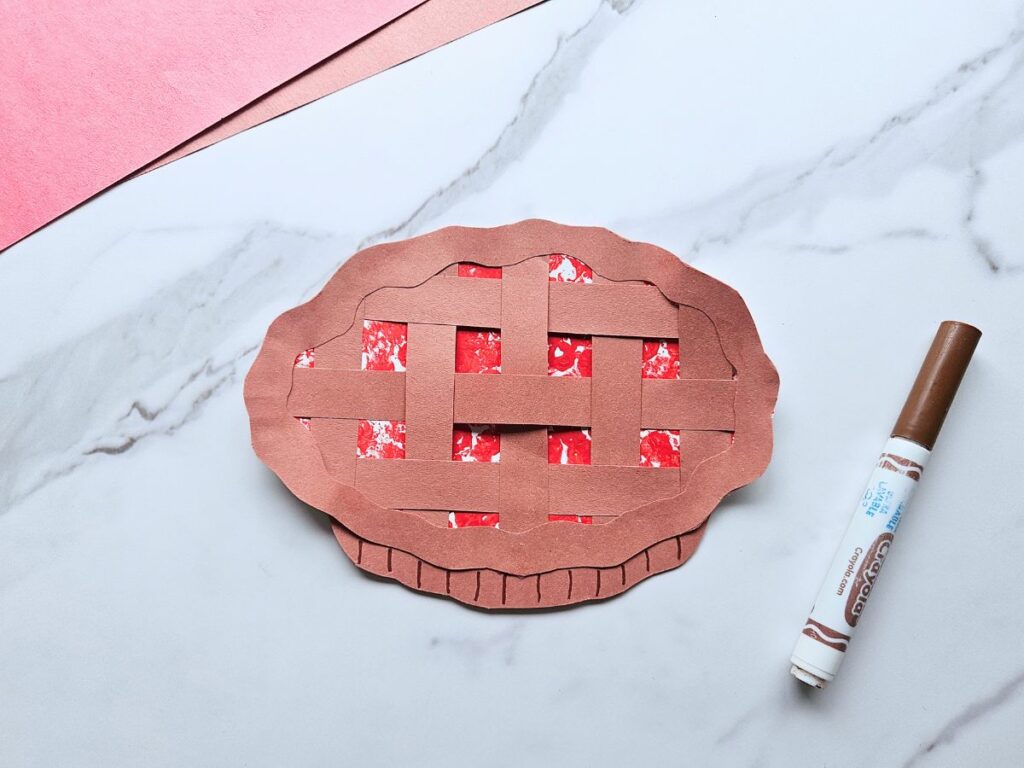
If desired, trace two cherries onto red paper and cut out. Also cut out two small strips of black paper. Glue the black paper to the cherries to be the stems. Draw a dimple onto the tops of the cherries.
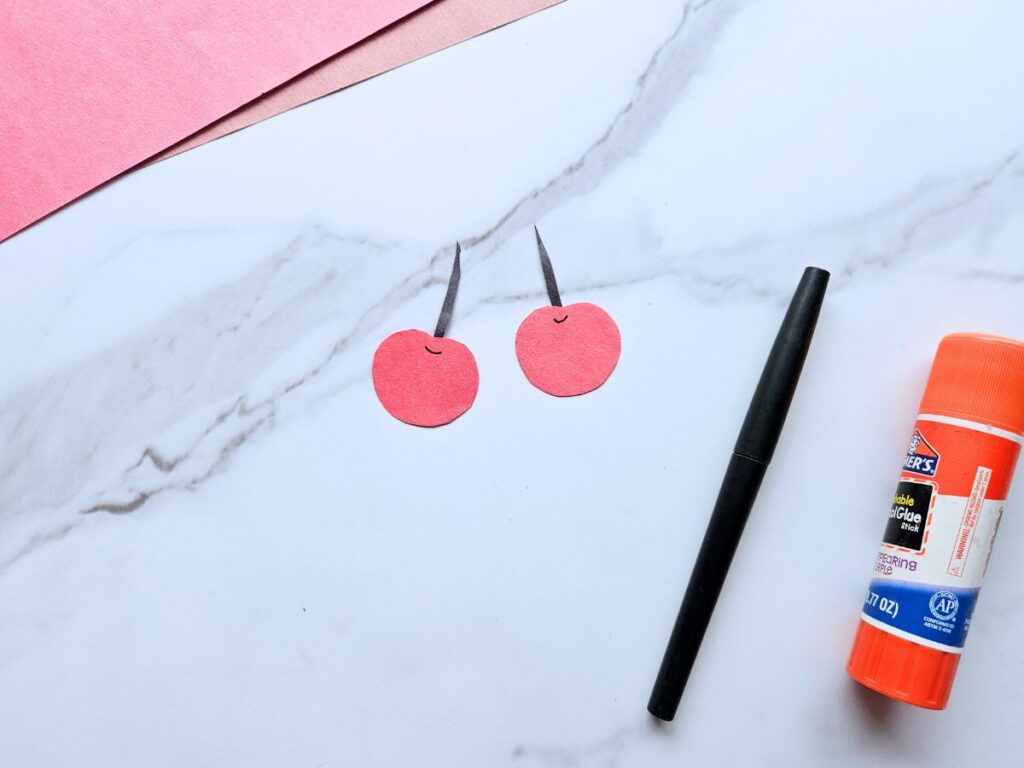
Glue the cherries onto the top of the pie.
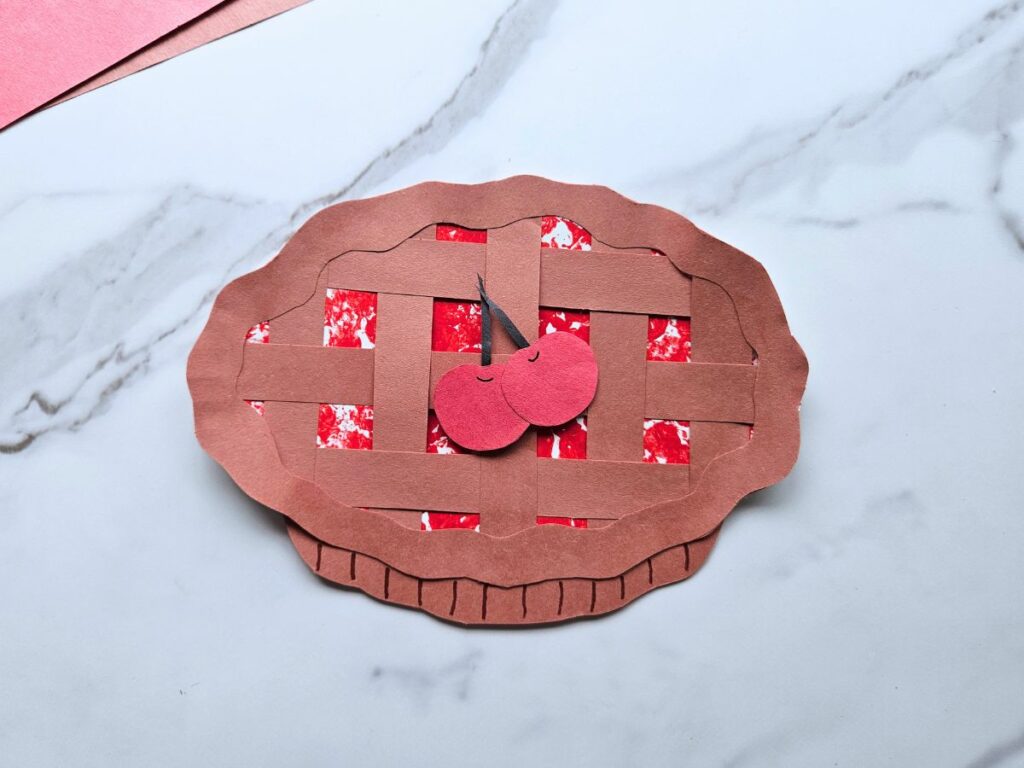
And just like that, your cherry pie is complete!
This paper plate pie craft is a delightful way to celebrate the fall season and Thanksgiving with your kids.
Not only is it easy and fun, but it also allows children to explore their creativity while making something festive. Whether you choose the cherry or pumpkin pie, this craft is sure to bring smiles and a sense of accomplishment to your little ones.